Incident workflow configuration example
This example shows how you can incorporate data pipeline incident workflows to reduce the MTTR (mean time to resolve) for incidents.
In this example, you will see how to create a data pipeline incident workflow that meets these conditions:
The workflow watches for the incidents containing the string "mongodb" in the
tags.collectorfield.The workflow copies the tag value "mongodb" to the
servicesfield for better visibility.It automatically assigns matching incidents to the Database support team.
When the severity of the incident is critical, it also assigns the Engineering team to the incident.
Defining the incident workflow
Every data pipeline incident workflow consists of a trigger and one or more actions. Data pipeline incident workflows can be triggered when incidents are created, updated, or both. The trigger also includes an optional filter that defines the incidents that the workflow will process. Once an incident passes the trigger, each workflow action processes the incident in sequence. To create a workflow for the example scenario described above, do the following:
Create the workflow
Navigate to Correlate & Automate > Workflow Engine, click the Incident Workflows tab, and then click the Data Pipeline Workflows tab.
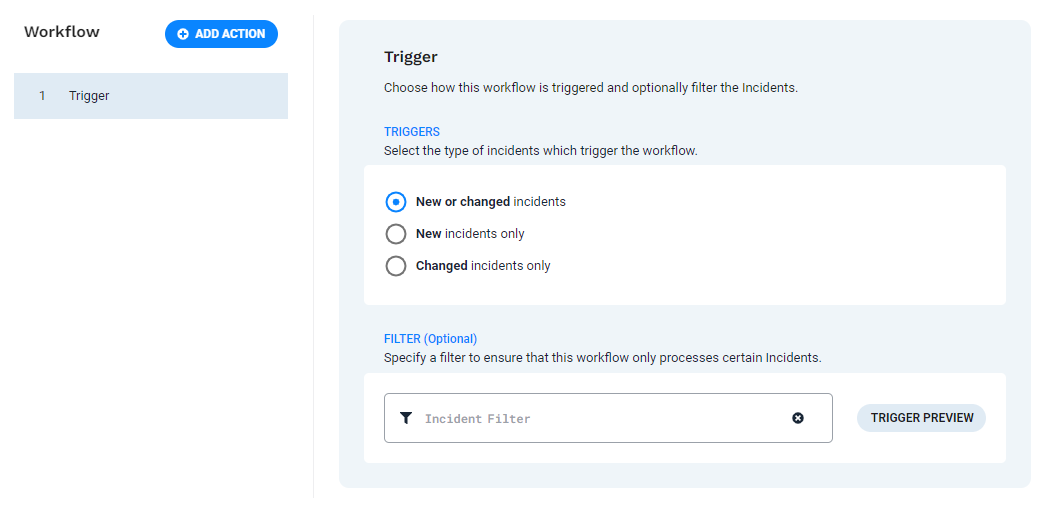
Click Add Workflow. A new workflow appears with a single Trigger element.
 |
Define the workflow trigger
The first step is to determine which incidents will trigger the data pipeline incident workflow. In this example scenario, the workflow should look for a value in tags.collector, which could be present when the incident is first created, or it could appear some point during an incident when additional alerts are added. The incident trigger allows you to choose from three scenarios to apply a workflow to an incident: New or changed incidents, New incidents only, or Changed incidents only. Because the tag value could get added at any time, select New or changed incidents for the trigger.
For more information on using tags, see Use custom tags to identify alerts and incidents.
The filter portion of the trigger is optional for incidents, but since this workflow only applies to incidents where mongodb is a value in tags.collector, use this filter:
tags.collector in (mongodb)
Define action 1 - Set Service
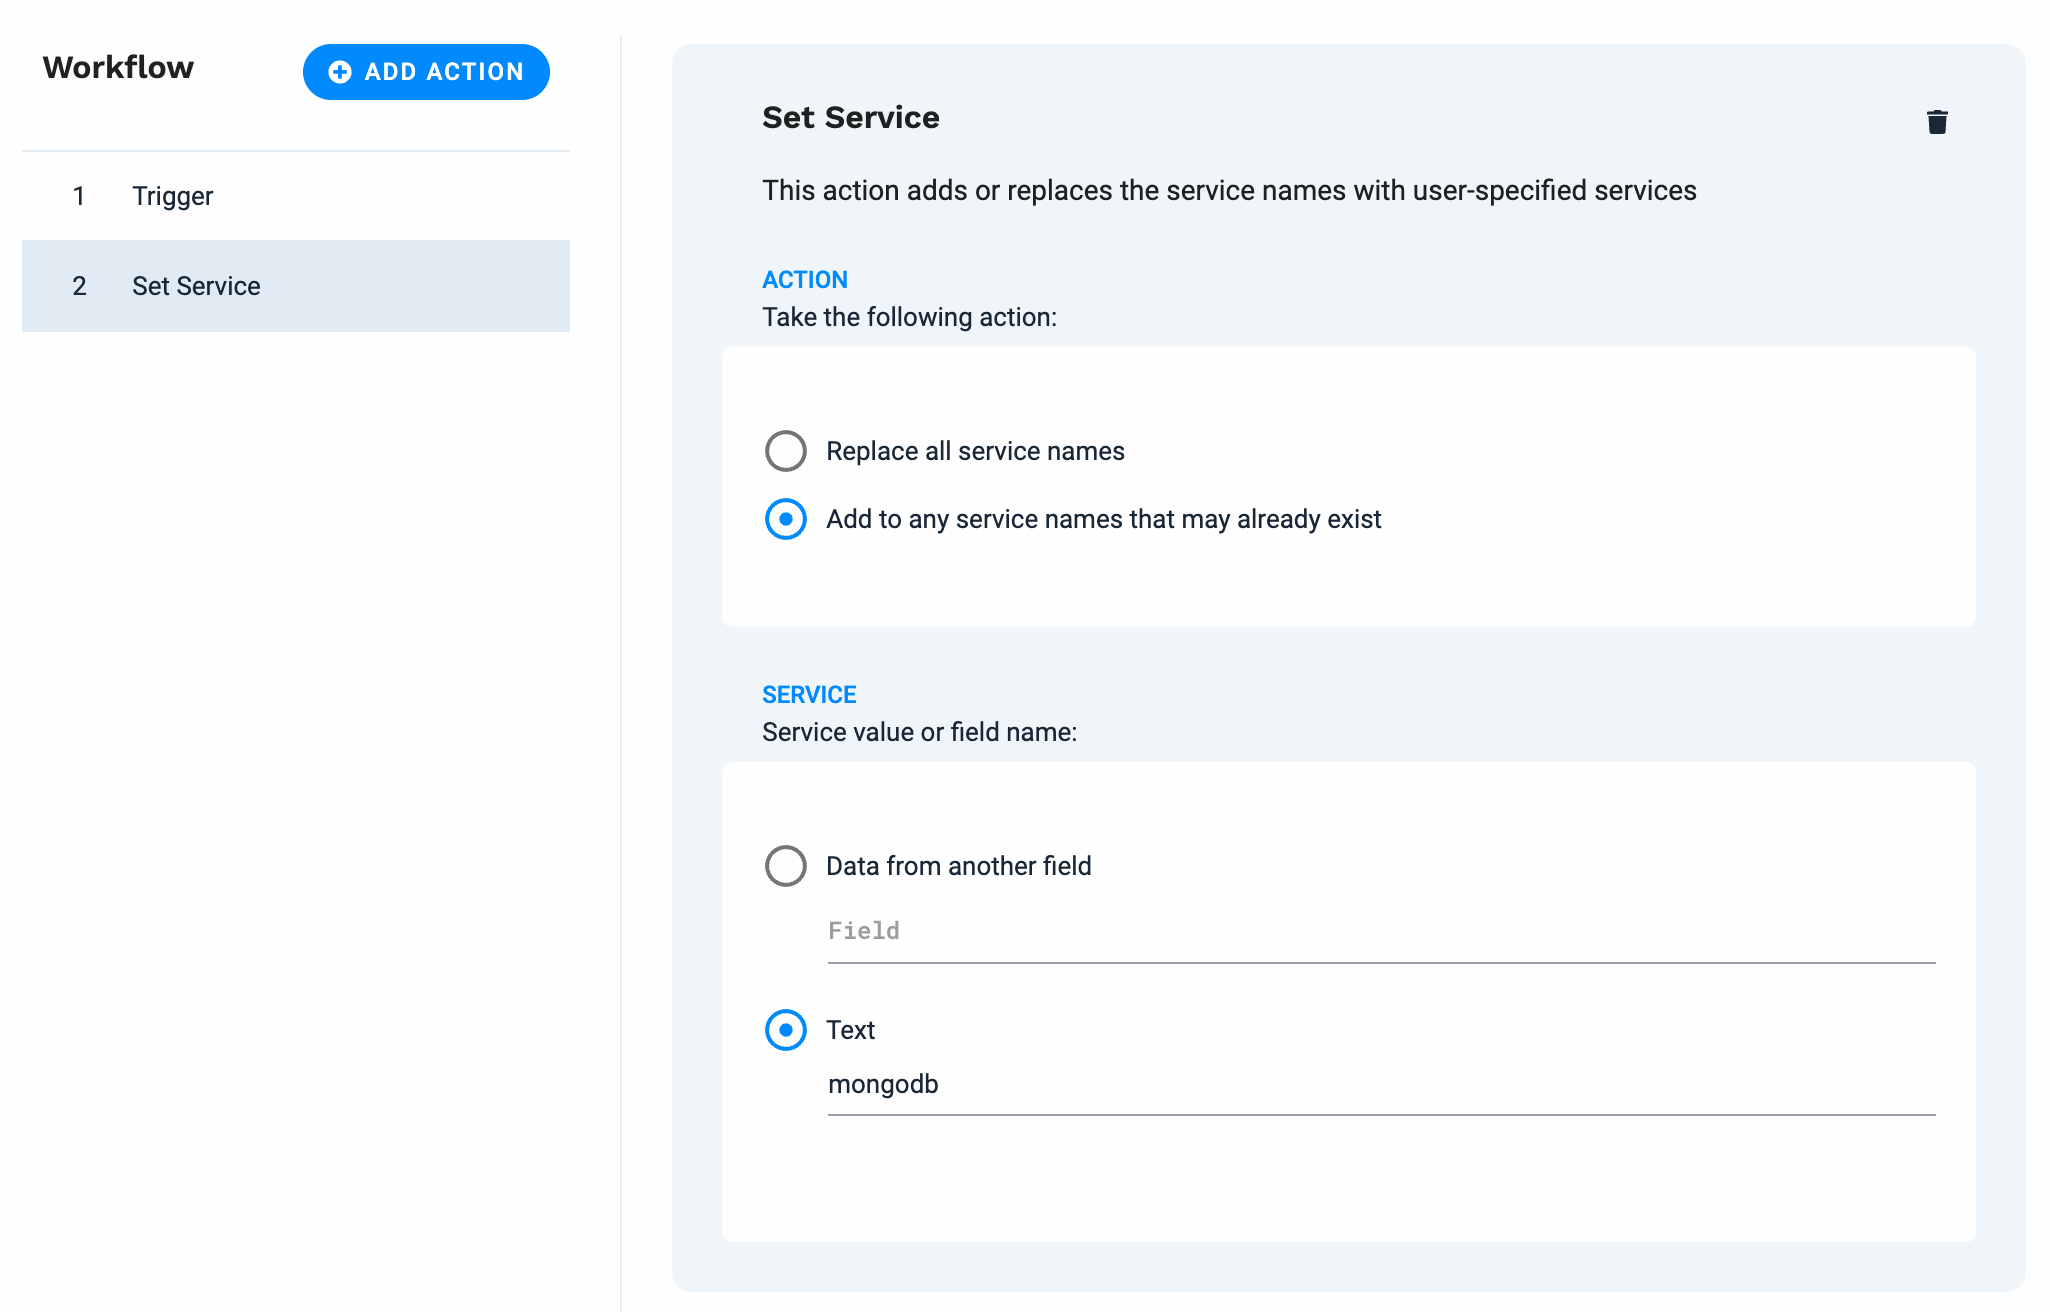
The first task is to copy mongodb to the services field, so a Set Service action needs to be added to the workflow.
To add the action to the workflow:
Click Add Action.
Locate the Set Service action in the list and select it.
NOTE: You can search for an action by name or keyword.
Click Add Selected action.
This image shows how the action is configured to add the service name to the services field. In case there could be other service names you want to preserve in the services field, simply add it to the list instead of overwriting it.
 |
Define action 2 - Assign
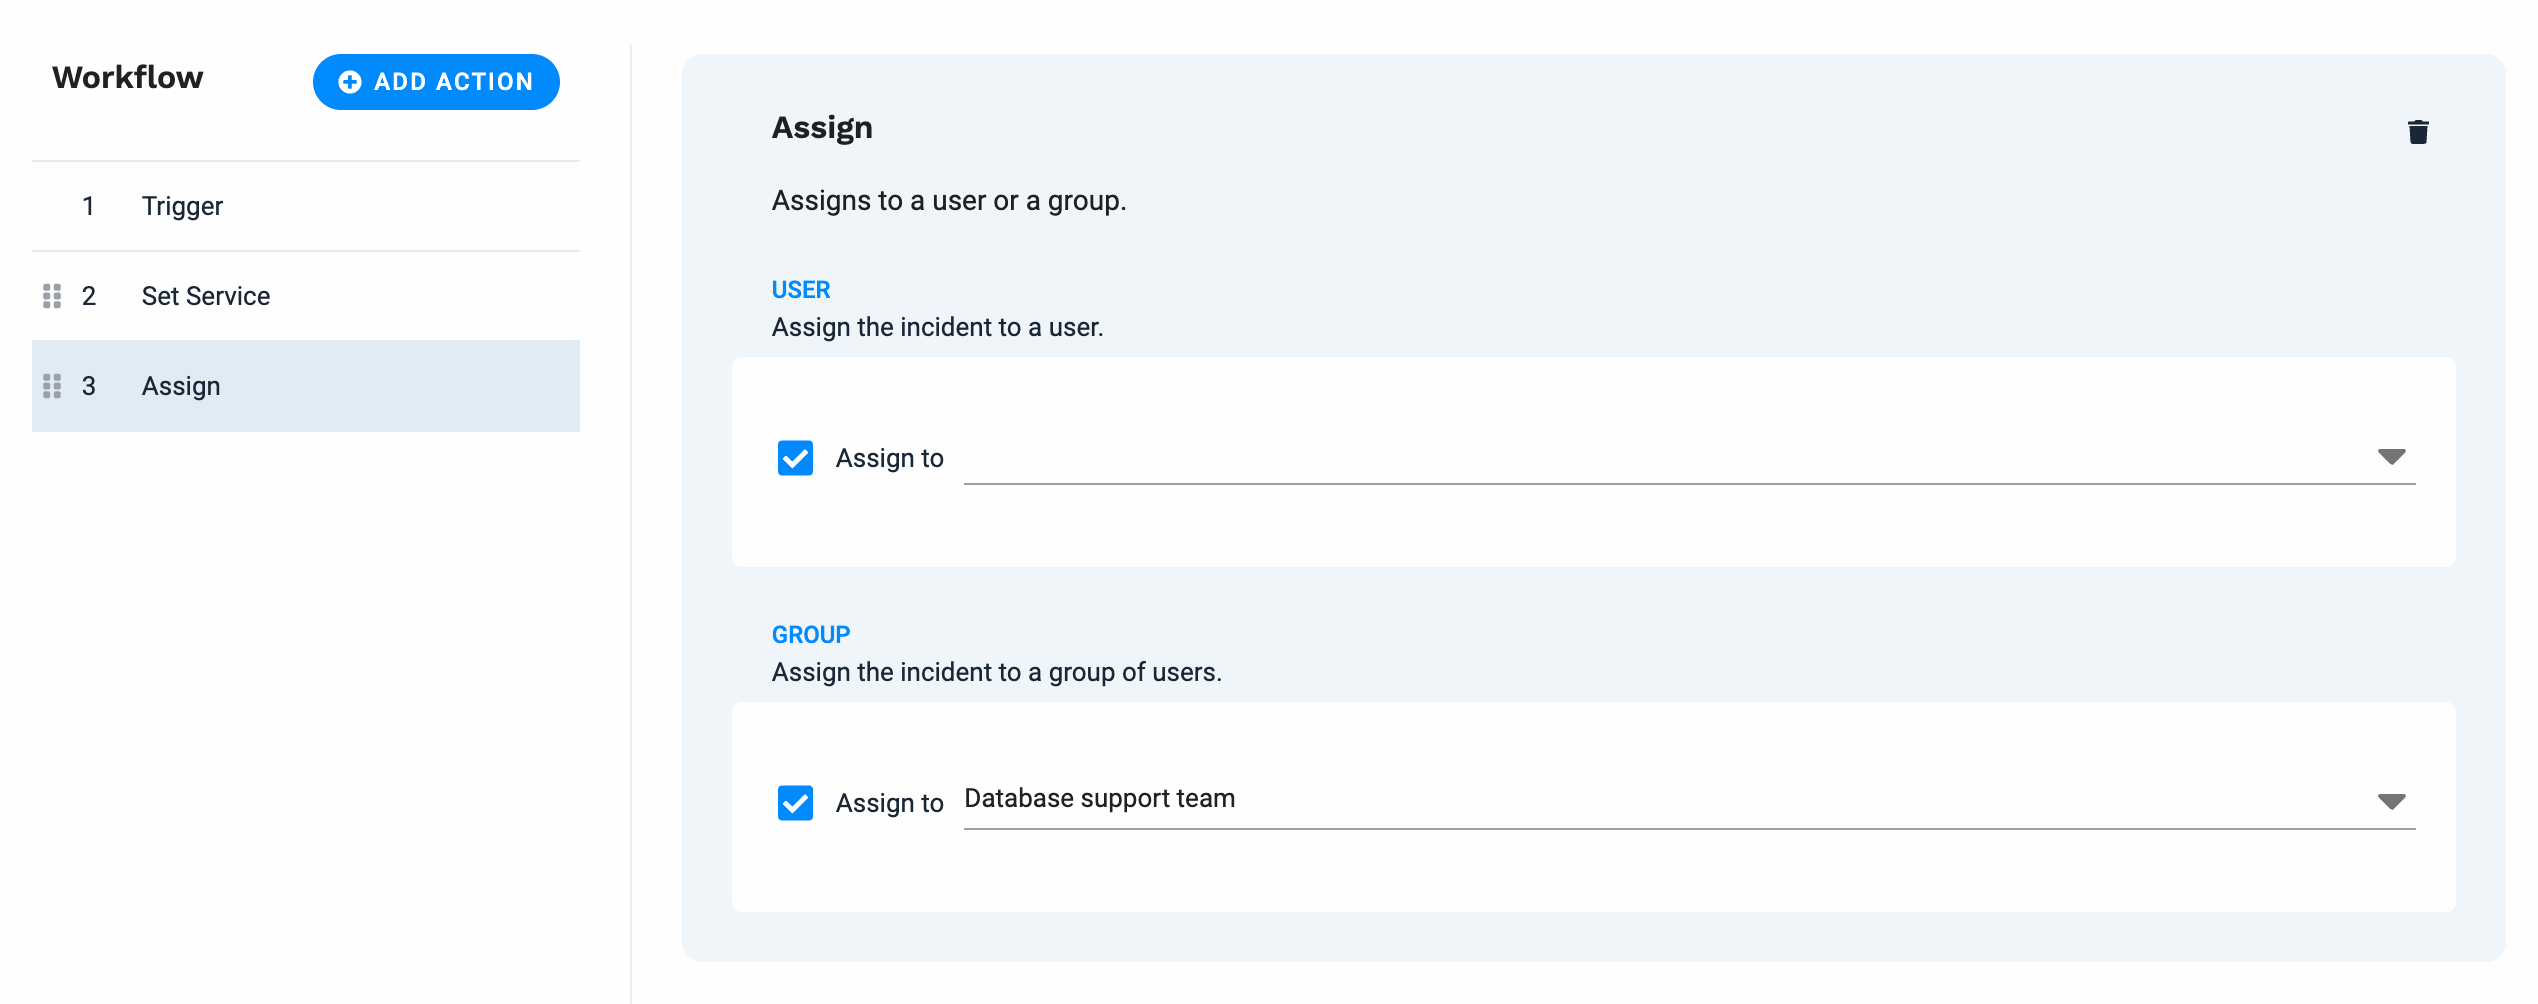
The next workflow task is to assign the incident to the Database support team.
To do this, click Add Action. Select the Assign action from the list and click Add Selected Action.
The image shows the action configured to assign the incident to the Database support team.
 |
NOTE: To use groups or user assignments in an action, those users or groups must already be present in APEX AIOps Incident Management. See User Groups overview for more information.
Define action 3 - Filter
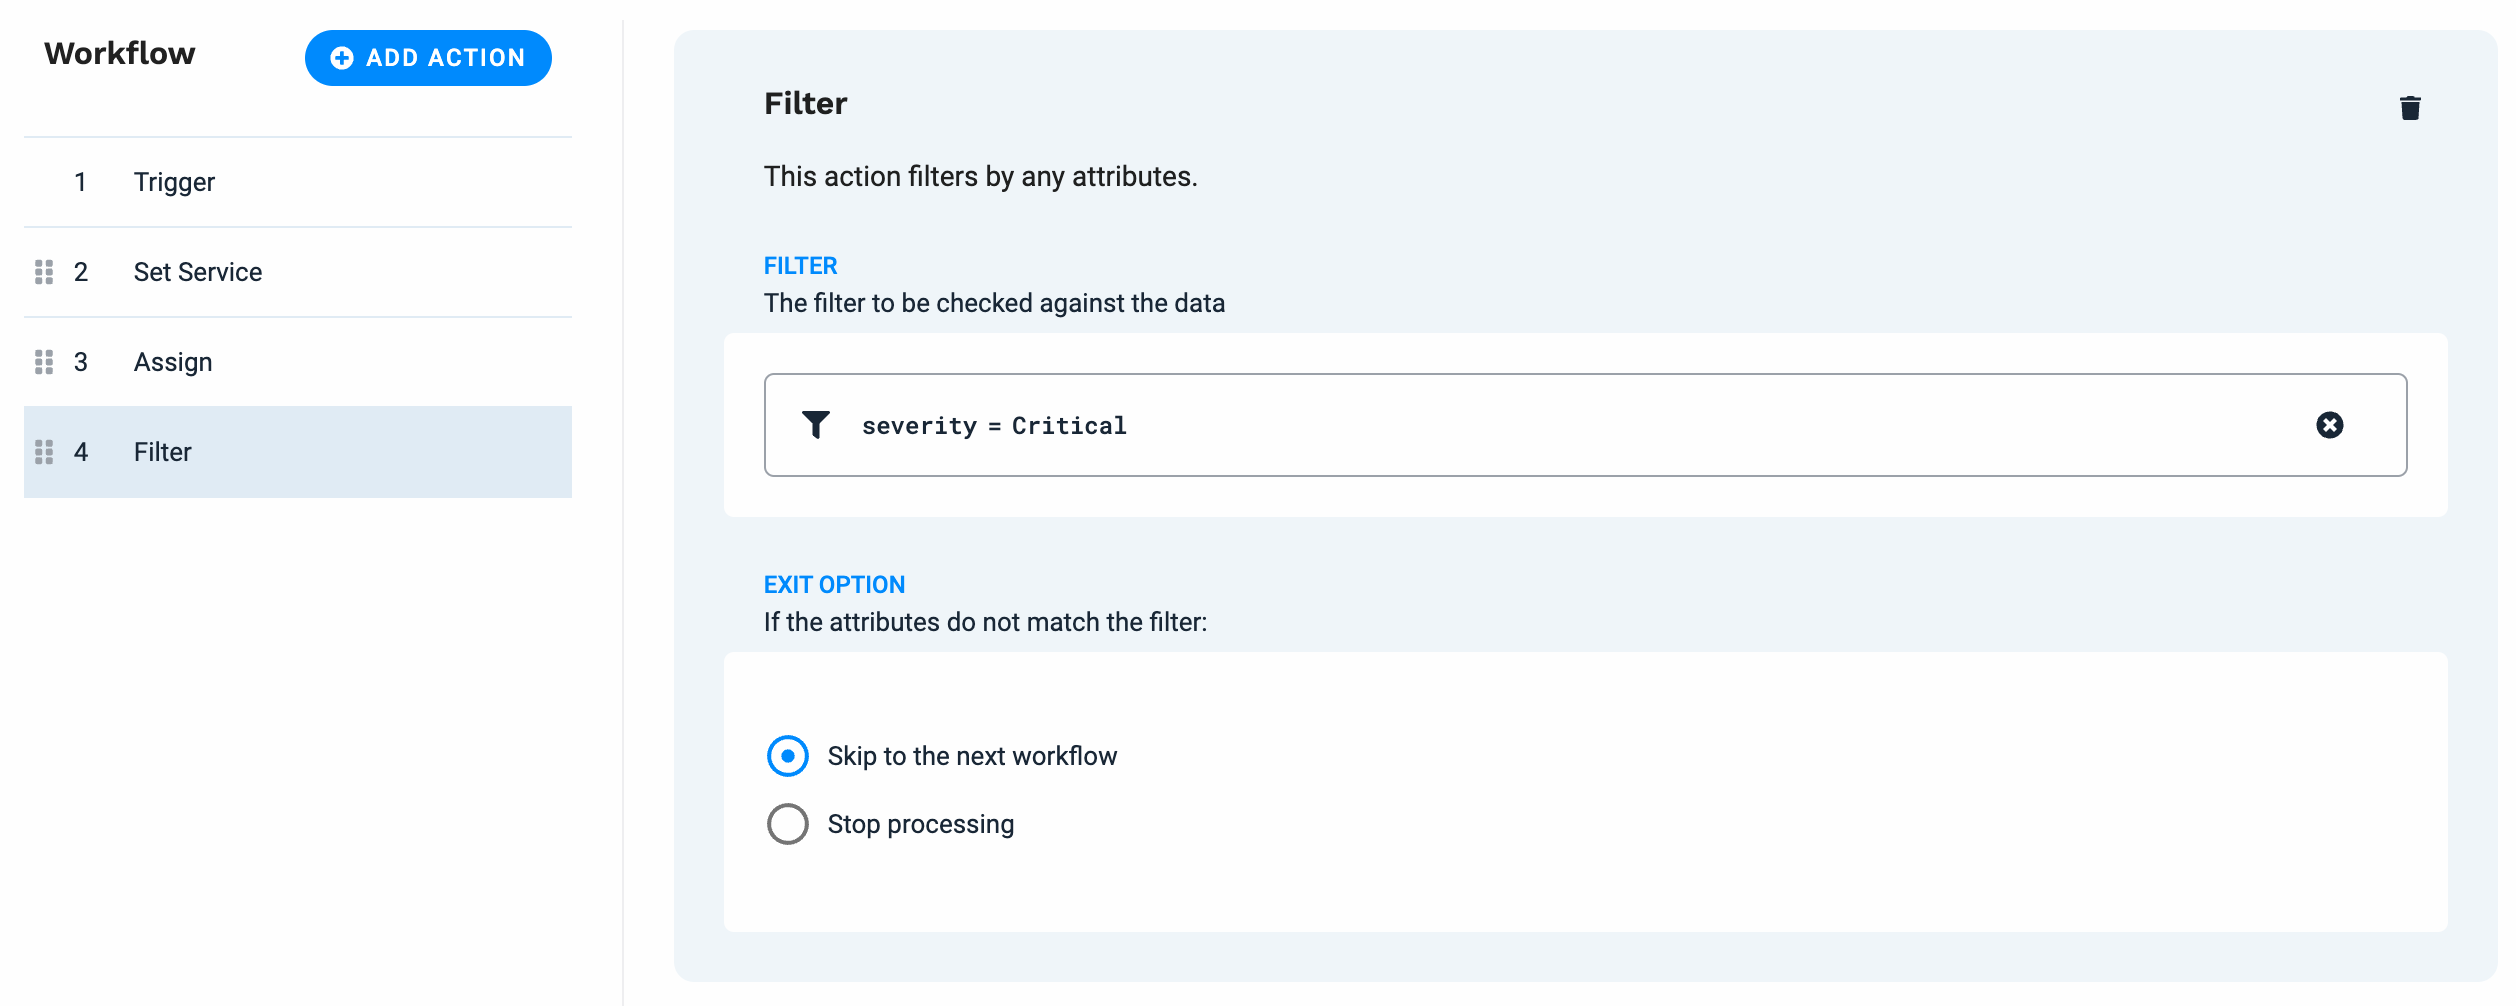
The next workflow task identifies the incidents affecting the MongoDB service which are critical.
Here, you add a Filter action. Click Add Action. Select the Filter action from the list and click Add Selected Action.
The image shows the Filter action configured to pass along only those incidents which have a severity of critical to the next action in this workflow. Incidents which do not have a severity of critical are not processed any further and move on to the next data pipeline incident workflow.
 |
Define action 4 - Assign
Now the the workflow has filtered out the incidents that are critical, you can add another Assign action to assign them to Engineering.
Add a second Assign action by clicking Add Action. Select the Assign action from the list and click Add Selected Action.
The image shows the Assign action configured to assign the incidents which passed through the filter to Engineering.
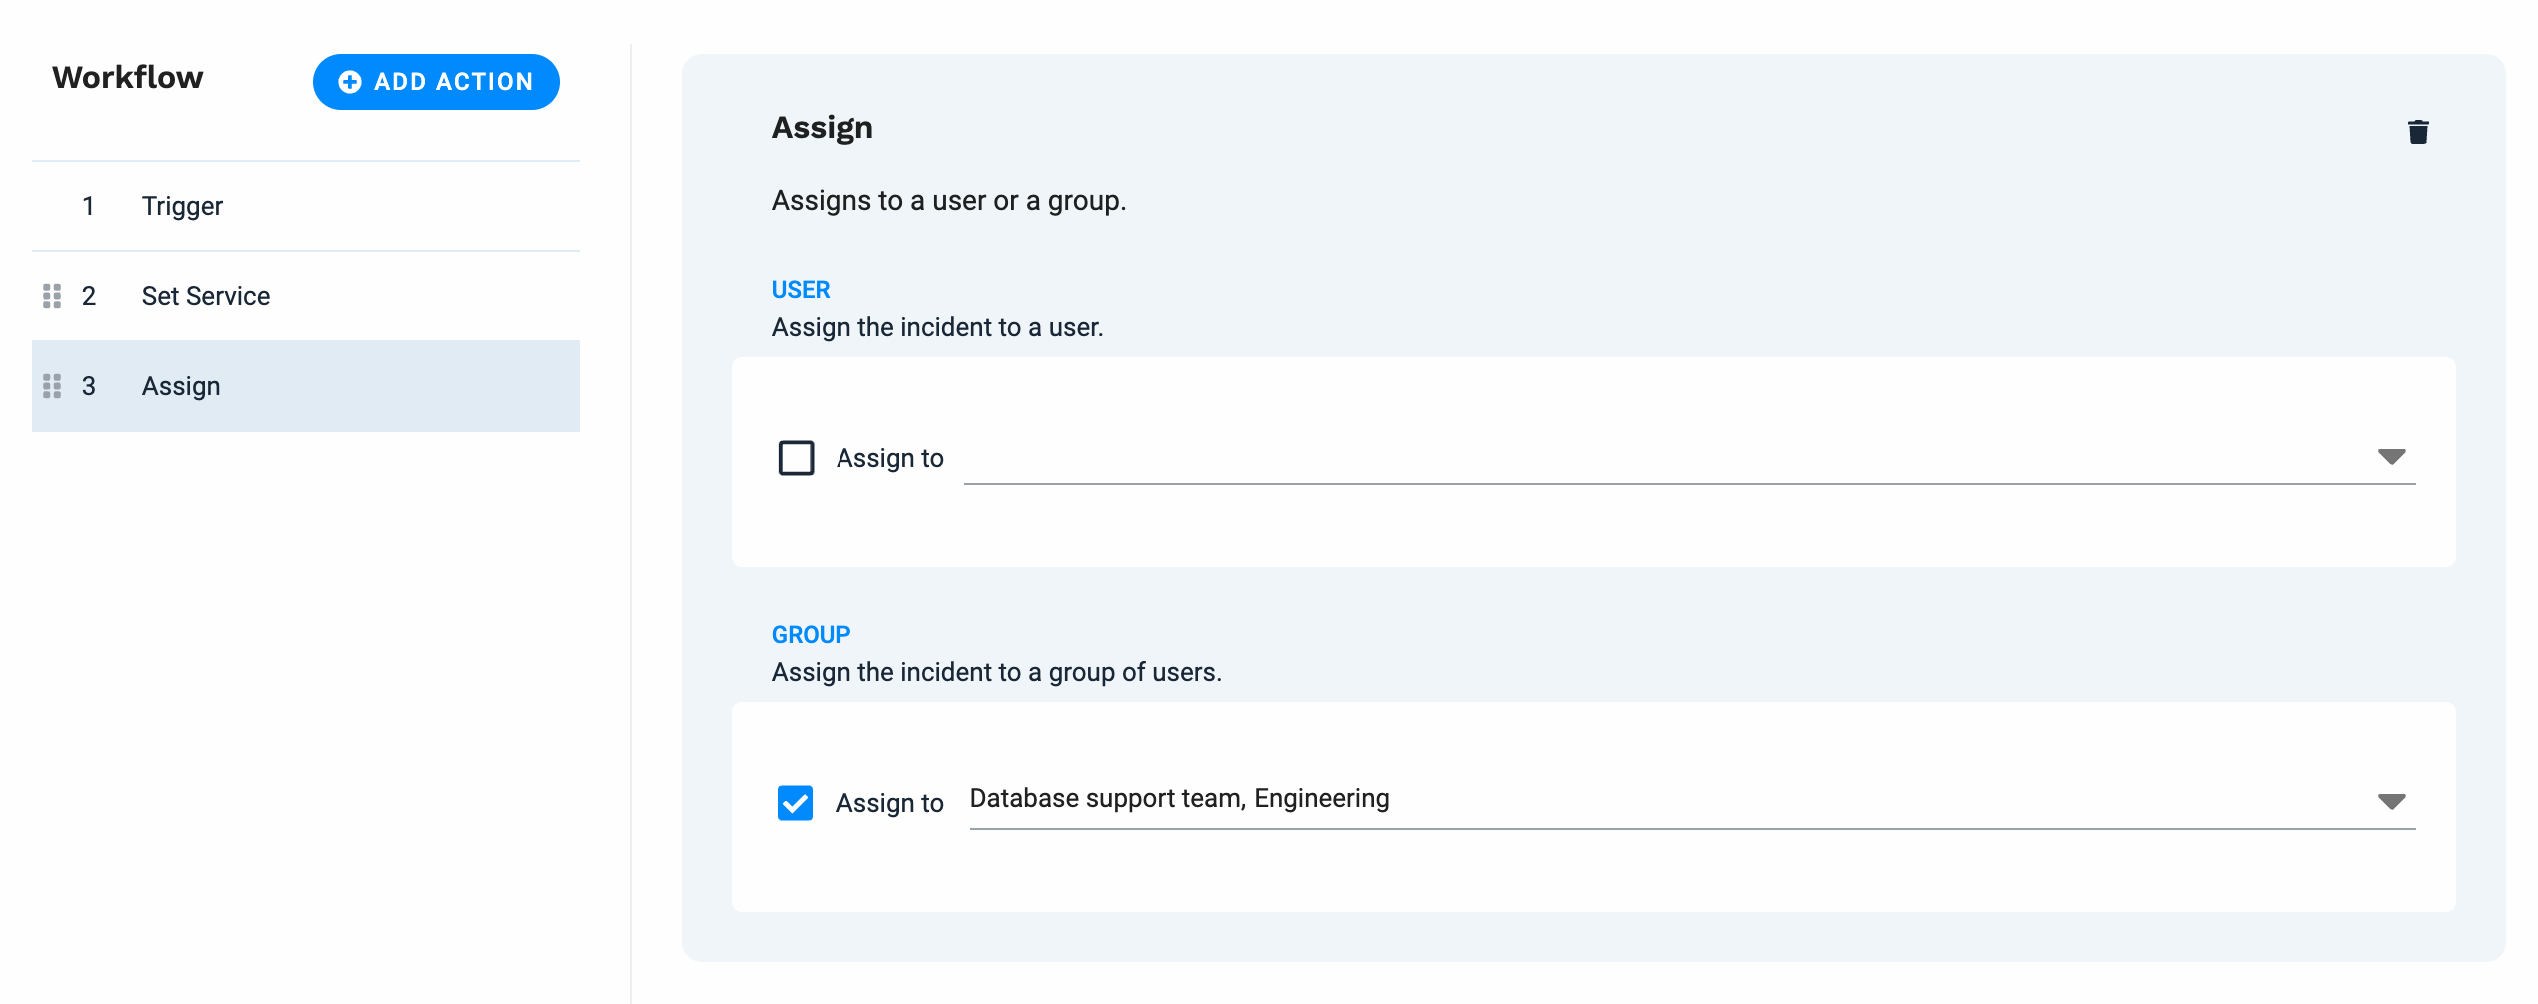 |
NOTE: Here, the incident gets assigned to both the Database support team and Engineering. If it were only assigned to Engineering, this assignment would replace the earlier one.
Test the workflow
The necessary steps are now complete, so the next task is to test the workflow to make sure it functions as desired.
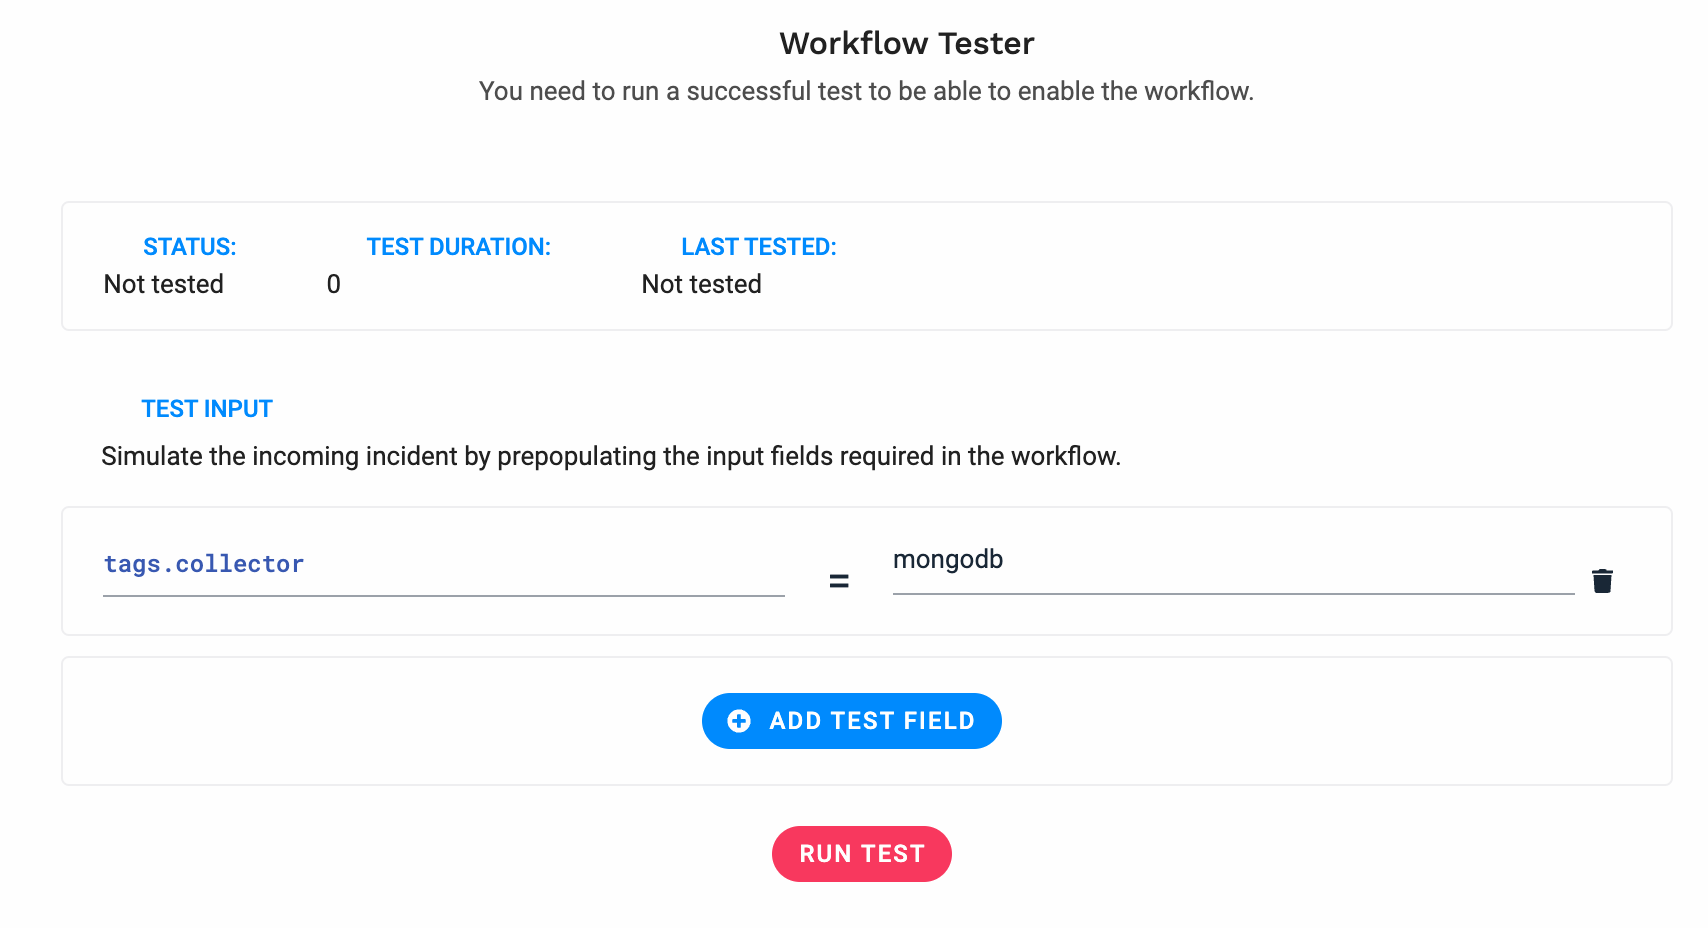
To test the workflow, scroll down to the bottom of the page and drag the Workflow Tester section upward so the settings are visible. Click Add Test Field.
For this example, you only need to configure one field, tags.collector, which has an input value of mongodb.
 |
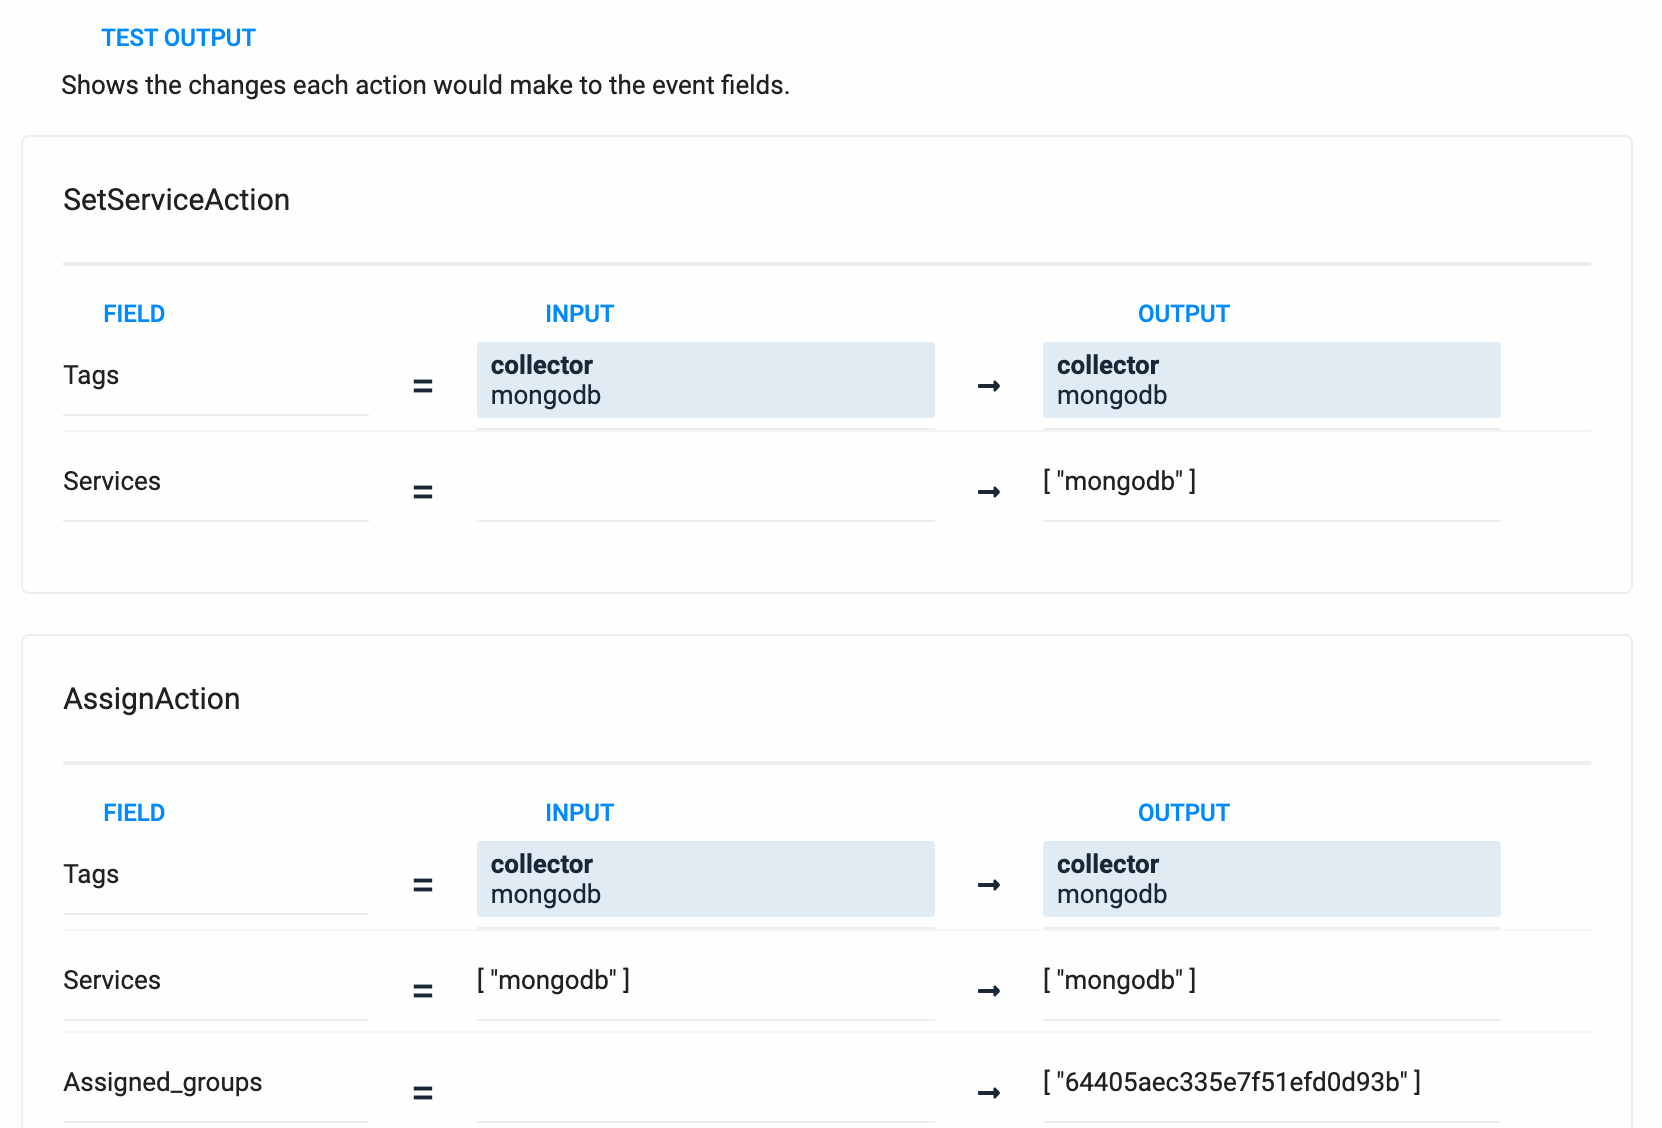
Clicking Run Test shows how the workflow updates the incident:
Note
The workflow tester currently shows the group ID instead of the name. Refer to the API example for retrieving IDs for information on obtaining group information, including both IDs and names.
 |
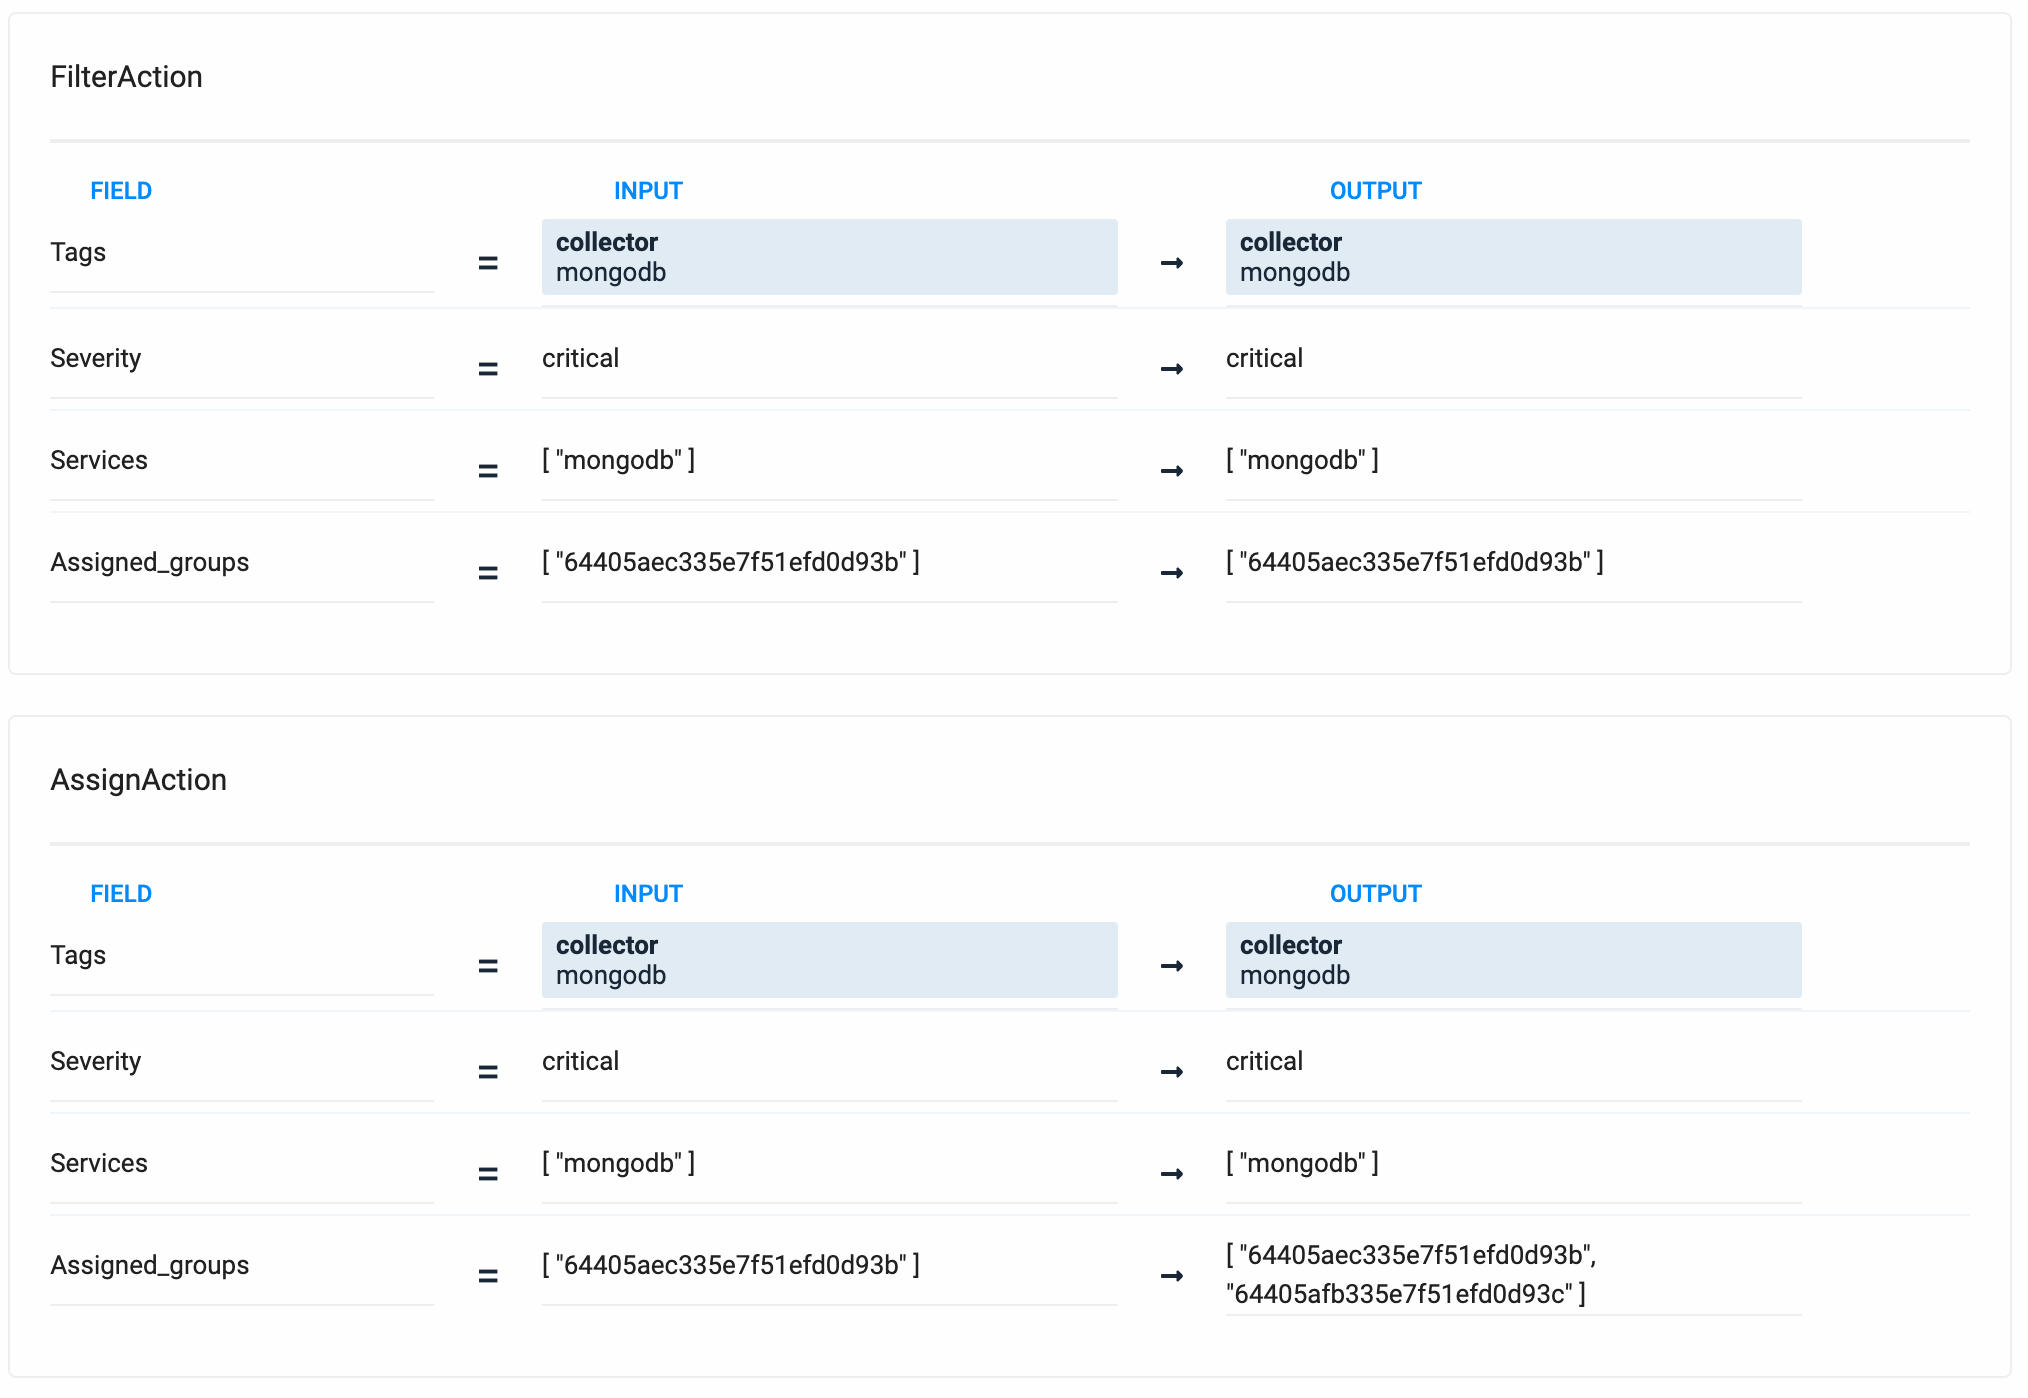
However, the test does not show the second assignment. To do this, add a second test field: severity. Set the value to critical and run the test again. Now the filter action and the second Assign action also display.
 |
The workflow functions as intended, so it can be enabled.