Event workflow configuration example
This example illustrates how you can use event workflows to format your raw events and enrich them with additional data from your environment.
Suppose you have a brewAPM service that observes performance on all nodes for a specific app. The service sends events to APEX AIOps Incident Management that look like this:
'{
    "description": "RT > 500 msec",
    "severity": 5,
    "source": "brewAPM",
    "check": "api",
    "service" : ["REST"],
    "tags": {
        "details": "ip=172.31.17.101,hostName=websrv01.us.west.myorg.org,id=12598993"
    }
}'
Your raw events have the following issues:
The
sourcefield describes the service that generated the event, not the host where the event occurred.The hostname where the event occurred is embedded in the
tags.detailstag.The
servicevalue is generic: it describes the type of service but not the service name.
Given this information, you want an event workflow that does the following:
Extracts the hostname from the
tags.detailstag.Copies the hostname to the
sourcefield.Uses the hostname to look up an entry from an external catalog.
Adds the service name from the catalog entry to the
servicelist field in the alert.
Defining the event workflow
Every event workflow consists of a trigger and one or more actions. The trigger is a filter that defines the events that the workflow will process. Once an event passes the trigger, each action processes the event in sequence. To create the desired workflow, you do the following:
Create the data catalog
To enrich your events, begin by creating one or more catalogs. A catalog is a collection of data from your environment, formatted in a tabular format. The Query Catalog action maps data from a catalog to new events in a workflow.
The simplest way to create a catalog is to define your enrichment data in a CSV file and upload it. For every row in the CSV, Incident Management creates a document in the catalog. See Create data catalogs.
Create the workflow
Navigate to Correlate & Automate > Workflow Engine, click the Event Workflows tab, and then click Add Workflow. A new workflow appears with a single Trigger element.
 |
Define the workflow trigger
The trigger is basically an event filter. The workflow only processes events that pass this filter. Double-click the trigger and then specify the types of events that you want the workflow to process. You want this workflow to process events from the brewAPM process, so you specify the following filter: source = brewAPM.
Define action 1: Update the source field
To add an action to the workflow:
Click Add Action.
Locate the action in the list and select it.
NOTE: You can search for an action by name or keyword.
Click Add Selected action.
In this example, the Extract Substring action is added, which applies a regex to one event field and then copies the result to another field.
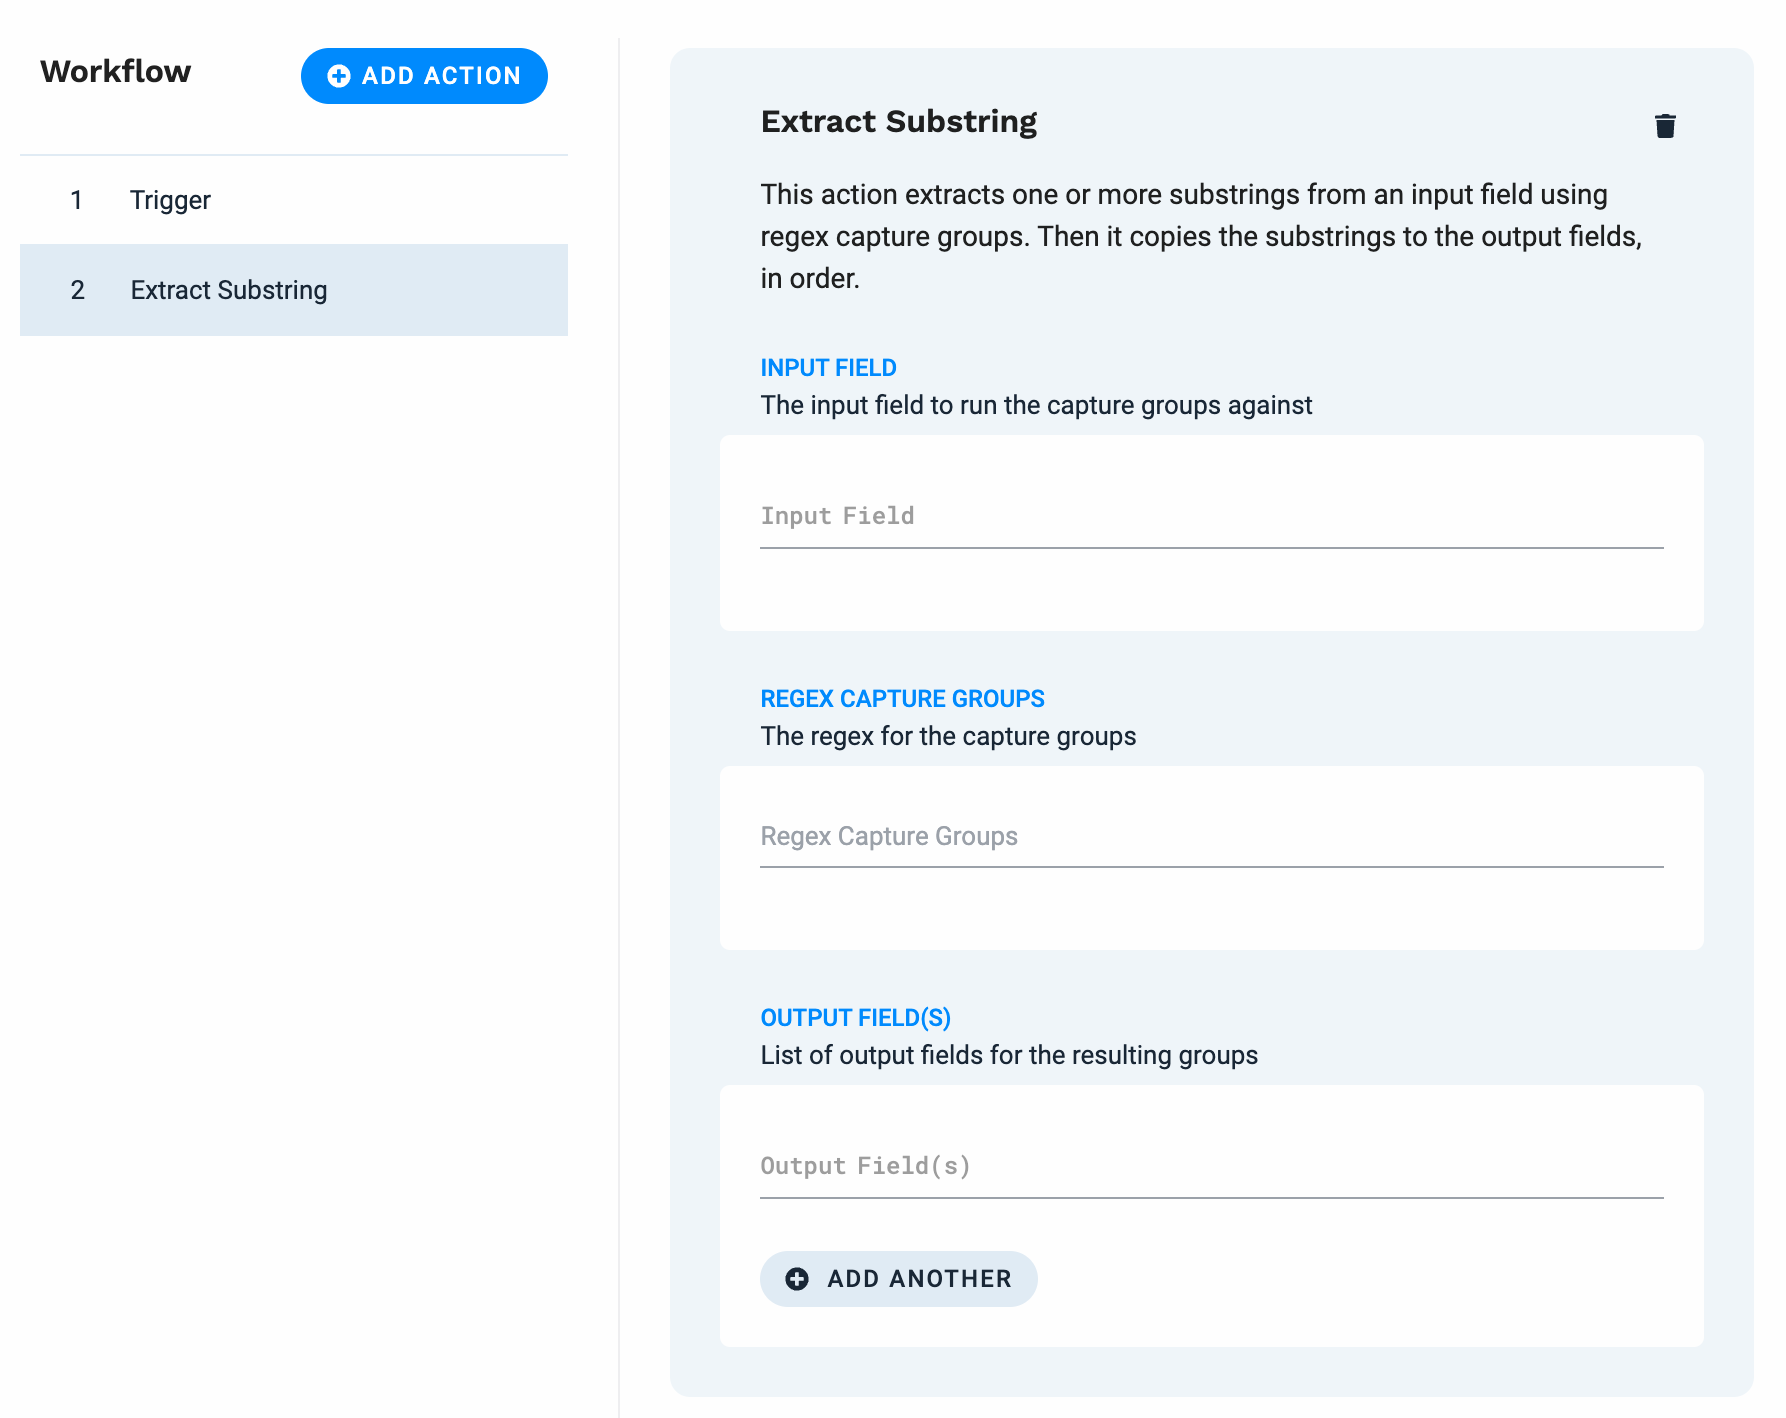 |
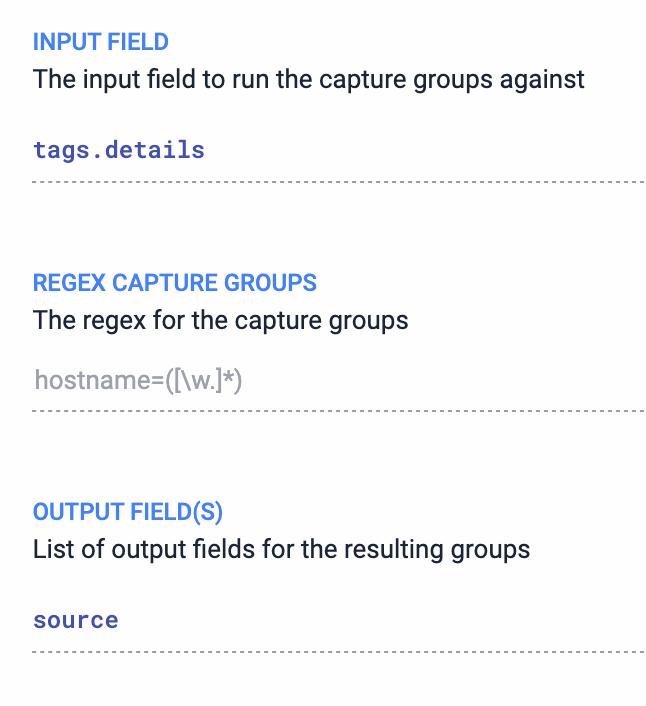
You want this action to extract the hostname from the tags.details tag and copy it to the source field. Extract the hostname using a regex as follows:
 |
Define action 2: Map catalog data to the event
After the Extract String action processes an event, the event has the event FQDN as its source. Now you want to add information about this source from your catalog. Do this using the Query Catalog action.
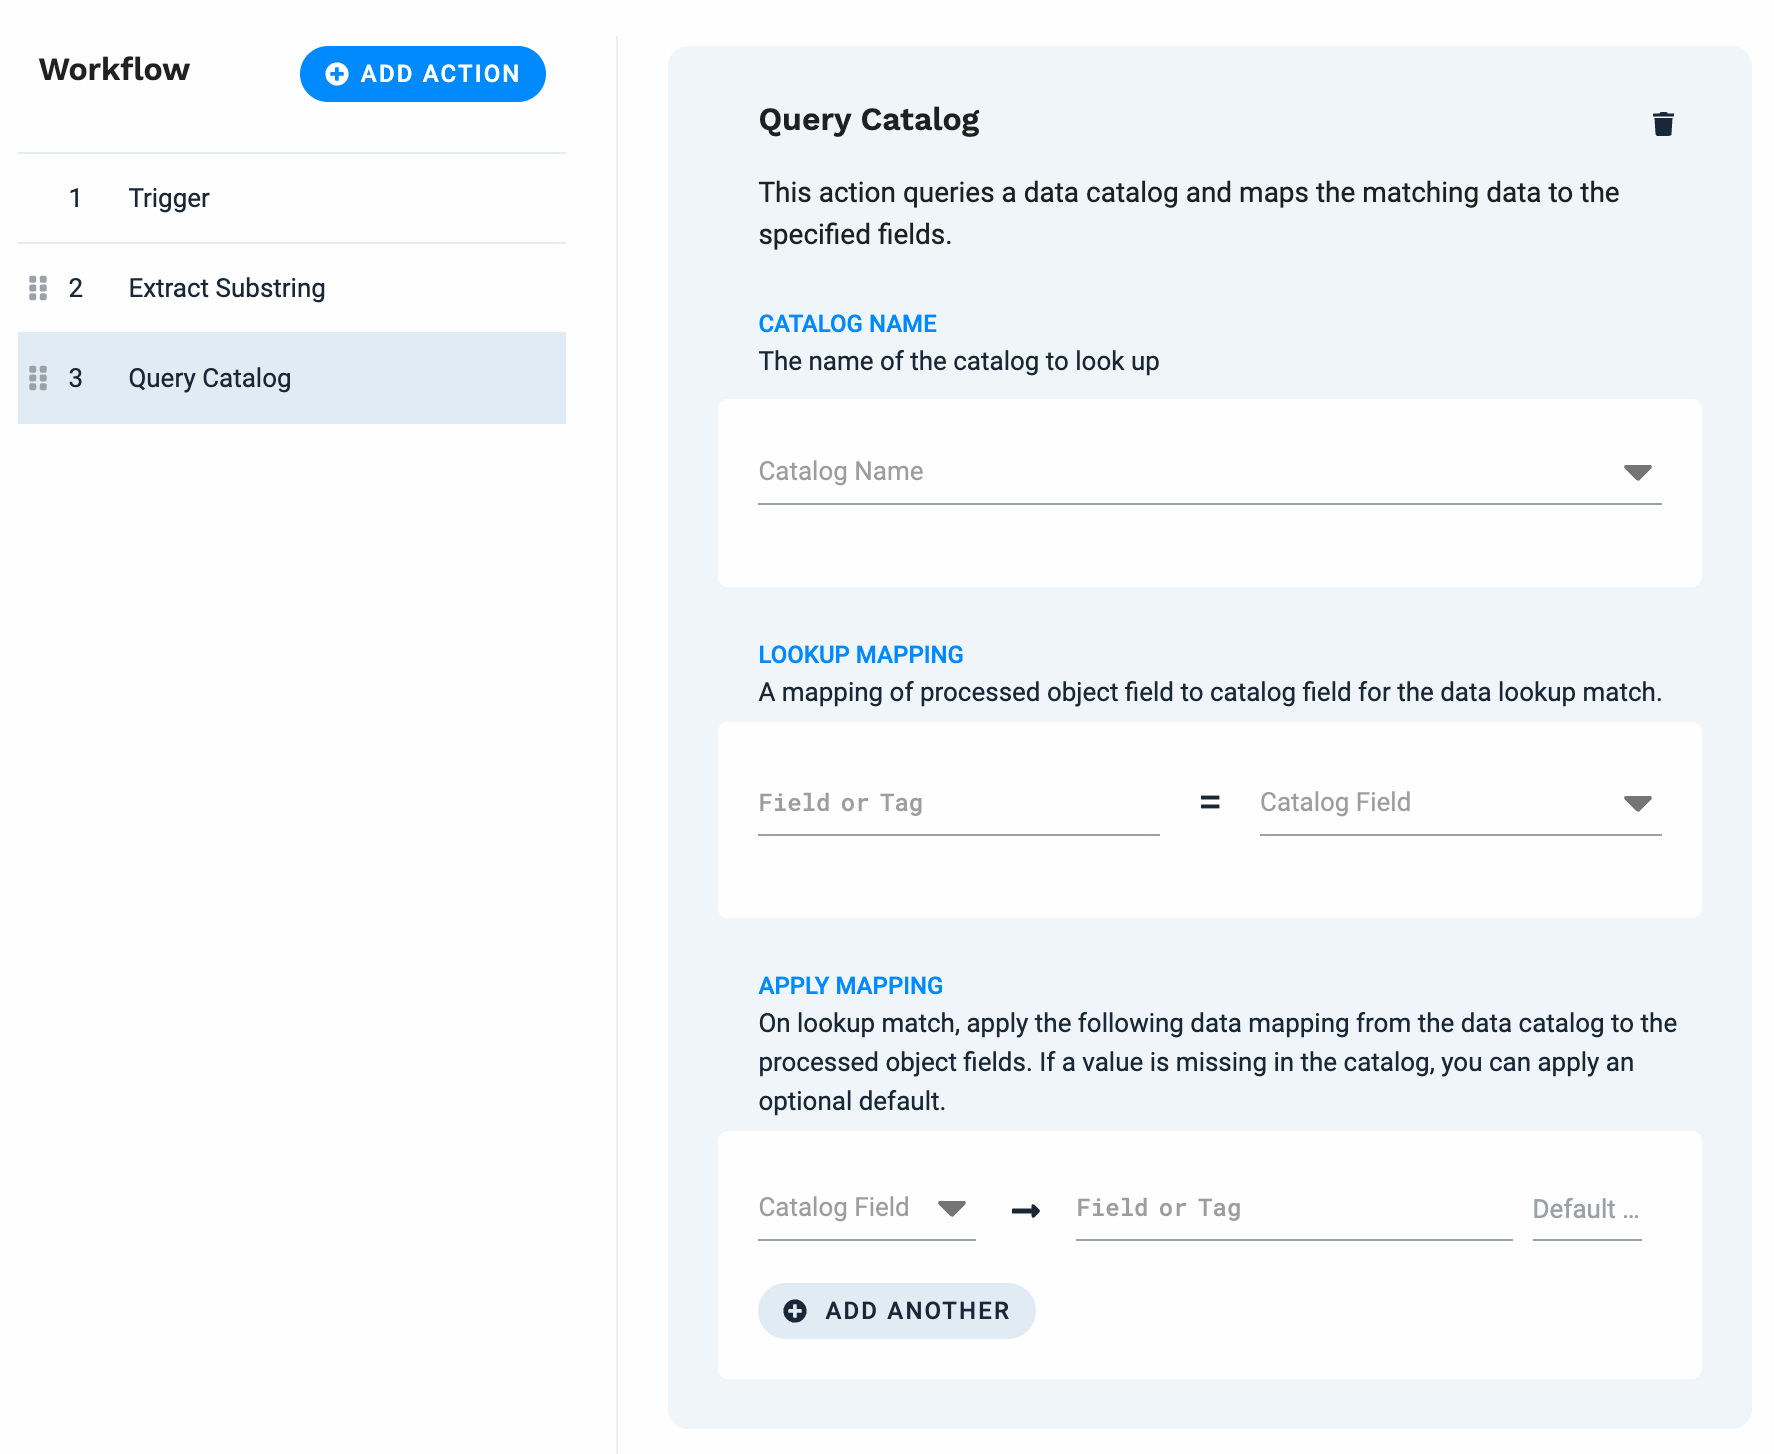 |
Add the Query Catalog action, choose the catalog name, and configure the mappings as follows:
Map the lookup field
Query the catalog for the relevant document by specifying a lookup field. This takes the event source and finds the document with the matching hostname:

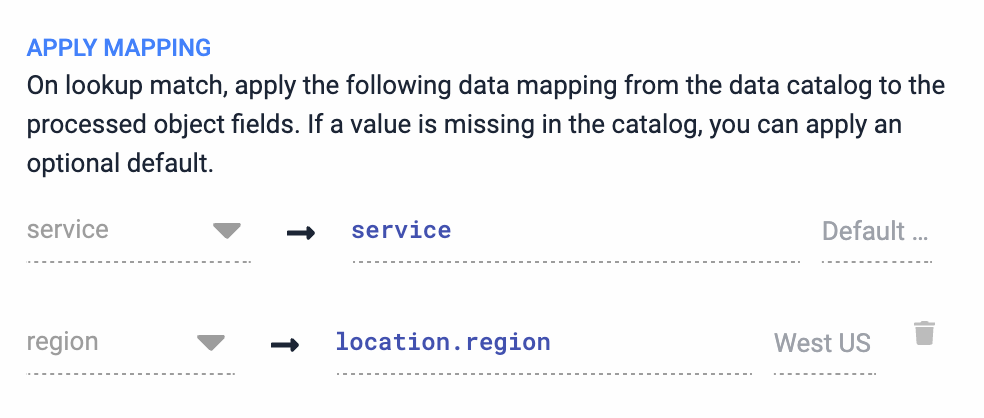
Map field names
Copy the document values to the event. This takes the catalog value and maps it to the specified output field in the event:
Test the workflow
After you define and save your workflow, test and validate it. Does the workflow process data the way you expect? Pull up the Workflow Tester pane, enter the values below, and click Run Test.
Field | Value |
|---|---|
| brewAPM |
| REST |
| ip=172.31.17.101,hostName=websrv01.us.west.myorg.org,id=12598993 |
The Workflow Tester shows the results of the two workflow actions in sequence:
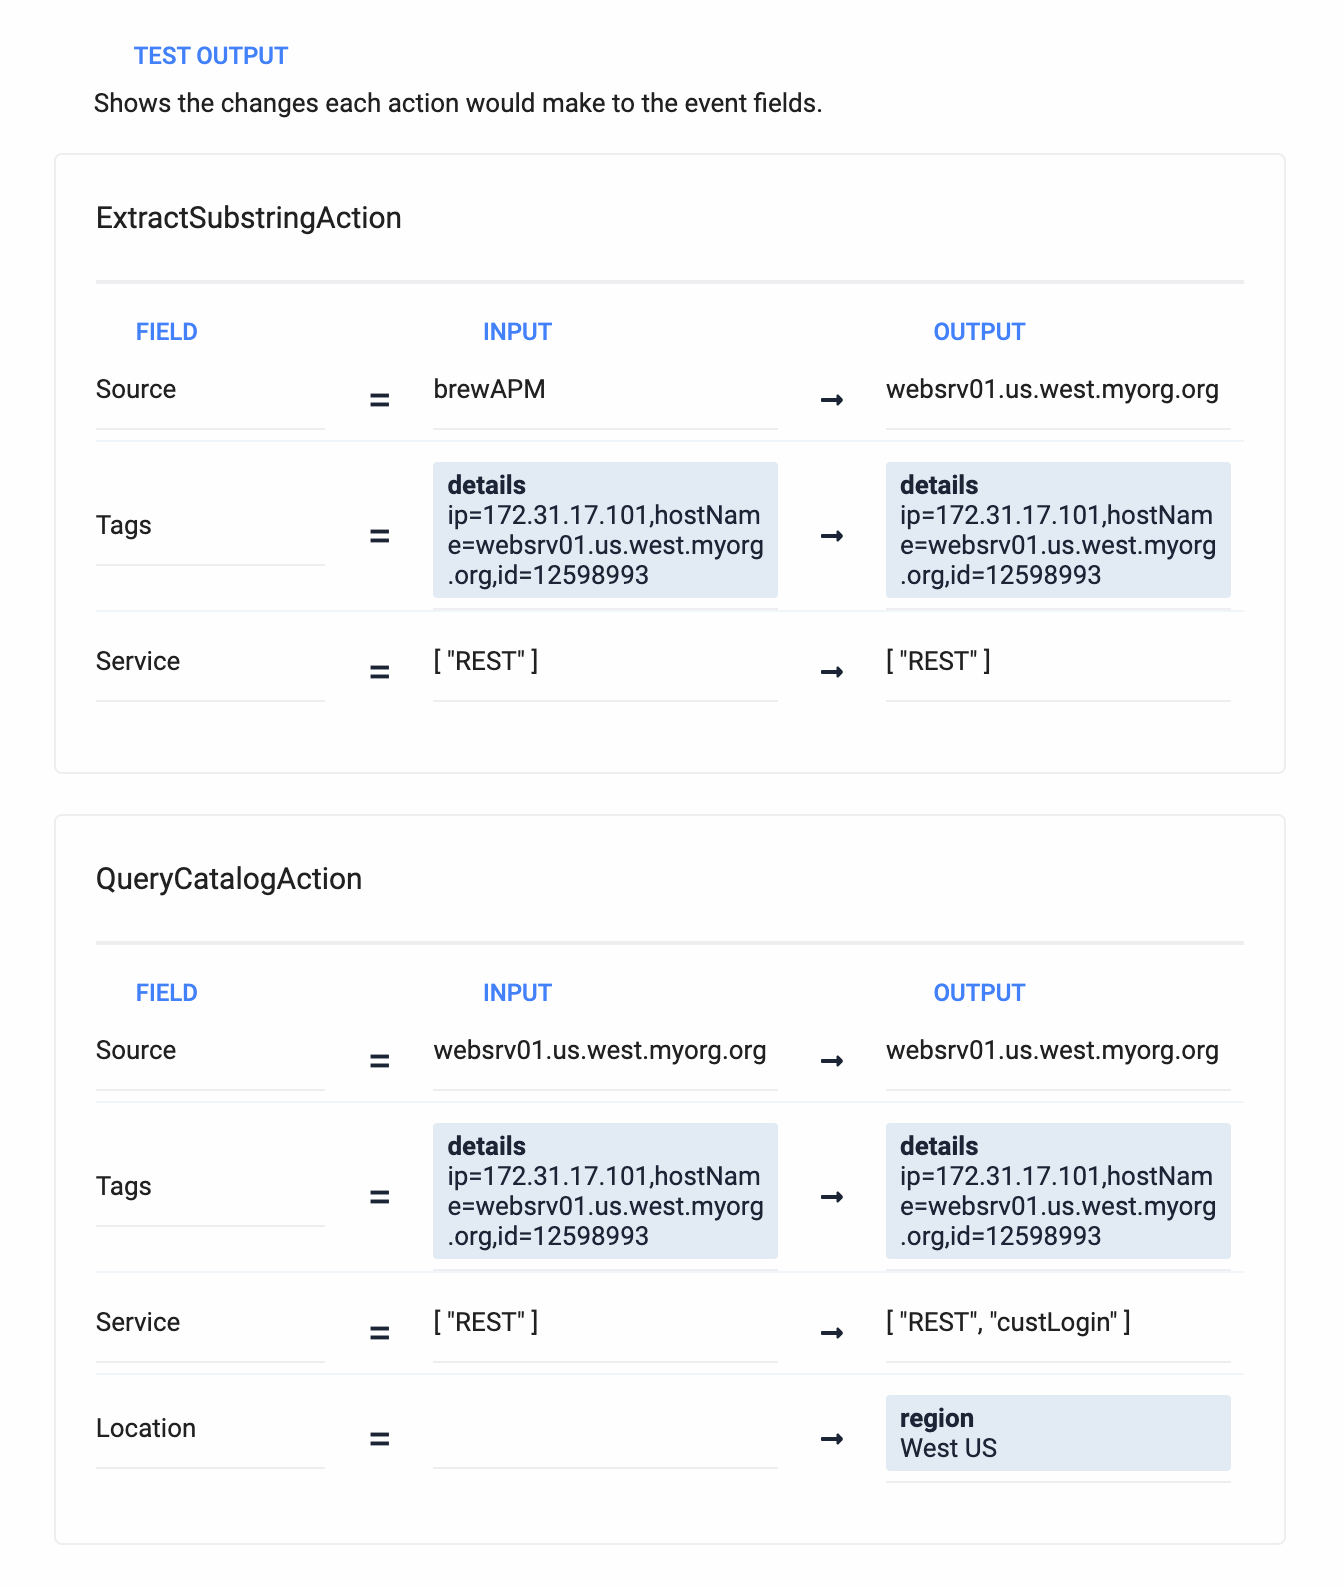 |
Example event: before and after
The following table shows how this workflow updates and enriches an example event. The workflow extracts the hostname from the tags.details field and copies it to the source field. Then it uses data from the catalog to add an element to the service list field and populate location.region.
Event before | ||
|---|---|---|
'{
    "description": "RT > 500 msec",
    "severity": 5,
    "source": "brewAPM",
    "check": "api",
    "service" : ["REST"],
    "tags": {
        "details": "ip=172.31.17.101,hostName=websrv01.us.west.myorg.org,id=12598993"
    },
}'
|