Datadog integration
You can use an APEX AIOps Incident Management custom integration to ingest events from Datadog.
Before you begin
Before you set up your Datadog integration:
Make sure you are signed in to your Incident Management instance.
Make sure you are signed in to Datadog.
Create a custom integration in Incident Management
Within Incident Management, navigate to Integrations > Inbound Integrations > Create Your Own Integration.
If necessary, click Add Integration to display the full list of integrations.
Click Add New Integration.
Under Incident Management Endpoint, enter a unique name for your new integration (required).
Note
The name of the integration can be anything you choose. Incident Management will automatically generate an API endpoint URL independent of what you enter for this field.
Under API Description, enter a description for the integration (optional).
Under Data Type, select Events.
Click Save.
Keep the web page for this integration open in your browser while you complete the following steps in Datadog.
Create a webhook in Datadog
Within Datadog, click on Integrations.
Click on Webhooks and create a new webhook.
Provide a unique name for the new webhook, such as "Incident Management."
In the URL field, paste the endpoint URL for your Incident Management instance.
The endpoint URL is provided for you in Incident Management on the page for your custom integration, under Configuration Information > Incident Management Endpoint.
Under Payload, delete the default payload text and replace it with the following:
{"host": "$HOSTNAME",
"title": "$EVENT_TITLE",
   "alert_metric": "$ALERT_METRIC",
   "alert_query": "$ALERT_QUERY",
   "body": "$EVENT_MSG",
   "body_clean": "$TEXT_ONLY_MSG",
   "link": "$LINK",
   "tags": "$TAGS",
   "event_type": "$EVENT_TYPE",
   "priority": "$PRIORITY",
   "alert_status": "$ALERT_STATUS",
   "alert_transition": "$ALERT_TRANSITION",
   "last_updated": "$LAST_UPDATED",
   "date": "$DATE",
   "email": "$EMAIL",
   "datadog_org_name": "$ORG_NAME",
   "datadog_org_id": "$ORG_ID",
   "id":"$ID",
   "aggreg_key": "$AGGREG_KEY"
}
Enable Custom Headers and paste the following header into the field that appears. Replace the placeholder text with your Incident Management API key:
{ "apiKey": "your-Incident Management-API-key-here" }Click Save.
Send a test payload to Incident Management:
Close the webhook window and navigate to Monitors > Manage Monitors.
Click on a monitor that you wish to send data from to Incident Management.
On the page for the monitor you selected, click the gear icon in the top right and select Edit.
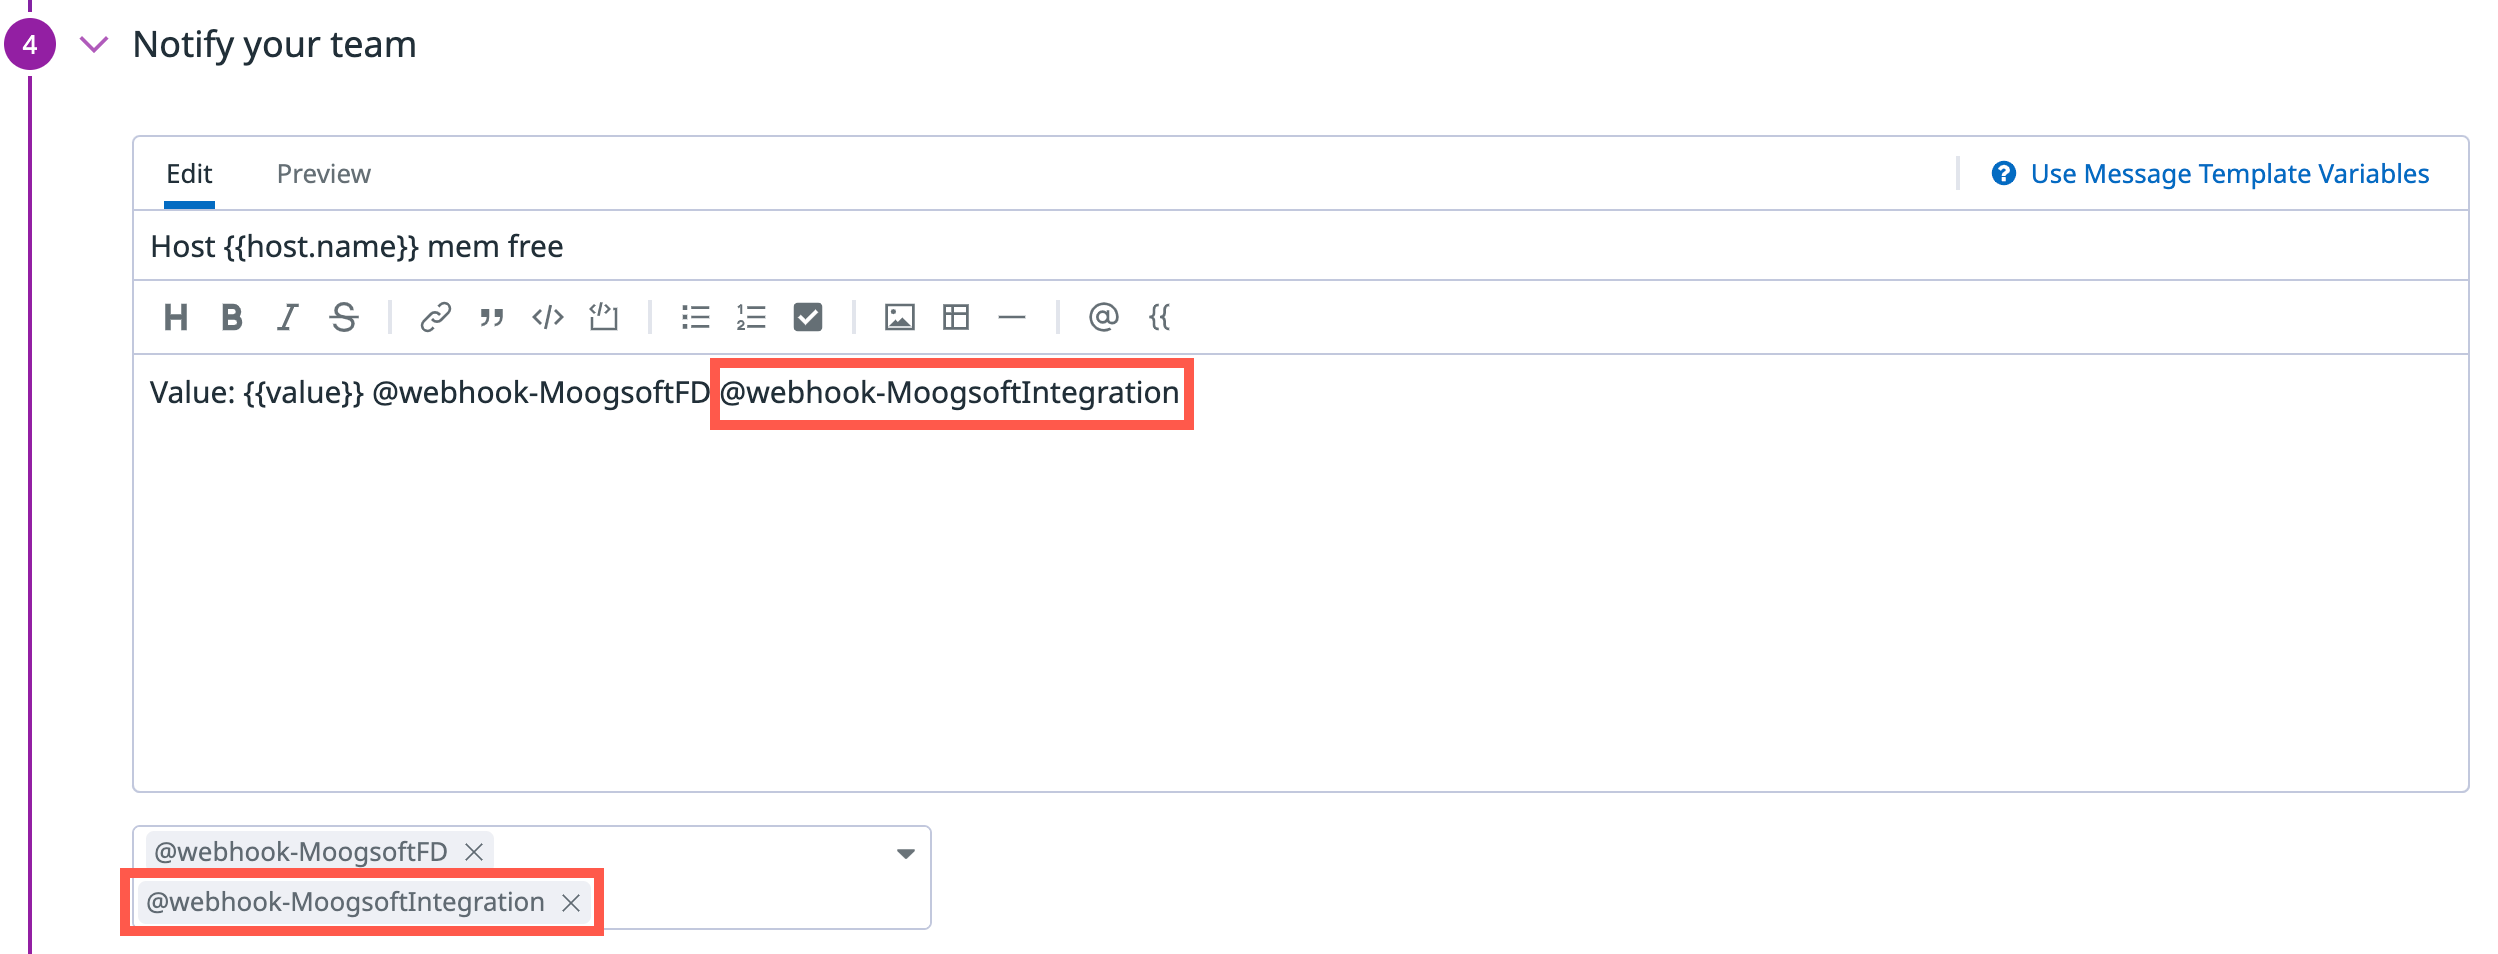
Scroll down to the Notify your team section and add the webhook that you created. In the following example, "MoogsoftIntegration" is the name of the Datadog webhook:
Scroll down to the bottom of the screen and click Test Notifications > Select All > Run Test.
This will send a test payload to your Incident Management integration.
Save the changes you made to the monitor.
Repeat these steps to add the webhook to other monitors within Datadog.
Configure the custom integration in Incident Management
Go to your Incident Management instance.
Open the page for your custom integration by going to Integrations > Inbound Integrations > Create Your Own Integration > your-integration-name.
In the Map Your Data section, you can view cached payloads of incoming events sent from Datadog. Confirm that the test payload you sent is there.
Map your payload fields to the corresponding Incident Management fields. An example mapping is provided for you below as a reference, but you should tailor the mapping according to your business needs.
For a complete list of mapping types, save options, and instructions on how to use them, read Use mapping types in custom integrations.
Table 1. Example mappingDatadog fields
Incident Management field
hostsourcetitle,body_cleandescriptionalert_metriccheckalert_transitionseverityClick Map Values and map the severity values according to the Severity Mapping table below.
linktags.datadog_url_linkEnter
Datadogas the default value and leave this field blank.managertagstags.ddtagsTable 2. Severity mappingDatadog severity field
Incident Management severity field
TriggeredCritical
Re-TriggeredCritical
WarnWarning
RecoveredClear
No dataUnknown
Re-no dataUnknown
Go to the top of the page and click Save.
Configure the event workflow in Incident Management
Within Incident Management, navigate to Correlate & Automate > Workflow Engine.
Click the Event Workflows tab, then click Add Workflow.
Provide a unique name for the workflow, such as "Split Datadog tags." Optionally, provide a description.
Under Trigger, set the Event Filter to the following:
manager = Datadog
Add a Split Tags action to the workflow. For instructions on adding actions to workflows, read Event workflow configuration example.
Configure the Split Tags action as follows:
Input Field:
tags.ddtagsNote
It may take a while for
tags.ddtagsto show up as a selectable field. Iftags.ddtagsis not appearing as an option, keep sending test notification payloads from your Datadog monitor and refresh your Incident Management instance periodically.Split Field:
,Separator String:
:
Save and then Enable your workflow.