ServiceNow Management
The ServiceNow Management integration makes it possible to enable bidirectional communication between Moogsoft Onprem and your ServiceNow incident management system.
Note
ServiceNow Management is the latest version of the Moogsoft ServiceNow integration. While you can continue using the older version (or a combination of the old version and new version), we recommend moving to the ServiceNow Management integration as it contains updates and additional functionality not present in the original ServiceNow integration.
After you complete the integration setup, the two systems keep information synchronized using workflows so that users can view data as follows:
You can use the out-of-the-box workflows to create and update ServiceNow incidents for Situations and alerts.
When you post a work note on an incident in ServiceNow, the comment appears in the linked Situation. Conversely, when you post on a Situation Room thread, the integration updates the linked ServiceNow incident with the comment.
You can right-click a Situation (or alert) and select Open ServiceNow Ticket to create a ServiceNow incident linked to the Moogsoft Onprem Situation.
You can right-click a Situation (or alert) and select Assign ServiceNow Ticket to user and support group to assign the related incident to the current Moogsoft user or specified user, and optionally a specified Support Group.
In Situation (or Alert) views, the Incident column contains a direct link to the incident in ServiceNow.
Refer to the ServiceNow documentation for details on ServiceNow components.
Current Version
The current version is 1.3 which make use of version 3.0.0 of the XML update set for ServiceNow.
Features introduced in this release:
Distributed as a single update set supporting both Moogsoft Cloud and Moogsoft Onprem.
Allows simultaneous integration to Moogsoft Onprem and Moogsoft Cloud from the same ServiceNow instance.
New functionality for Moogsoft Onprem:
Incident Cancelled state is treated the same as Close, and Incident assignment changes can change the assignment in Moogsoft Onprem.
Maintenance Window creation can be enabled or disabled from individual Change Requests.
New properties to suppress Moogsoft tabs in Incident and Change Request views.
Before You Begin
The ServiceNow integration has been validated with ServiceNow Vancouver, Utah, Tokyo and San Diego.
Before you set up your ServiceNow integration:
Note the URL of your ServiceNow incident management instance.
Verify that ServiceNow and Moogsoft Onprem can communicate over port 443.
Load the Moogsoft Update Set and create the moogint user as detailed in the Configure the ServiceNow Integration section below
(Optional) Install and configure the ServiceNow MID Server as detailed in the Configure a ServiceNow MID Server section, below, if you are using a dedicated MID Server for ServiceNow-to-Moogsoft Onprem communication. This step is not required if you use an existing MID Server or if one is not required. Set the
mid.instance.usernameandmid.instance.passwordaccording to those instructions.During configuration of the ServiceNow Integration, you will need to provide information for the following settings. These settings are used to set the values in the ServiceNow Moogsoft Onprem Properties upon validation.
Setting | Description |
|---|---|
ServiceNow Instance URL | The ServiceNow URL. |
Moogsoft ServiceNow User | ServiceNow user defined above. Defaults to |
Moogsoft ServiceNow User Password | ServiceNow user password. |
Moogsoft MID Server | ServiceNow MID Server used for return communication. Leave blank if not used. |
Moogsoft Instance Name | Moogsoft server name, resolvable from ServiceNow MID Server or directly. Must be in hostname notation, not URL notation. Example:
|
Moogsoft Graze API User Name | Moogsoft Graze user name for use in return communication from ServiceNow. |
Moogsoft Graze User Password | Moogsoft Graze user password. |
ServiceNow OAUTH2 Security Profile Name | ServiceNow OAUTH2 Profile name defined as needed. Leave blank if not used. |
You will also need to decide on processing options which relate to how ServiceNow sends incident updates back to Moogsoft Onprem and if Maintenance Windows will be automatically created (and deleted on ServiceNow Change completion) for the CI related to ServiceNow Change.
Setting | Description |
|---|---|
Moogsoft Thread Name | Situation thread used for posts made on incident note added - defaults to Support. |
Moogsoft Graze API Retry Limit | ServiceNow Graze API call retry limit. Defaults to 3. |
Moogsoft Graze API Timeout (in seconds) | ServiceNow Graze API timeout. Defaults to 20. |
Close Moogsoft Situation on Incident Close | Check to automatically close a Moogsoft Onprem Situation on ServiceNow Incident Close. |
Set Situation resolving step on incident resolution | Check to set Resolving Step flag on the Situation collaboration post added when a related ServiceNow Incident is resolved. |
Enable change integration for Maintenance Window Manager | Check to enable Maintenance Window creation and deletion for changes raised in ServiceNow. |
(Optional) After configuring the integration, navigate to the Moogsoft Onprem Properties in ServiceNow by using the filter navigator. Check that the properties reflect the values you set.
If you do not use moogint as the Moogsoft Onprem ServiceNow User, you must manually edit the Moogsoft Onprem Properties value for this field to reflect your chosen user. We do not update this value as it is considered a potential security risk.
Configure the ServiceNow Integration
To configure the ServiceNow integration, you need to provide a unique instance name. You can use the default name or customize the name according to your needs.
Additionally, provide connection data for your ServiceNow system.
If your Moogsoft Onprem is installed on-premise and does not have a direct connection to ServiceNow, you will need to configure the proxy settings in the integration by selecting the ENABLE PROXY check button.
You can only create one ServiceNow integration.
Configure a ServiceNow MID Server
Note
If you are running a cloud installation of Moogsoft Onprem you do not need to configure a MID Server.
On-premise installations require a ServiceNow MID server to be set up on your Moogsoft Onprem machine, or on a Linux machine that is accessible from Moogsoft Onprem. Installing the MID server achieves a bidirectional integration wherein the MID server receives updates from ServiceNow and forwards them to Moogsoft Onprem using the Graze API.
Note that in order to set up a MID Server you require a ServiceNow account with MID-server role permissions. For more help, see the ServiceNow documentation.
Installing a MID Server (Linux)
Within ServiceNow, under Mid Servers > Downloads, find the suitable package for your environment.
Transfer the MID server Linux package to the server you want to install the MID server on. Make sure that this system has access to both the Moogsoft Onprem Instance and ServiceNow Instance. (This documentation is for RPM package install suitable for CentOS 7).
Install the MID Server rpm using the following command:
rpm -ivh --nodeps <filename> --prefix=/usr/local/servicenow/moog_mid_server
Run the Installer (this command will appear in the output of the previous command should you have an issue). You will need a non-root user for the MID Server to run as for this script.
/usr/local/servicenow/moog_mid_server/agent/installer.sh
Answer the questions that follow using the example values below as a guideline:
Question
Suggested Answer
Enter the ServiceNow Instance URL [https://YOUR_INSTANCE.service-now.com/] :https://dev12345.service-now.com/Do you want to use proxy? [Enter Y or N] :NDo you want to use Mutual Authentication? [Enter Y or N]NEnter the username for mid user :<username for ServiceNow instance>Enter the password for mid user :<password for above user>Enter the Mid Server Name [My_Linux_Mid_Server] :MID ServerEnter the unique name for the service to be created [mid] :midNote: This value should be unique in this ServiceNow instance. This will also be the name of the Linux Service created.
Enter the Non-Root User Name to run this service :<user on local Linux Server>Check to make sure that the service is running. Make sure to use the service name you specified above:
# systemctl status mid
● mid.service - ServiceNow_MID_Server
   Loaded: loaded (/etc/systemd/system/mid.service; enabled; vendor preset: disabled)
   Active: active (running) since Thu 2022-05-26 11:49:26 EDT; 18min ago
  Process: 4143 ExecStart=/usr/local/servicenow/moog_mid_server/agent/bin/mid.sh start sysd (code=exited, status=0/SUCCESS)
 Main PID: 4232 (wrapper-linux-x)
Caution
<MOOGSERVERNAME> needs to be the hostname of the Moogsoft Onprem instance. This needs to match the name used when logging into the server. IP addresses or alternative alias names will not work. It must also match the Moogsoft Onprem instance in the Moogsoft Onprem integration for ServiceNow:

Install the Moogsoft Onprem Certificate on the MID Server (Linux)
If your Moogsoft Onprem instance has a self signed certificate (likely for dev/test), you will need to import it into the MID Server’s Java Certificate keystore.
To do this, get a copy of the certificate using openssl. Replace <MOOGSERVERNAME> with your Moogsoft Onprem instance’s hostname:
openssl s_client -showcerts -connect <MOOGSERVERNAME>:443 </dev/null 2>/dev/null|openssl x509 -outform PEM >mycertfile.pem
If you do not have openssl installed, you can also get the certificate via your browser:
Open
https://<MOOGSERVERNAME>and save the self-signed certificate to a file.Install the certificate:
/usr/local/servicenow/moog_mid_server/agent/jre/bin/keytool -import -alias <MOOGSERVERNAME> -file mycertfile.pem -keystore /usr/local/servicenow/moog_mid_server/agent/jre/lib/security/cacerts
Default keystore password is:
changeitAnswer "Yes" to Trust this certificate.
Check to make sure that the certificate matches the hostname you want to connect to:
curl https://<MOOGSERVERNAME> --cacert mycertfile.pem
This should return some HTML. If you get
curl: (60) Issuer certificate is invalid, it means that the hostname used is not the same one as that of the certificate. The previous command in Step 2 will list the hostname that the certificate is for.
Installing a MID Server (Windows)
Note
Requires a Server version of Windows. MID server cannot be installed on desktop versions of Windows (Windows 10 and Windows 11).
Within ServiceNow, under Mid Servers > Downloads, find the suitable package for your environment.
Download the 64-bit MID server Windows package to your Moogsoft Onprem machine or to a machine accessible from Moogsoft Onprem.
Run the Installer as Administrator. If you are having issues, try the following command:
msiexec /i <msi_package_name>Specify your ServiceNow instance, username, password and other connection information. Test the connection.
Enter a MID Server Name (unique to the ServiceNow Instance), Windows account, and password for local service. Test MID Server settings (or click on the + to create one).
Set the Installation Directory. Entering
C:\will result in the MID Server being installed toC:\ServiceNow MID Server SNOWMID2Select Start MID Server after installation.
Install the Moogsoft Onprem Certificate on the MID Server (Windows)
Caution
<MOOGSERVERNAME> needs to be the hostname of the Moogsoft Onprem instance. This needs to match the name used when logging into the server. IP addresses or alternative alias names will not work. It must also match the Moogsoft Onprem instance in the Moogsoft Onprem integration for ServiceNow:
If your Moogsoft Onprem instance has a self signed certificate (likely for dev/test), you will need to import it into the MID Server’s Java Certificate keystore.
Open
https://<MOOGSERVERNAME>and save the self-signed certificate to a file.Install the certificate (assuming
C:\installation folder):"C:\ServiceNow MID Server SNOWMID2\agent\jre\bin\keytool.exe" -import -alias <MOOGSERVERNAME> -file mycertfile.pem -keystore "C:\MID Server\ServiceNow MID Server SNOWMID2\agent\jre\lib\security\cacerts"
Default keystore password is:
changeitAnswer "Yes" to Trust this certificate.
Validate the MID Server
To validate the MID server:
Within the ServiceNow console, navigate to MID Servers > Servers and select your new MID Server.
Under Related Links, select Validate.
Your MID Server will now be “validating”. This can take 5 to 15 minutes and will eventually change to “yes”.
Note
If the MID server stays on validating for more than 15 minutes, try restarting the service on the Linux or Windows Host and waiting another few minutes.
Disable a ServiceNow MID Server in Moogsoft Integration
You should use this configuration when you are using Moogsoft Hosted with a SaaS implementation of ServiceNow.
Within ServiceNow, navigate to Moogsoft Onprem Properties and deselect the MID server.
Navigate to business rules. Disable the Moogsoft AIOps apply MID server to REST business rule.
Navigate to REST messages and remove the MID server from the HTTP requests of each REST message.
Configure ServiceNow
Note
It is possible to upgrade to 3.0.0 from Moogsoft Onprem update set versions from 2.3.0 onwards and any version of the Moogsoft Cloud update set:
If an earlier Moogsoft Onprem update set is installed, it should first be upgraded to 2.3.0.
When upgrading from a version of the Moogsoft Cloud update set, an additional post installation step is required (see below).
Once installed, configuration should be performed via the “Moogsoft Onprem Properties” menu.
Configure the integrations user and XML update set for ServiceNow:
Download the XML update set file.
In the ServiceNow UI, import the update set and open it. Refer to the ServiceNow Update Set documentation for detailed instructions.
Preview the update set. The preview will attempt to load and will fail with an error message similar to "Preview problems for Moogsoft. To commit this update set you must address all problems".
Close the message to view the list of preview problems.
Select all preview problems and then accept the remote update.
Commit the update set. Ignore the dictionary error that appears and proceed with the commit.
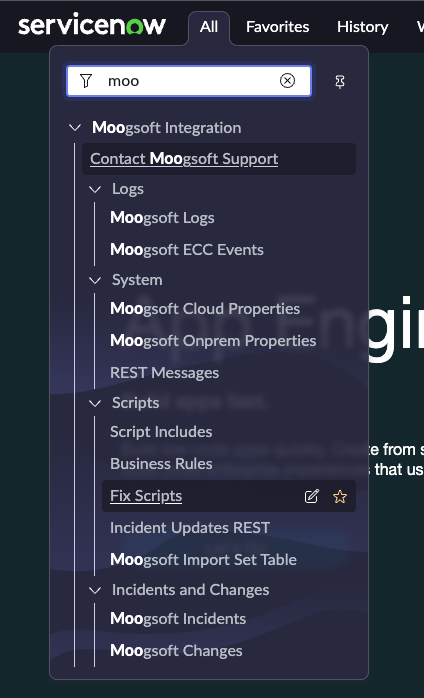
To verify that the update is successful, type "moogsoft" into the filter navigator and confirm that the Moogsoft Integration update set displays.
Create an integration user in ServiceNow named moogint and assign it the following roles:
mid_server: Allows the MID server to access protected tables.
x_moogs_incident_m.import: Allows Moogsoft Onprem to synchronize work notes and resolutions.
Caution
For the Tokyo version of ServiceNow, the import_admin role is also required.
x_moogs_incident_m_properties_user: Allows the ServiceNow user to edit Moogsoft Onprem event properties.
incident_manager: Allows the auto-assign feature to assign new incidents to the logged in user.
Upgrading a previous Cloud update set
When upgrading from the version of the Moogsoft Cloud update set, an additional post installation step is required.
The Incident field used to hold the Moogsoft Cloud incident ID has been changed. To migrate any existing ServiceNow Incidents to use the new field, a Fix Script has been supplied which should be run following the installation of 3.0.0. This is visible in the Moogsoft application menu:
 |
Open an run the Migrate Cloud Incident IDs Fix Script.
Configuration should then be performed via the “Moogsoft Onprem Properties” menu.
Alert forwarding in maintenance windows
The existing property ALLOW ALERT FORWARDING FOR IN MAINTENANCE CIS controls whether any ServiceNow maintenance windows will allow situation membership for alerts under maintenance. This is a global setting and will apply to all Change Requests.
From version 2.3.5 of the update set, a new property called ALLOW OVERRIDE OF ALERT FORWARDING IN CHANGE REQUESTS allows the global setting to be overridden in individual change requests.
 |
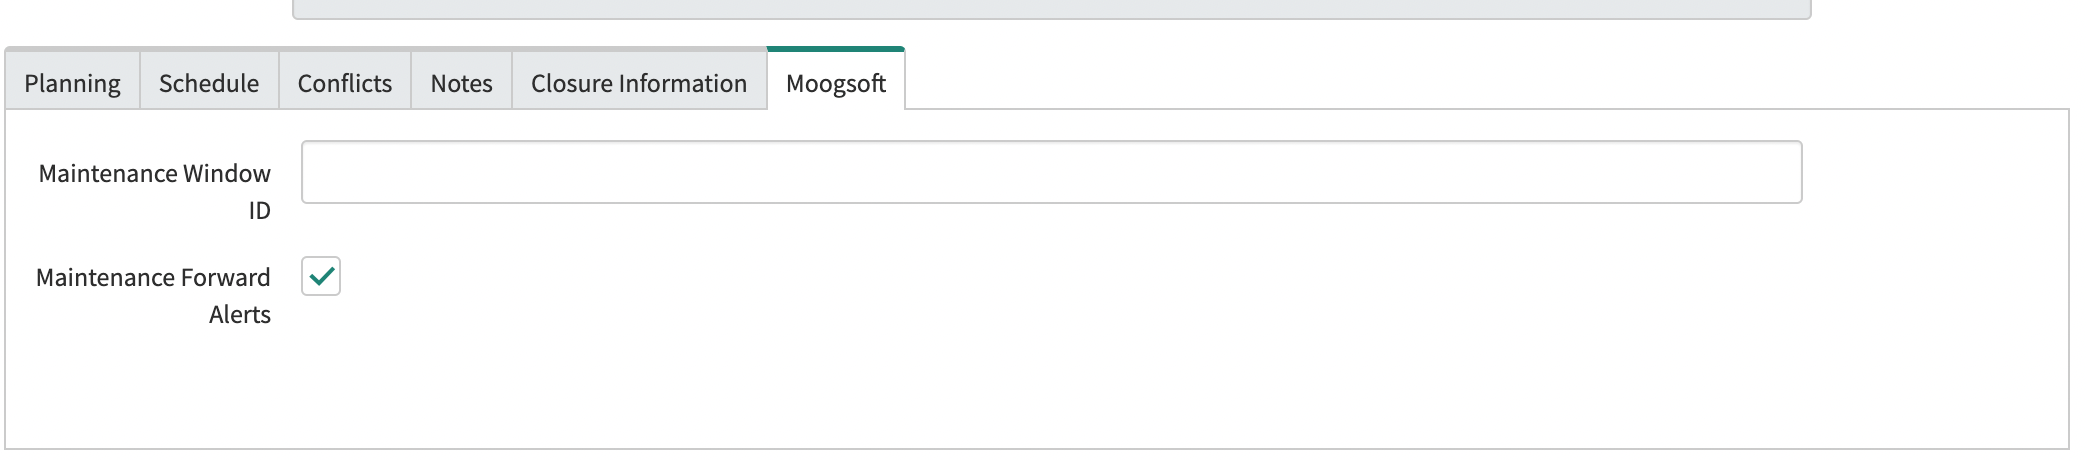
If the ALLOW OVERRIDE OF ALERT FORWARDING IN CHANGE REQUESTS option is enabled, all ServiceNow Change Requests will display a Moogsoft tab that includes a check box called “Maintenance Forward Alerts”. By default, this will reflect the global setting but can be changed if required:
 |
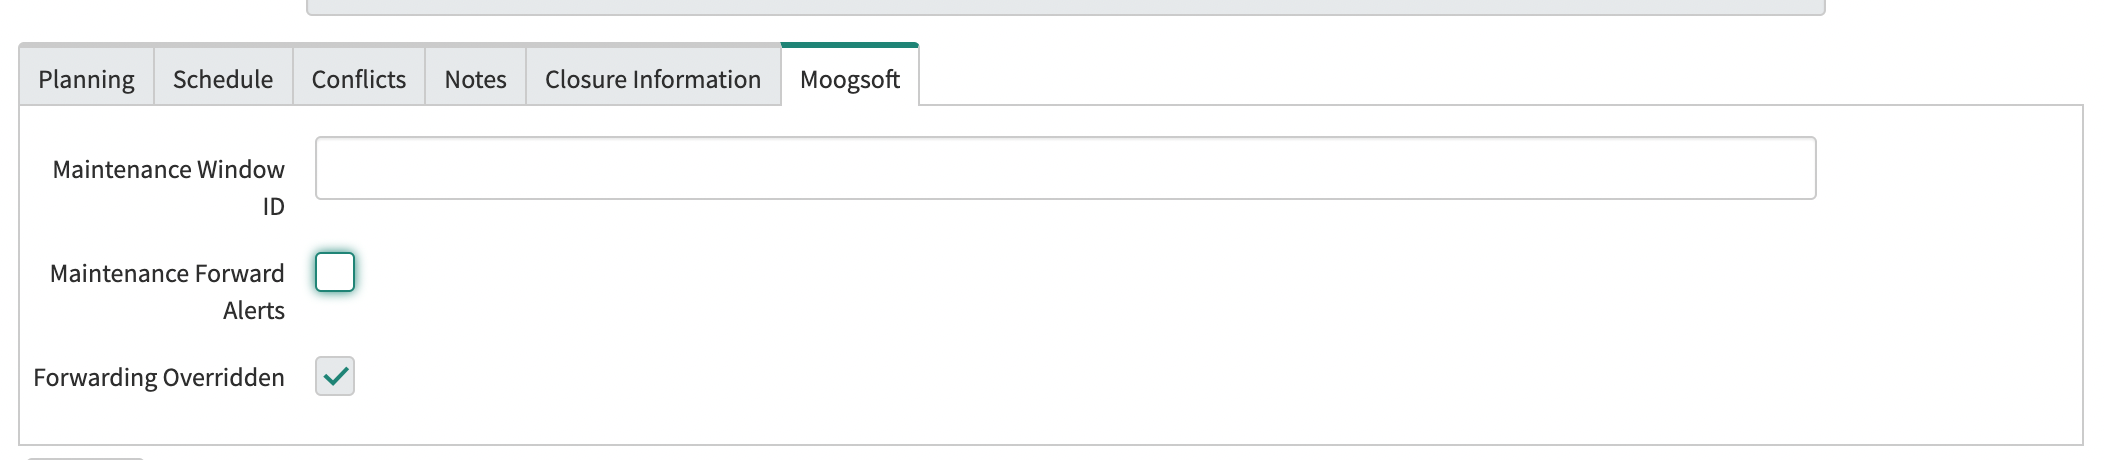
If the Maintenance Forward Alerts check box is modified, a Forwarding Overridden flag is set to indicate that the local value will be used when creating Maintenance Windows for that Change Request.
 |