Configure ActiveMQ
ActiveMQ Configuration
Apache ActiveMQ is an open source message broker written in Java together with a full Java Message Service (JMS) client.
Configuring ActiveMQ to function with JMS LAM has following three steps:
Creating a JMS Queue.
Creating a JMS Topic.
SSL configuration for ActiveMQ.
Creating a JMS Queue for ActiveMQ
Enter the URL
http://127.0.0.1:8161/admin/in a browser. The browser prompts for login.Enter the following details and click OK:
User: admin
Password: admin

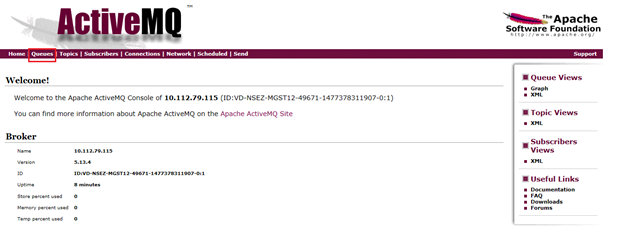
Select Queues from the menu bar of the ActiveMQ admin console.

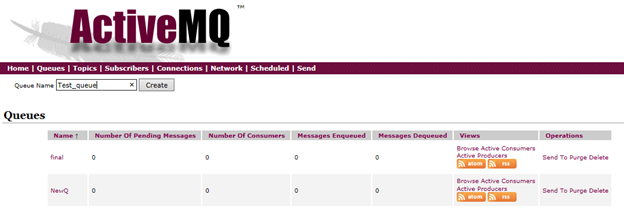
Enter a queue name in the field Queue Name E.g. Test_queue and click on Create. The queue is created and displayed in the Queues section.

The JMS Queue is created.
Creating a JMS Topic for ActiveMQ
Enter the URL
http://127.0.0.1:8161/admin/in a browser. The browser prompts for login.Enter the following details and click OK:
User: admin
Password: admin

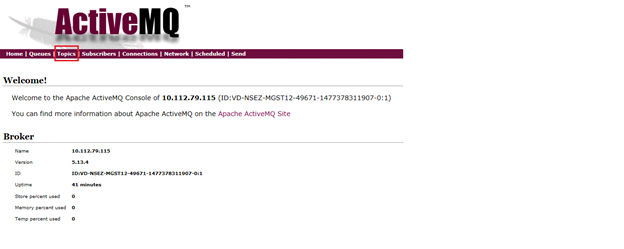
Select Topics from the menu bar of ActiveMQ admin console.

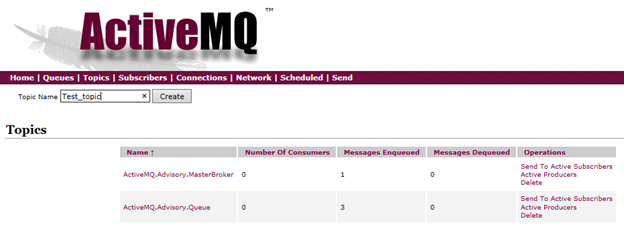
Enter a topic name in the field Topic Name, for example, Test_topic, and click on Create. The topic is created and displayed in the Topics section.

SSL Configuration for ActiveMQ(Optional)
To configure SSL in ActiveMQ, proceed as follows:
Note
The following procedure is same for both Windows and Linux.
Note
If the SSL configuration is already implemented for ActiveMQ, then this configuration can be skipped.
Open a CLI and create a folder using the command
mkdir SSL.Navigate to SSL directory using the command
cd SSL.Execute the following commands one by one.
$ keytool -genkey -alias localhost -keyalg RSA -keysize 2048 -validity 90 -keystore amq-server.ks
$ keytool -export -alias localhost -keystore amq-server.ks -file amq-server_cert
$ keytool -genkey -alias localhost -keyalg RSA -keysize 2048 -validity 90 -keystore amq-client.ks
$ keytool -import -alias localhost -keystore amq-client.ts -file amq-server_cert
$ keytool -export -alias localhost -keystore amq-client.ks -file amq-client_cert
$ keytool -import -alias localhost -keystore amq-server.ts -file amq-client_cert
The following files are generated in the SSL directory.
amq-clients.ks
amq-client.ts
amq-client_cert
amq-server.ks
amq-server.ts
amq-server_cert
Copy the
amq-server.ksand amq-server.ts files from theSSLfolder to the.conffolder of the unzipped downloaded ActiveMQ setup.Change the
transportConnectorselement for "ssl" in the.activemq.xmlfile in the.conffolder, setneedClientAuth=truein the element. If the transport connector for SSL is not present then add it in the <transport connectors> section and delete all the other transport connectors.Enter the
<sslcontext>section in theactivemq.xmlfile in the.conffolder. Add the ssl context as follows:<transportConnectors> <transportConnector name="ssl" uri="ssl://0.0.0.0:61617?trace=true&needClientAuth=true"/> </transportConnectors> <sslContext> <sslContext keyStore="file:${activemq.base}/conf/amq-server.ks" keyStorePassword="PASSWORD" trustStore="file:${activemq.base}/conf/amq-server.ts" trustStorePassword="PASSWORD" /> </sslContext>Note
The password mentioned in the above section should be the same password that you have given while creating the certificates
Start the ActiveMQ service by executing the command
activemq start.