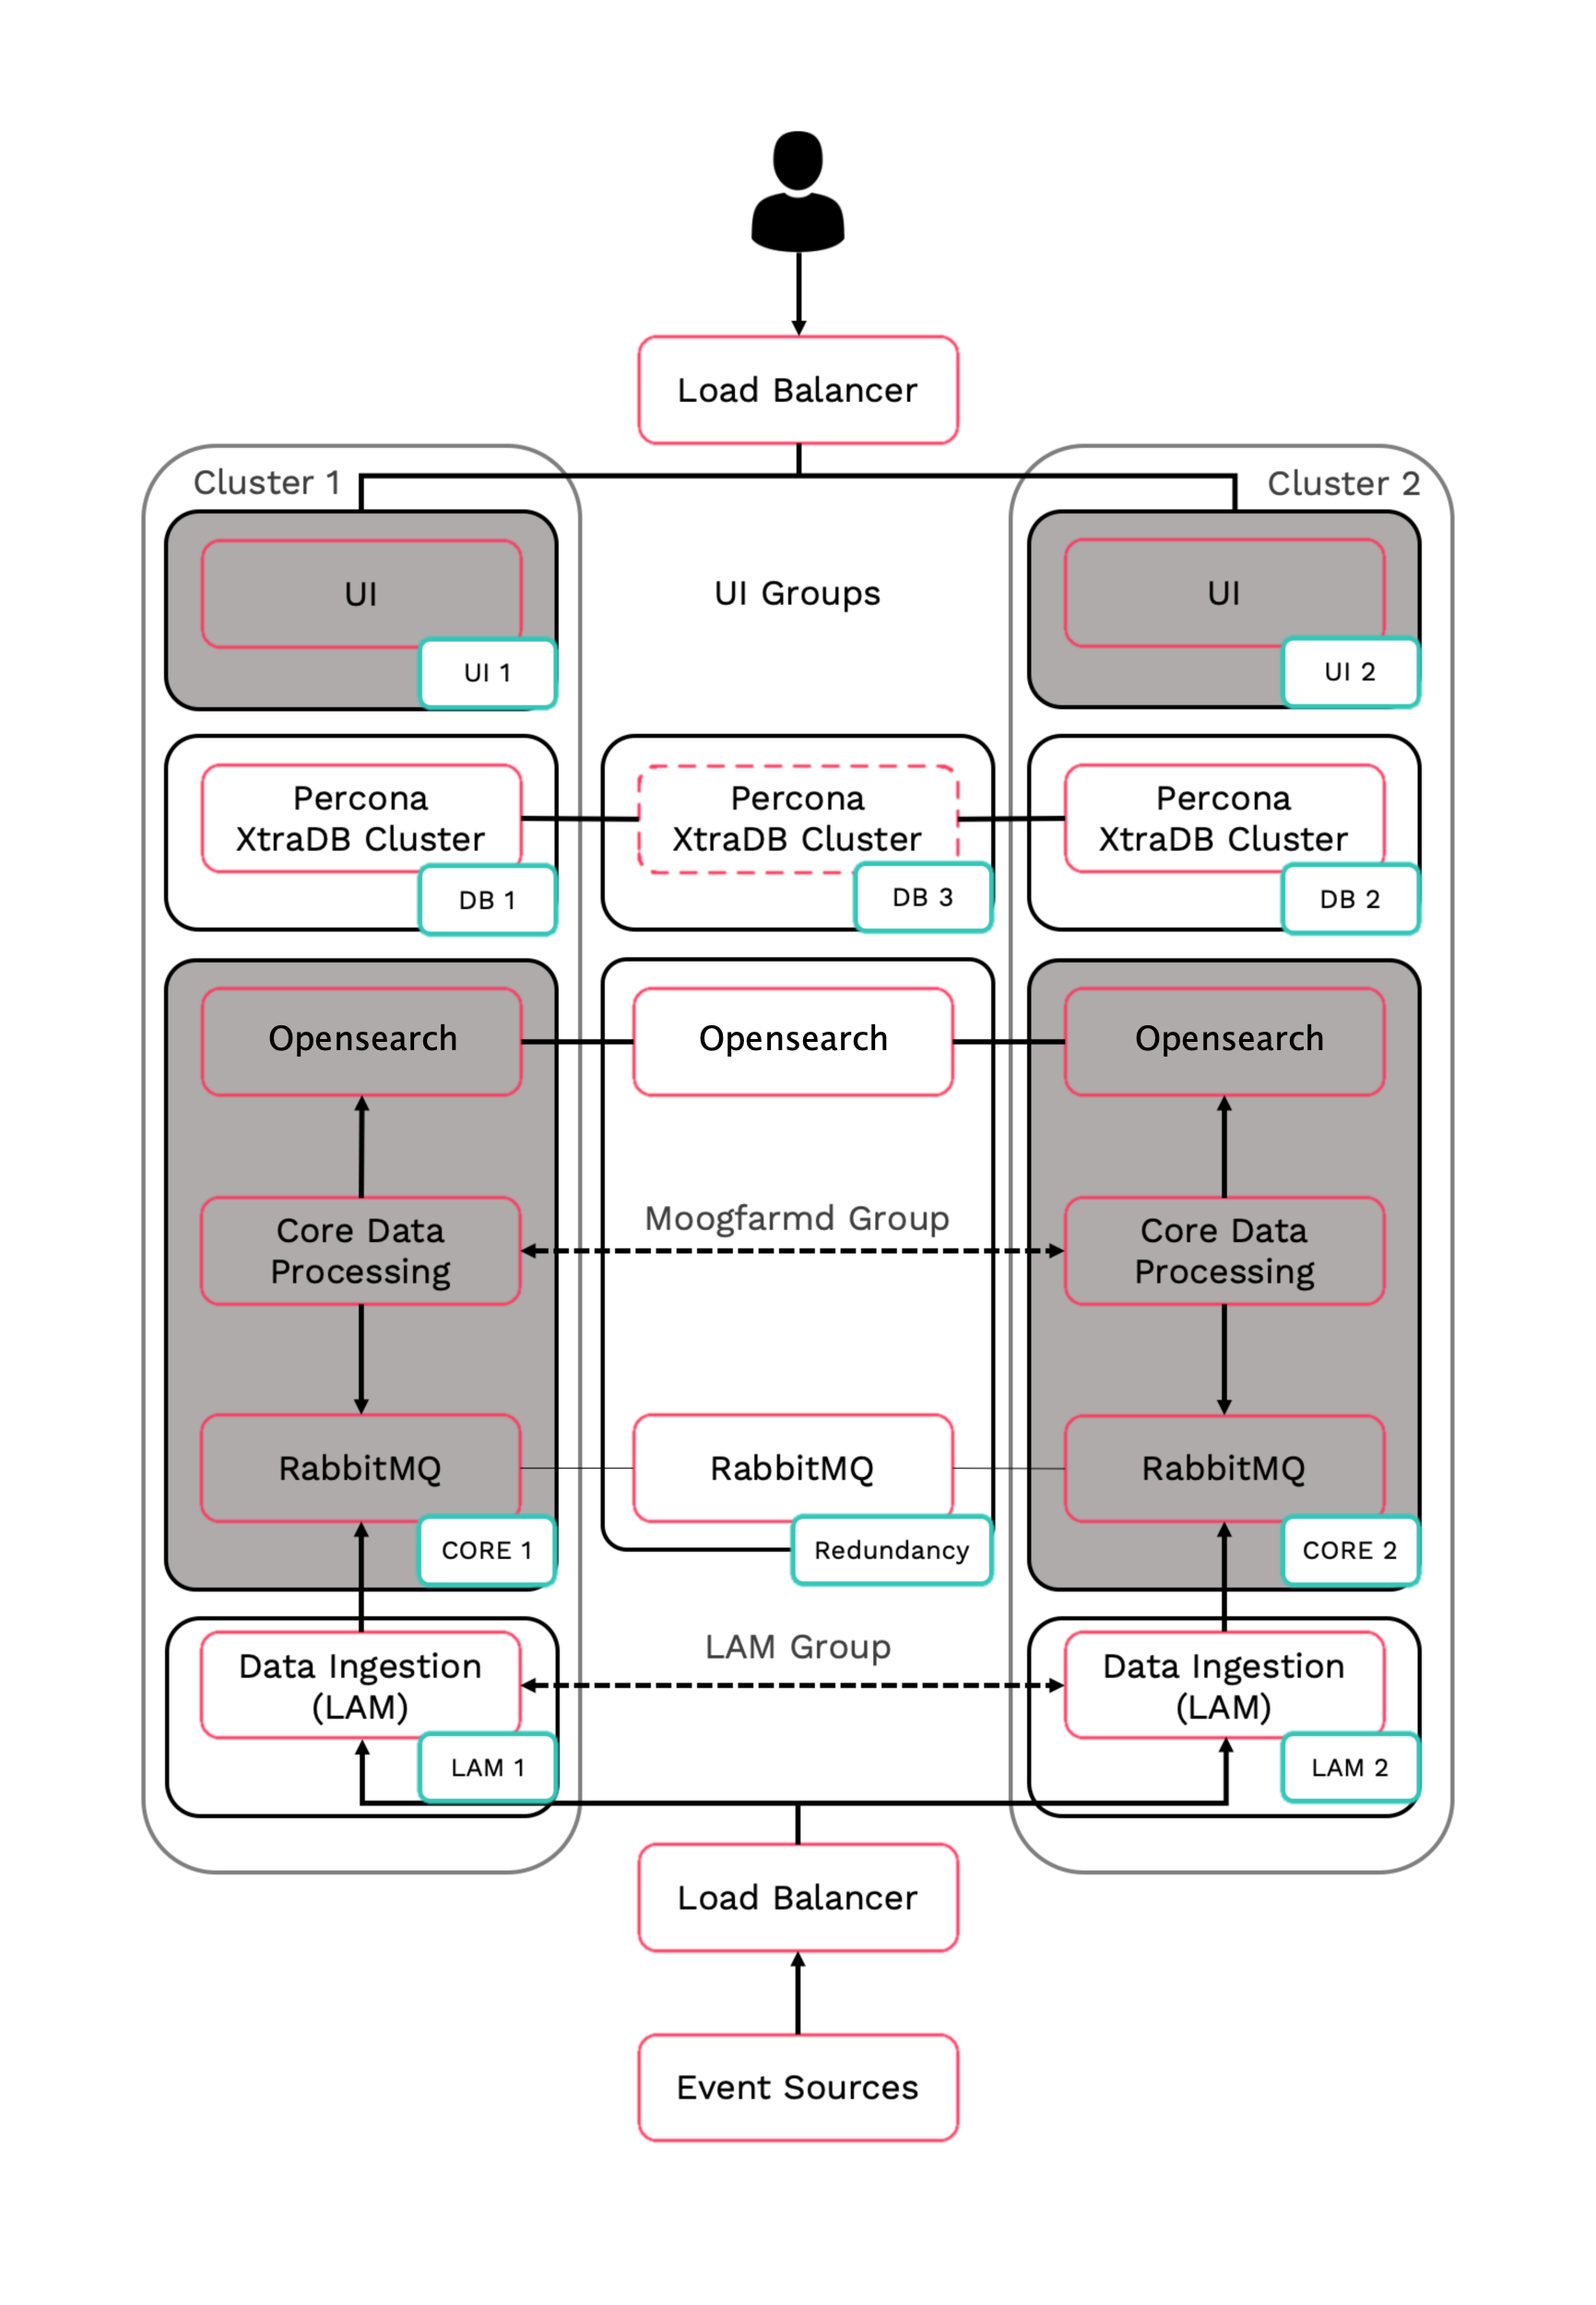
Set Up HA Proxy for the Database Role
This topic tells you how to install and configure HA Proxy on a Moogsoft Enterprise server to connect to a remote Percona XtraDB cluster.
Percona XtraDB Cluster must be run as a 3-node (minimum) cluster distributed across the database roles.
Before you begin
Before you install and configure HA Proxy, you must configure Percona XtraDB as described in Set Up the Database for HA.
You must also set up the Core and UI nodes before installing and configuring HA Proxy on these nodes. See the following documentation for more information:
Once you have set up the Core and UI nodes, you install and configure HA Proxy on these nodes:

Refer to the Distributed HA system Firewall for more information on connectivity within a fully distributed HA architecture.
Install and configure HA Proxy
You install and configure HA Proxy on the following Core and UI nodes:
Core 1 and Core 2: Core primary and secondary.
UI 1 and UI 2: UI primary and secondary.
Complete the following steps for the Core and UI primary and secondary servers:
Install and configure HA Proxy to listen on
0.0.0.0:3309and route connections to one of three Percona XtraDB nodes. Use the Percona XtraDB server IP addresses instead of hostnames to reduce network latency.$MOOGSOFT_HOME/bin/utils/haproxy_installer.sh -l 3309 -c -i <DB 1 server IP address>:3306,<DB 2 server IP address >:3306,<DB 3 server IP address>:3306
See Set up the database for HA for more information.
Restart the running services that use Percona XtraDB on the primary and secondary servers to allow those services to connect on
3309:Moogfarmd on the Core servers.
Apache Tomcat on the UI servers.
Run the following script to confirm successful installation:
$MOOGSOFT_HOME/bin/utils/check_haproxy_connections.sh
If successful, you see a script output similar to the following example:
HAProxy Connection Counts
Frontend:
    0.0.0.0:3309 : 27
Backend:
    mysql_node_1 172.31.82.211:3306 : 27
    mysql_node_2 172.31.82.133:3306 : 0
    mysql_node_3 172.31.85.42:3306 : 0