Install LAMs (Moogsoft Enterprise)
This topic describes how to install LAMs in a distributed HA system in Moogsoft Enterprise. In this configuration all components in the HA architecture are on-premise.
In HA architecture, LAM 1 and LAM 2 run in an active / passive mode for a HA polling pair, and in active / active mode for a HA receiving pair.
HA architecture
In our distributed HA installation, the LAM components are installed on the LAM 1 and LAM 2 servers:
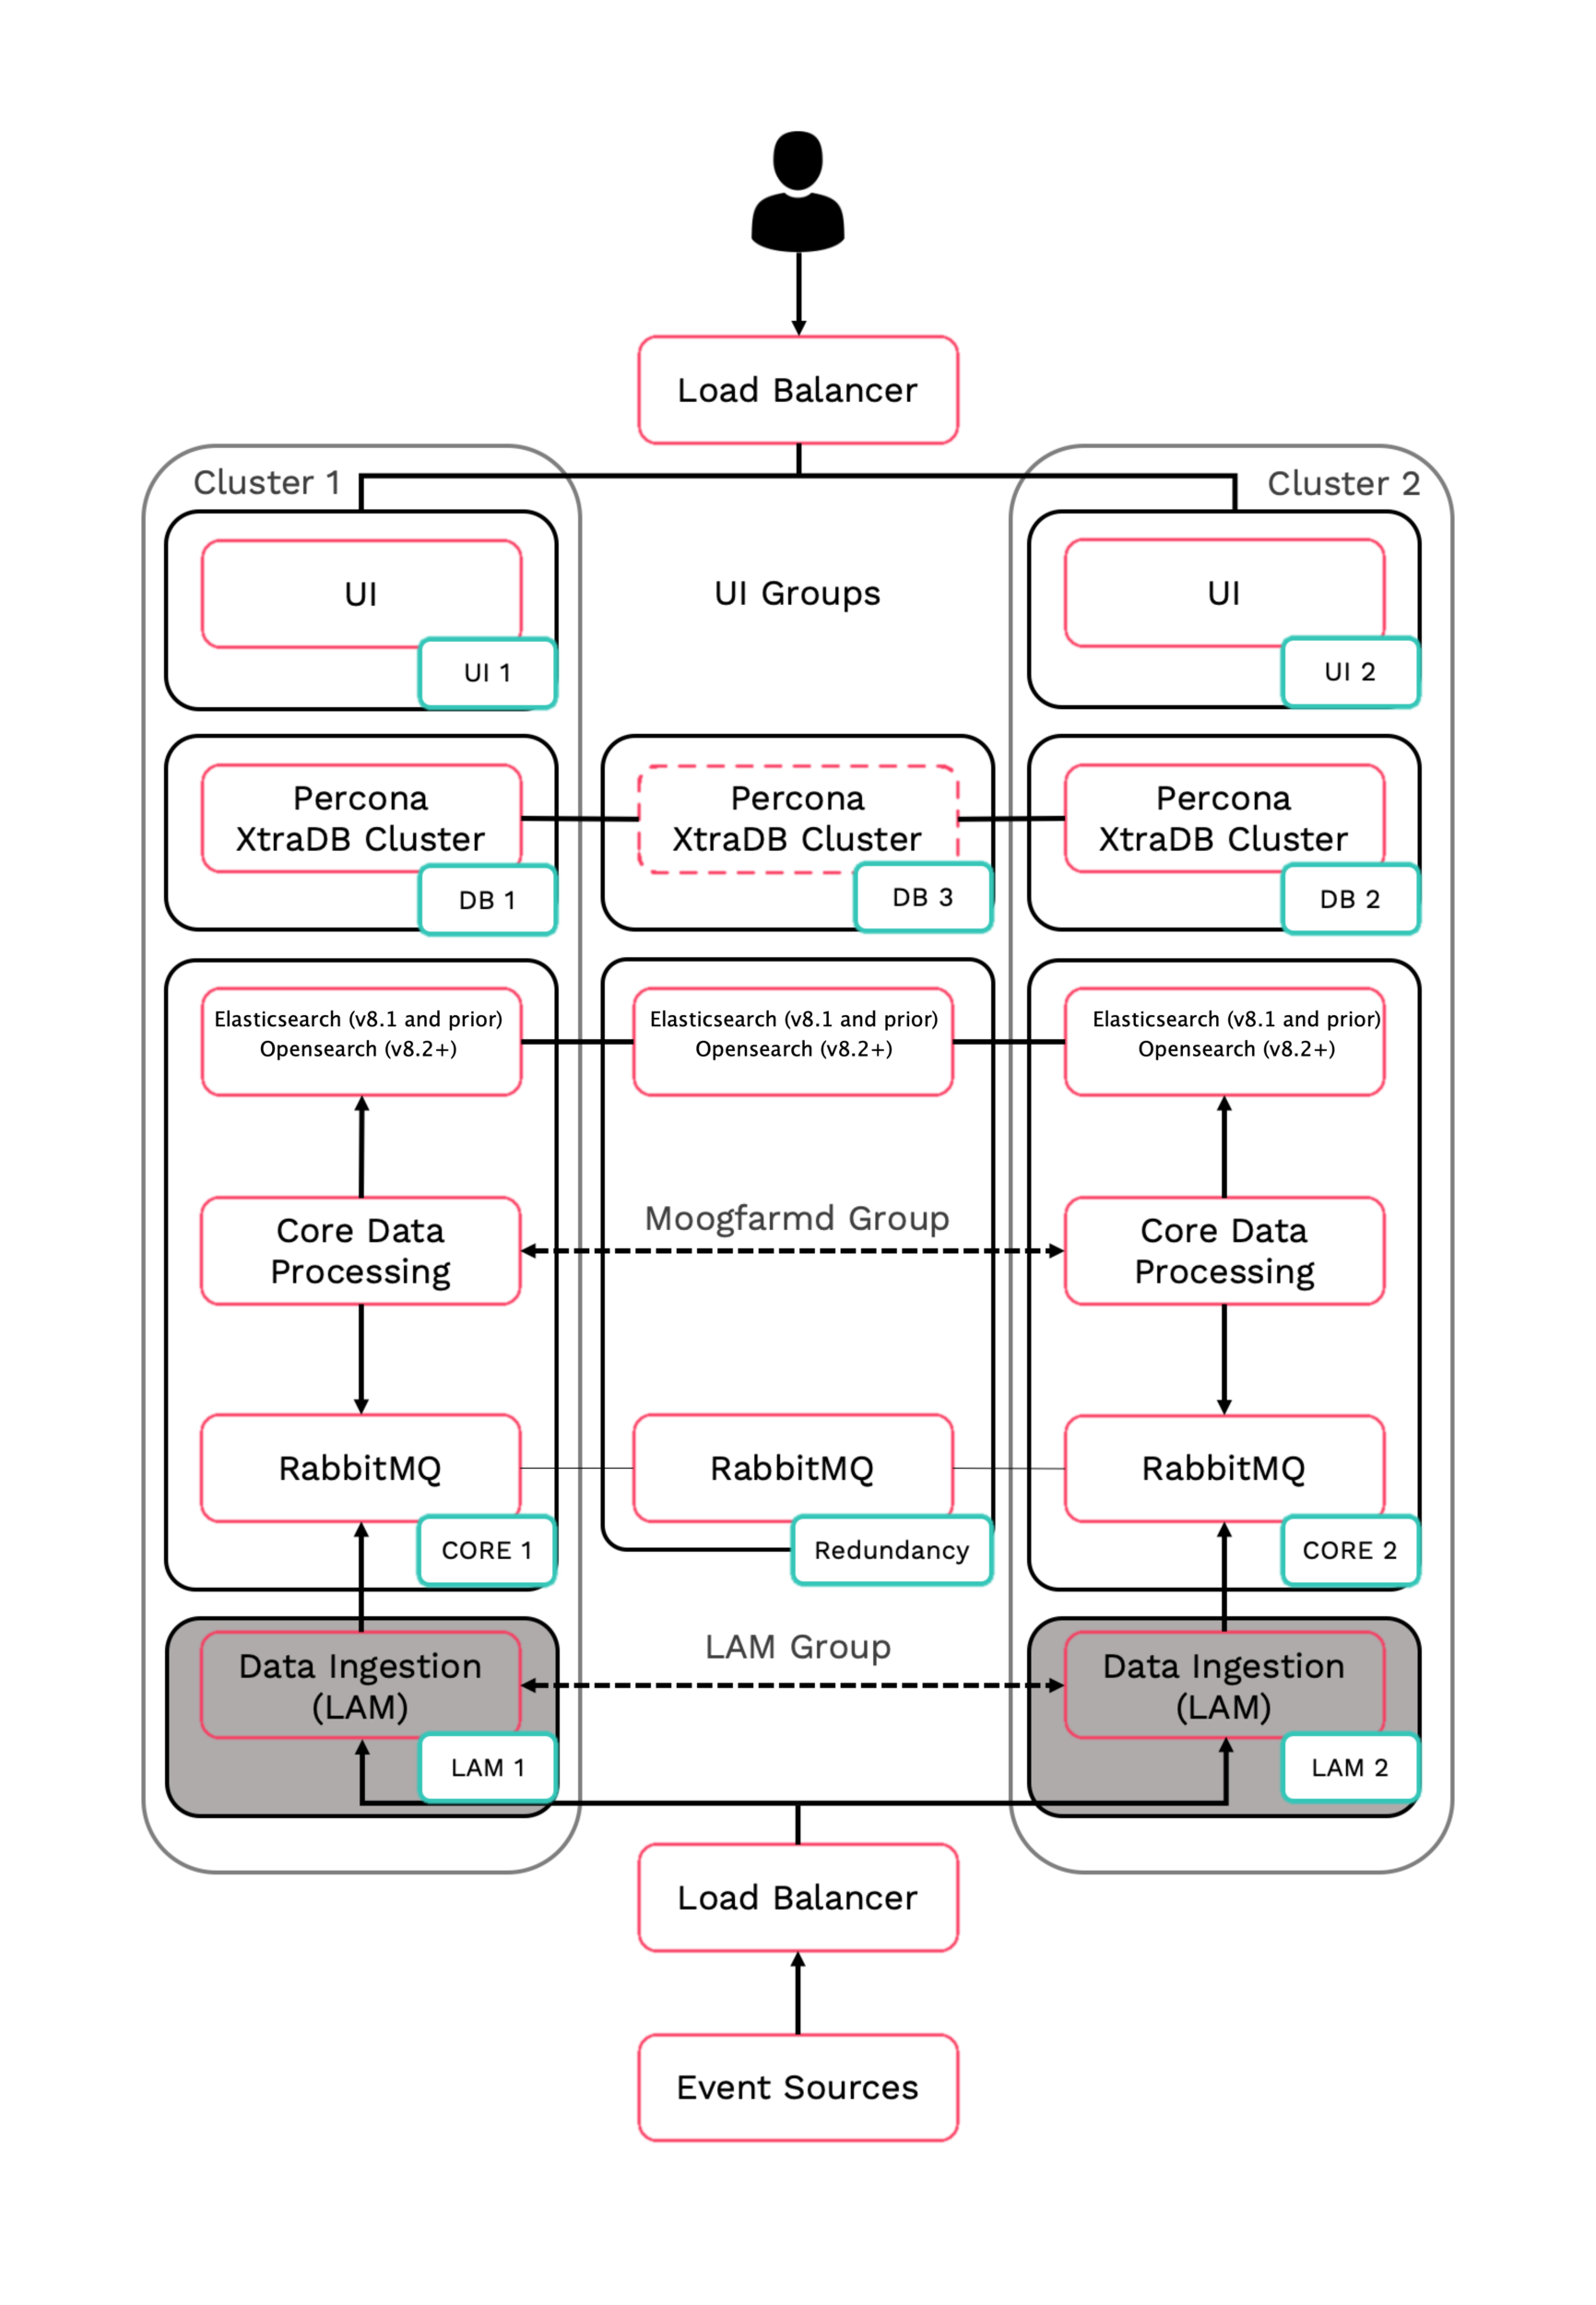
Refer to the Distributed HA system Firewall for more information on connectivity within a fully distributed HA architecture.
Install LAM 1
Follow these instructions to install Moogsoft Enterprise on the LAM 1 server.
On LAM 1 install the following Moogsoft Enterprise components (where $VERSION is the version being installed):
export VERSION=8.2.0;
yum -y install moogsoft-common-${VERSION}* \
    moogsoft-integrations-${VERSION}* \
    moogsoft-utils-${VERSION}*
Edit your
~/.bashrcfile to contain the following lines:export MOOGSOFT_HOME=/usr/share/moogsoft export APPSERVER_HOME=/usr/share/apache-tomcat export JAVA_HOME=/usr/java/latest export PATH=$PATH:$MOOGSOFT_HOME/bin:$MOOGSOFT_HOME/bin/utils
Source the
~/.bashrcfile:source ~/.bashrc
On LAM 1, edit
$MOOGSOFT_HOME/config/system.confand set the following properties. Substitute the name of your RabbitMQ zone, the server hostnames, and the cluster names:"mooms" : { ... "zone" : "<zone>", "brokers" : [ {"host" : "<Core 1 server hostname>", "port" : 5672}, {"host" : "<Core 2 server hostname>", "port" : 5672}, {"host" : "<Redundancy server hostname>", "port" : 5672} ], ... "cache_on_failure" : true, ... "search" : { ... "nodes" : [ {"host" : "<Core 1 server hostname>", "port" : 9200}, {"host" : "<Core 2 server hostname>", "port" : 9200}, {"host" : "<Redundancy server hostname>", "port" : 9200} ] ... "failover" : { "persist_state" : true, "hazelcast" : { "hosts" : ["<Core 1 server hostname>","<Core 2 server hostname>"], "cluster_per_group" : true } "automatic_failover" : true, } ... "ha": { "cluster": "PRIMARY" }
Install LAM 2
Follow these instructions to install Moogsoft Enterprise on the LAM 2 server.
On LAM 2 install the following Moogsoft Enterprise components (where $VERSION is the version being installed):
export VERSION=8.2.0;
yum -y install moogsoft-common-${VERSION}* \
    moogsoft-integrations-${VERSION}* \
    moogsoft-utils-${VERSION}*
Add the following code to the
~/.bashrcfile:export MOOGSOFT_HOME=/usr/share/moogsoft export APPSERVER_HOME=/usr/share/apache-tomcat export JAVA_HOME=/usr/java/latest export PATH=$PATH:$MOOGSOFT_HOME/bin:$MOOGSOFT_HOME/bin/utils
Source the
~/.bashrcfile:source ~/.bashrc
On LAM 2, edit
$MOOGSOFT_HOME/config/system.confand set the following properties. Substitute the name of your RabbitMQ zone, the server hostnames, and the cluster names:"mooms" : { ... "zone" : "<zone>", "brokers" : [ {"host" : "<Core 2 server hostname>", "port" : 5672}, {"host" : "<Core 1 server hostname>", "port" : 5672}, {"host" : "<Redundancy server hostname>", "port" : 5672} ], ... "cache_on_failure" : true, ... "search" : { ... "nodes" : [ {"host" : "<Core 2 server hostname>", "port" : 9200}, {"host" : "<Core 1 server hostname>", "port" : 9200}, {"host" : "<Redundancy server hostname>", "port" : 9200} ] ... "failover" : { "persist_state" : true, "hazelcast" : { "hosts" : ["<Core 2 server hostname>","<Core 1 server hostname>"], "cluster_per_group" : true } "automatic_failover" : true, } ... "ha": { "cluster": "SECONDARY" }
Configure a new backend LAM integration as HA on LAM 1 and LAM 2
Follow the instructions in Set Up LAMs for HA.