Incident details
 |
To access the incident details pane, navigate to Incidents > Incidents, click the list icon at the top center of the screen if necessary to display the incidents list, and click one of the incidents in the list. You can pull up the short horizontal “handle” at the top of the incident details pane to see more of the pane on screen. Click the x on the top right to close the pane.
Within the incident details pane you can:
Analyze and manage the incident
Update the assignee, status, description and priority for the incident
View incident attributes
Navigate to the incident's Situation Room
Navigate to the incident in external systems where you have configured outbound integrations
Explore the incident details UI
The following tables describe controls which appear at the top of the incident details pane. See Incidents list for descriptions of additional UI elements at the top of the incidents page.
The following controls appear in the top row of the incident details pane from left to right:
UI element | Description |
|---|---|
Incident number | Each incident is assigned a unique number by Moogsoft Cloud. |
Priority | Click the P icon to set a priority for the incident from 1 (highest) to 5 (lowest). Unlike severity, the priority does not change when the incident is resolved or closed. |
Severity | The incident severity is based on the highest severity of the alerts in the incident. |
Link | Click the chain link icon to copy a link to the incident's Situation Room. |
Watch | Click to receive emails describing changes to the incident. See Comments overview. |
Situation room | Click to access the Situation Room, which devotes the full screen to the incident. The Situation Room adds Timeline and Similar Situation tools to the tools available in the incident details pane. |
Close | Click the x to close the details pane. |
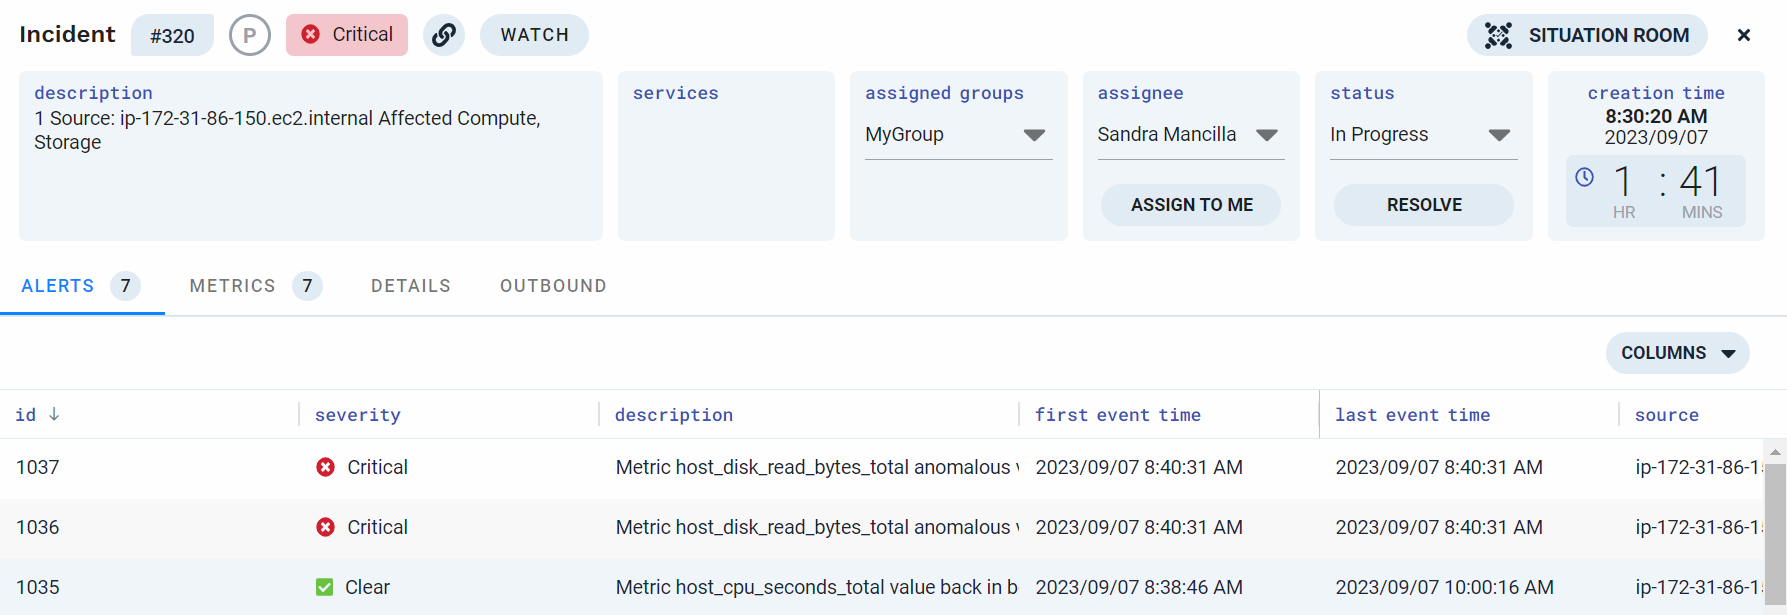
The following controls appear in the second row of the incident details pane from left to right:
UI element | Description |
|---|---|
Description | Click to edit the incident description. |
Services | Displays a list of services for the alerts in the incident. |
Assigned groups | Open the dropdown to assign the incident to one or more user groups. Assigning groups to an incident does not assign them to the alerts in that incident. |
Assignee | Assign the incident and its member alerts to another user or to yourself. |
Status | Update the status of an incident. Incident status can be Open, In Progress, Resolved, or Closed. |
Creation time | Displays the time the incident was created, based on the time of the first event in the first alert in the incident. |
Correlation definition | Displays the correlation definition used to group the alerts in the incident. Click to go to the correlation definition. |
The following tab headings appear in the third row of the incident details pane from left to right:
UI element | Description |
|---|---|
Alerts | Lists the alerts in the incident. Click the number in the tab to go to a filtered list of the alerts in the incident. Click an alert to open an alert details pane to the right of the alerts list. |
Metrics | Displays graphs of the metric anomalies that generated alerts in the incident. Click the number in the tab to display a filtered list of those metrics in the metrics view. Click an individual metric to see it in the metrics view. |
Details | Displays a list of incident attributes. |
Outbound | Displays external names, external IDs, and a link to the incident in external systems for any outbound integrations or webhooks you have configured. |
Supported actions
The following table describes actions you can take when viewing the incident details pane.
What you can do | How to do it |
|---|---|
Update the assignee for the incident | Click under assignee and select a user from the list. |
Update any groups assigned to the incident | Click under assigned groups and select one or more groups from the list. Note that you can assign multiple groups to an incident, and you can unassign some or all of them. Assigning a group to an incident does not assign the group to the alerts in the incident. |
Update the status of the incident | Click under status and select a status from the list. |
Set or change the priority of the incident | Click the circular P icon to the right of the incident number and choose a priority value between 1 (highest priority) and 5 (lowest priority). |
Edit the description of the incident | Click the description to edit it. When you are done, click the check mark button to save your changes. To cancel your changes, click the "X" button. To copy the incident description, click the copy button in the top right corner. To reset your incident description to the automatically generated description, click the Reset button. |
View and leave comments related to the incident | Click the Comment (speech bubble) icon on the upper right. You can also create announcements and mark comments as resolving steps. See Comments overview to learn more. |
Copy a link to the incident | Click the chain link icon. |
Add yourself to the list of watchers for the incident | Click the Watch button. For details, see Comments overview. |
Open the incident in the Situation Room to collaborate with your team | Click the Situation Room button. |