Configure the CREATE payload body for an incident webhook
This is Step 4 in the procedure for creating an incident webhook triggered from an incident workflow.
Important
You may need to create a separate incident webhook for each CREATE and UPDATE payload, depending on your system and your goals. Refer to Determine how many webhooks you need.
There are two ways to define payloads:
Edit the payload using the Input Assistant — This is an easy way to define simple payloads.
Edit the JSON payload directly — This provides flexibility to define more complex payloads.
Note
Moogsoft Cloud payload fields are context-aware and can be replaced by text substitutions. Be sure to review Field and tag substitution for JSON payloads to better understand how predefined rules are used by the system.
Edit the payload using the Input Assistant
Toggle on the Input Assistant to add Key/Value pairs to the payload using a form interface.
To add an additional payload item, click ADD KEY/VALUE PAIR. Provide the Name and Value using the menu.
Field values in the JSON appear in curly braces, preceded by a dollar sign ($) to identify the value as a field substitution.
Use the menu to experiment with inserting field values, such as location fields (for example, ${location.city}) or tags (for example, ${tags.collector}).
The Input Assistant only supports simple JSON payloads, with a single level of depth. To create nested payload items, you must toggle off the Input Assistant and edit the JSON directly.
Edit the JSON payload directly
Toggle off the Input Assistant to edit the payload using free typing.
The payload editor lets you can create a complex, multilevel, nested JSON object. However, after you create nested levels, you cannot re-enable the Input Assistant.
Click the JSON PREVIEW tab to see sample substitutions of the fields with representative values. The preview window shows what the payload looks like when Moogsoft sends it to the external system. Tag values are not substituted here because it might be confusing if the wrong data is shown, but the preview is helpful for matching braces, checking commas, and finding other structural problems. Note that the payload preview is not a JSON linter and does not perform validation.
Tip
Use the JSON PREVIEW option often to see what the webhook payload will look like. Note that the webhook needs to have a name for the JSON PREVIEW to work.
Send Payload as List
Toggle on the Send Payload as List option to add square brackets [ ] to your payload and convert it to a list. Enable this setting if your target system requires payloads formatted as lists.
If the input value is already a list, then enabling this setting sends times as a list instead of one at a time.
If the input value is null (does not exist), then enabling this setting will create an empty list.
If the input value exists, then enabling this setting will convert the value into a list.
Caution
Do not put quotation marks around the JSON variable in your payload body when using this setting. Only include quotation marks if you want the output to be a string of concatenated values, not a list.
Example: Assume that an incident has three unique values for the
test1tag and Send Payload as List is toggled fortest1.This payload body, which excludes quotation marks
{
  "test1": ${tags.test1}
}
...will generate the following output:
{
    "test1": ["value1", "value2", "value3"]
}
Whereas this payload body, which includes quotation marks:
{
  "test1": "$tags.test1"
}
...will generate the following output:
{
  "test1": "["value1", "value2", "value3"]"
}
Manage JSON variable type declarations
If your target system requires certain information in a specific data type, select the variable from the Variable list and choose the preferred data type from the Type list.
Send custom values
To send a specific value instead of the input value received from Moogsoft, click Custom Values and substitute a different value to send instead when the Input Value is received.
Substituting custom values lets you modify data in a way that makes it more relevant, understandable, or useful on the external system. For example, you could set a custom value for the ${status} value of "In Progress" to "In Process" to support alternative terminology, change raw information (such as codes for systems or locations) to more understandable names, identify similar information as the same by changing a variable value to be the same for several different values, or perform other useful substitutions.
Test the Payload Body
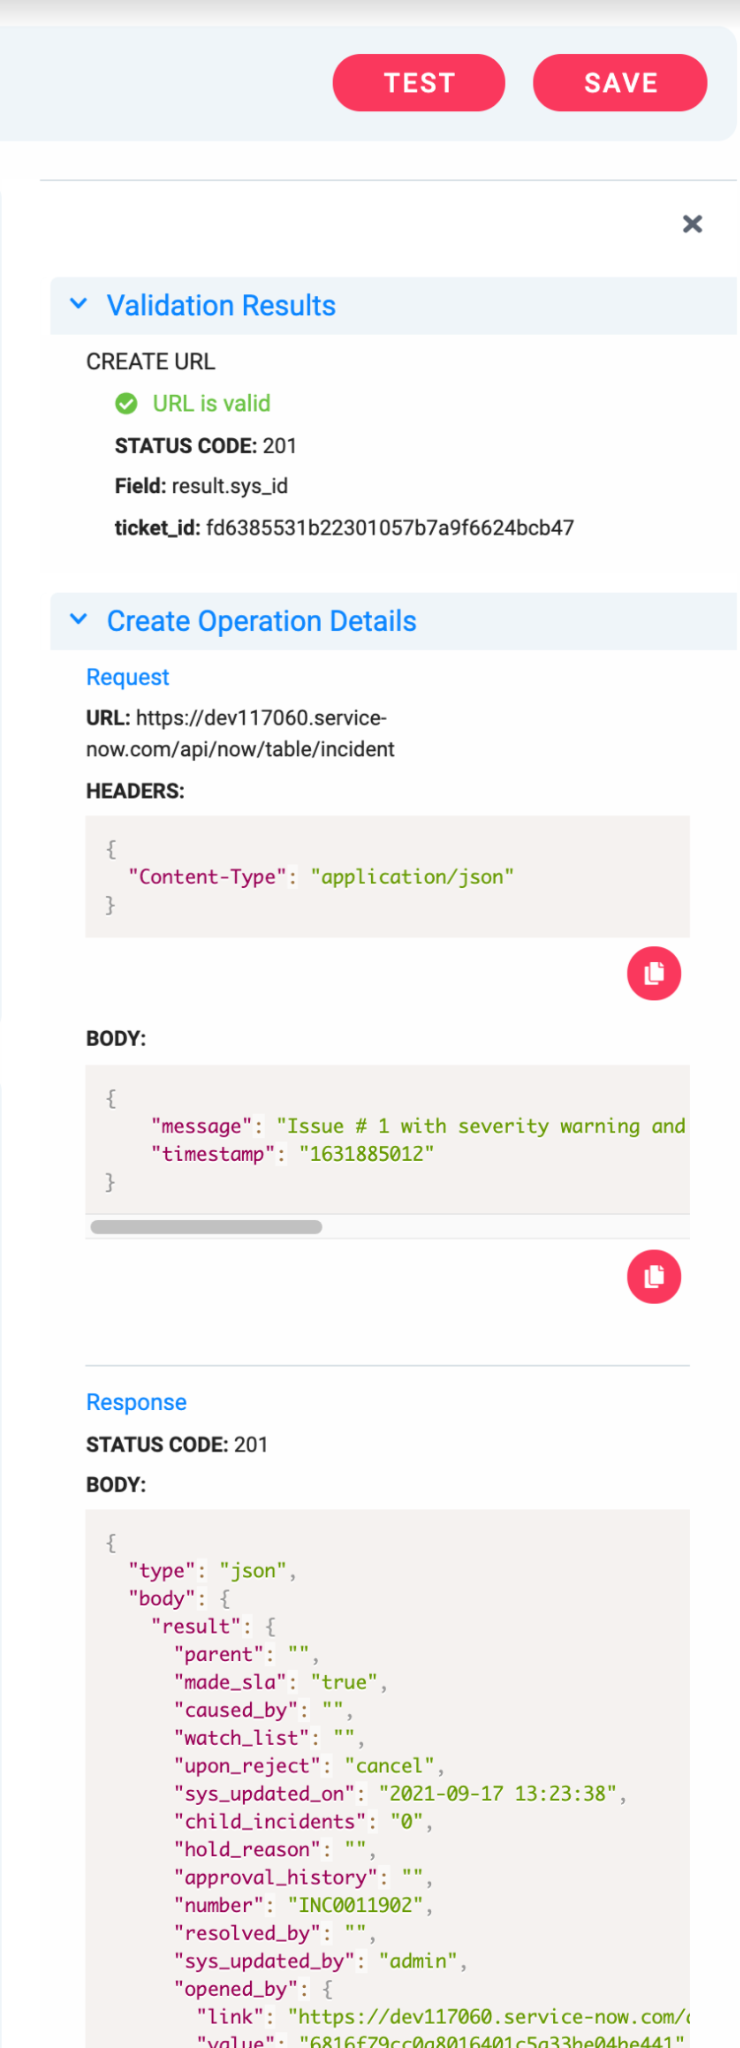
After creating the payload for the CREATE operation, you can perform an end-to-end validation by clicking Test. Test validates the end-to-end connectivity to the endpoint by executing an actual REST call on Create and Update. Testing can help you build your payload incrementally, ensuring both connectivity and payload validity at each step (by validating authorization, ticket ID extraction, and other payload components). Note that testing the payload creates a ticket, so be sure to close that ticket so that there are no dangling tickets left at the endpoint.
Tip
TEST is enabled only after you enter a Name and URL for the outbound webhook. Use the Test option frequently. It is a best practice to test after each change you make to the JSON to ensure the payload is still valid after each change.
Testing performs variable value substitution on a best-effort basis and performs end-to-end validation.
Note that there are some fields that the payload test cannot actually substitute values for, such as tags. Because it has no knowledge of the actual values, it cannot determine reasonable values to substitute, and so does not add any text. If the external endpoint requires a tag field to have a value, manually add some text in the summary field just for the purpose of the test. Delete it when your test is complete.
