Route notifications using tags
Once data is coming into Moogsoft in the form of alerts or events, and the alerts are clustering together to form incidents, you can use notification routing. Instead of using traditional methods of alerting users (such as creating a general trouble ticket), Moogsoft enables you to:
Leverage incidents to send the right notifications to the right team.
Define individual and team notifications and escalation paths.
Send different types of notifications to specific groups.
Define where the notifications go. A notification can go to one or more notification tools, such as Slack or PagerDuty. For example, you can configure webhook endpoints to send notifications to Jira for your engineers and to Zendesk for your SREs. Moogsoft notifications can be routed to different systems based on your defined escalation path.
The following example shows how to set up a simple notification with five basic activities: 1) plan your notifications, 2) set up your data source, 3) configure outbound notifications, 4) create a tag, and 5) map alerts/events with the Moogsoft Workflow Engine.
Before you begin
Before you begin using these instructions to route notifications, you must understand and know how to:
Create data catalogs.
Use the Moogsoft Workflow Engine. For more information, read the Workflow Reference and the Event workflow introduction.
Use the Query Catalog action in the Workflow Engine and how to apply mapping. To learn about the Query Catalog, read the Query Catalog action topic.
Create and use custom tags.
Plan your notifications
Before setting up notifications, it is a good idea to determine what individuals and teams get notified and when. Define your escalation paths, groups and conditions so that you can specify them in your tags and scope filters to determine what notification is routed and to what group.
Configure your data source in Moogsoft
Next, you need to have or configure a data source to generate events or alerts that can be grouped into incidents. Moogsoft offers the following data ingestion options that you can use to configure your data source:
A number of out-of-the box data ingestion methods from AppDynamics to Zabbix.
Easy to use Moogsoft collector and plugin combinations for data sources, such as New Relic, MongoDB and more.
If you don’t see a data source that you want to integrate, Moogsoft also offers the Create Your Own Integration (CYOI) to help you use the data source you want with Moogsoft.
Configure your outbound notifications in Moogsoft
You must configure a webhook endpoint that communicates with your notification system such as ServiceNow, PagerDuty, Slack, or other system. The outbound integration can be a pre-configured integration such as PagerDuty or a webhook endpoint. For more information, read Outbound integrations and Webhook endpoints.
The following sections show how to complete the notifications routing process for incidents using an incident webhook endpoint in an incident workflow.
Create the webhook endpoint
Use the following instructions to create a webhook endpoint:
Navigate to Integrations > Outbound Integrations. Click Webhook Endpoint in the list, then click the Incident Webhook Endpoint tab.
Click Add Incident Webhook Endpoint.
At the top of the page, enter a name for the webhook endpoint (required) and a description (optional) in the spaces provided.
NOTE: It is helpful to include the name of the system in the webhook name.
Under Triggers, optionally select one or more conditions that will cause the webhook to send an incident.
NOTE: Triggers are optional in webhook endpoints if the conditions for triggering the endpoint are handled in the workflow action.
Under Endpoint, configure the request:
Request Method
Choose the request type (POST, PATCH, DELETE, PUT) from the menu.
NOTE: In most cases, you will use the POST method to send notifications when a new incident is created and the PATCH method to send notifications for updates.
URL
Enter the external system endpoint to use to communicate with this webhook endpoint. Use the appropriate external endpoint for the type of action you need to perform. For example, if you are performing a POST action, use an endpoint which supports that action.
Authorization
Select the authorization type and credentials to use. If you have not already done so, add a new credential to the Credentials Store for the external system and select it for this field.
Headers
Define the key/value pairs to send in the header information.
By default, the header "Content-Type: application/json" is included. Make any changes that are necessary for your system. You can add additional rows to add as many headers as needed.
Under Payload Body, include the payload information that you want to send to the external system.
Include any mappings that you want to include in the payload. To see the external fields available to include in the mappings, click Test and view the system response.
For more detailed information, see Configure the CREATE payload body for a webhook endpoint.
Create the workflow
Create your workflow and define the trigger:
Navigate to Correlate & Automate > Workflow Engine. Click Incident Workflows, and then Add Workflow.
At the top of the page, enter a name (required) and description (optional) for the workflow in the spaces provided.
NOTE: As with the webhook, it is helpful to include the name of the target system in the name of the workflow plus the type of action it is used with.
Configure the workflow trigger:
Set up the conditions that determine when the workflow triggers.
NOTE: This example focuses on sending a notification when an incident is created. You can also add a workflow and incident webhook to send updates.
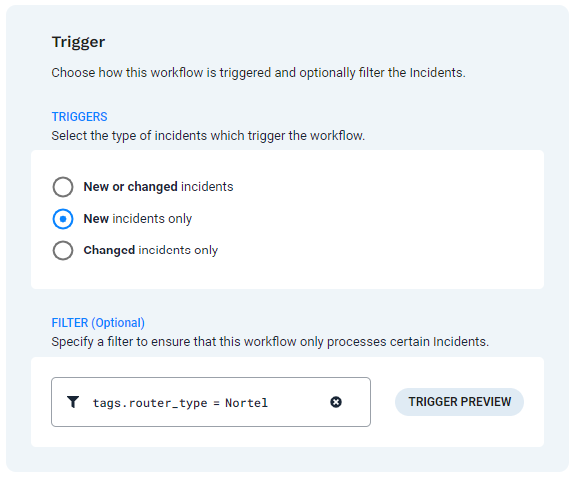
In the Trigger section, select New incidents only to send a notification when an incident is created.
In the Filter section, add the tags which indicate the data to watch for.
For example, you can use data catalogs to enrich your data with a tag that indicates this incident is flagged as payroll, or from Europe, or from a particular system. This example shows a filter that causes the workflow to trigger for this tag:
tags.router_type="Nortel".
Click Add Action and select Send to Endpoint from the list. Click Add Selected Action to add it to the workflow.
Configure the Send to Endpoint action:
Webhook
Select the webhook endpoint that you created in the previous section.
External Link
Select this box if you want to include a clickable link to the external system on the Outbound tab in Moogsoft, on the Incidents page.
Integration Name
The name that displays on the Outbound tab on the Incidents page. You can name the integration according to your preferences.
External ID
A value which identifies the object on the external system. This is usually a number referencing the ticket ID.
You can get this information from another field, tag or attribute.
External Name
A value which identifies the name of the object on the external system.
URL
The URL for the link to the external system. You can use parameter substitution variables when defining the URL so they point to a viewable ticket link.
Example: https://www.example.com/incidents/v1/${outbound.<integration_name>.external_name}
Click Save, then click Enable to allow the workflow to function.
If everything is configured correctly, a notification will be sent to the external system the next time an incident matching the filter criteria in the workflow trigger is created.
Modify the workflow with actions
In addition to simply sending a notification when an incident matches a trigger, you can use additional incident workflow actions to perform further operations:
Assign the incident to one or more users and teams
Set a priority for the incident based on the trigger information
Other actions, covered in the Workflow action reference
The procedure for sending alert notifications based on tags using an alert webhook endpoint is very similar to the procedure for sending incident notifications using an incident webhook endpoint. These sections show how to complete the notifications routing process for alerts using an alert webhook endpoint in an alert workflow.
Thix example shows how you could use an endpoint to send notifications to Slack. To do this, you would create a tag that contains a Slack channel name. You might use #payroll, #finance, or #backend Slack channels to route notifications to those groups. You must have set these channels in Slack prior to using notifications.
Note
This example is provided for illustrative purposes only to show a possible way of sending alerts to an external system. It is not intended to be a step-by-step guide for configuring Moogsoft and Slack.
Create the alert webhook endpoint
Navigate to Integrations > Outbound Integrations. Click Webhook Endpoint in the list, then click the Alert Webhook Endpoint tab.
Click Add Alert Webhook Endpoint.
At the top of the page, enter a name for the webhook endpoint (required) and a description (optional) in the spaces provided.
NOTE: It is helpful to include the name of the system in the webhook name.
Under Triggers, optionally select one or more conditions that will cause the webhook to send an alert.
NOTE: Triggers are optional in webhook endpoints if the conditions for triggering the endpoint are handled in the workflow action.
Under Endpoint, configure the request:
Request Method
Choose the request type (POST, PATCH, DELETE, PUT) from the menu.
NOTE: In most cases, you will use the POST method to send notifications when a new alert is created and the PATCH method to send notifications for updates.
URL
Enter the external system endpoint to use to communicate with this webhook endpoint. Use the appropriate external endpoint for the type of action you need to perform. For example, if you are performing a POST action, use an endpoint which supports that action.
Authorization
Select the authorization type and credentials to use. If you have not already done so, add a new credential to the Credentials Store for the external system and select it for this field.
Headers
Define the key/value pairs to send in the header information.
By default, the header "Content-Type: application/json" is included. Make any changes that are necessary for your system. You can add additional rows to add as many headers as needed.
Under Payload Body, include the payload information that you want to send to the external system.
Include any mappings that you want to include in the payload. To see the external fields available to include in the mappings, click Test and view the system response.
For more detailed information, see Configure the CREATE payload body for a webhook endpoint.
Create the workflow
After you have configured your data source and outbound notifications, you can create a filter to trigger the workflow and send alerts for when the alert payload includes specific alerts.
Create your workflow and define the trigger:
Navigate to Correlate & Automate > Workflow Engine. Click Alert Workflows, and then Add Workflow.
At the top of the page, enter a name (required) and description (optional) for the workflow in the spaces provided.
NOTE: As with the webhook endpoint, it is helpful to include the name of the target system in the name of the workflow plus the type of action it is used with.
Configure the workflow trigger:
Set up the conditions that determine when the workflow triggers.
NOTE: This example focuses on sending a notification when an incident is created. You can also add a workflow and incident webhook to send updates.
In the Trigger section, select the type of alerts to send a notification for. In this example, New or changed alerts is selected so the workflow will send a notification when an alert is created or updated.
In the Filter section, add the tags which indicate the data to watch for.
In this example, the workflow triggers for new or changed alerts with a
severityvalue of Clear, Major, or Critical where theservicesfield includes Slack and the values of #payroll or #finance for thegroups_idfield.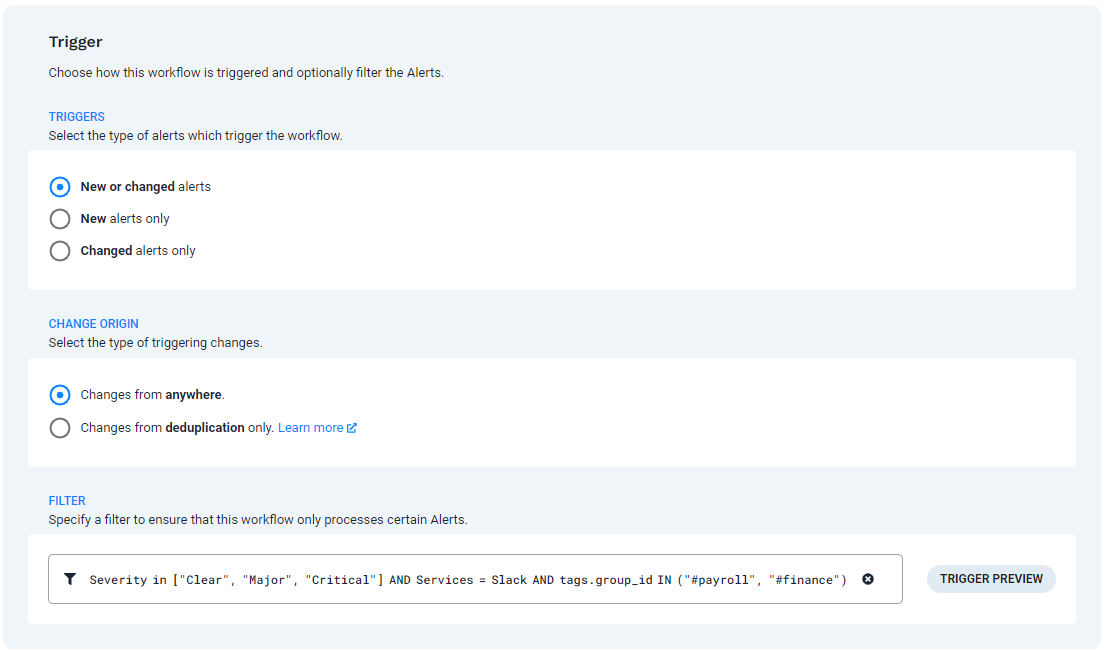
The filter shown in the image above:
Severity in ["Clear", "Major", "Critical"] AND Services = Slack AND tags.group_id IN ("#payroll", "#finance")
Click Add Action and select Send to Endpoint from the list. Click Add Selected Action to add it to the workflow.
Configure the Send to Endpoint action:
Webhook
Select the webhook endpoint that you created in the Create the alert webhook endpoint section.
Including the webhook endpoint in the Send to Endpoint action causes the alerts (in this example) which trigger the workflow to be sent to the external system via the webhook endpoint.
External Link
Select this box if you want to include a clickable link to the external system on the Outbound tab in Moogsoft, on the Incidents page.
Integration Name
The name that displays on the Outbound tab on the Incidents page. You can name the integration according to your preferences.
External ID
A value which identifies the object on the external system. This is usually a number referencing the ticket ID.
You can get this information from another field, tag or attribute.
External Name
A value which identifies the name of the object on the external system.
URL
The URL for the link to the external system. You can use parameter substitution variables when defining the URL so they point to a viewable ticket link.
Example: https://www.example.com/incidents/v1/${outbound.<integration_name>.external_name}
Click Save, then click Enable to allow the workflow to function.
If everything is configured correctly, a notification will be sent to the external system the next time an incident matching the filter criteria in the workflow trigger is created.
Map alerts or events to tags in the Workflow Engine
You still need to associate a tag with a group ID (or equivalent name) for your alerts and events. One method is to use the Query Catalog action in an Event Workflow.
 |
Navigate to Correlate & Automate > Workflow Engine > Event Workflows ><your specific workflow name >.
In the Workflow, click Trigger. In the right-side panel under Trigger > Event Filter, select the event type that you want to trigger the workflow.
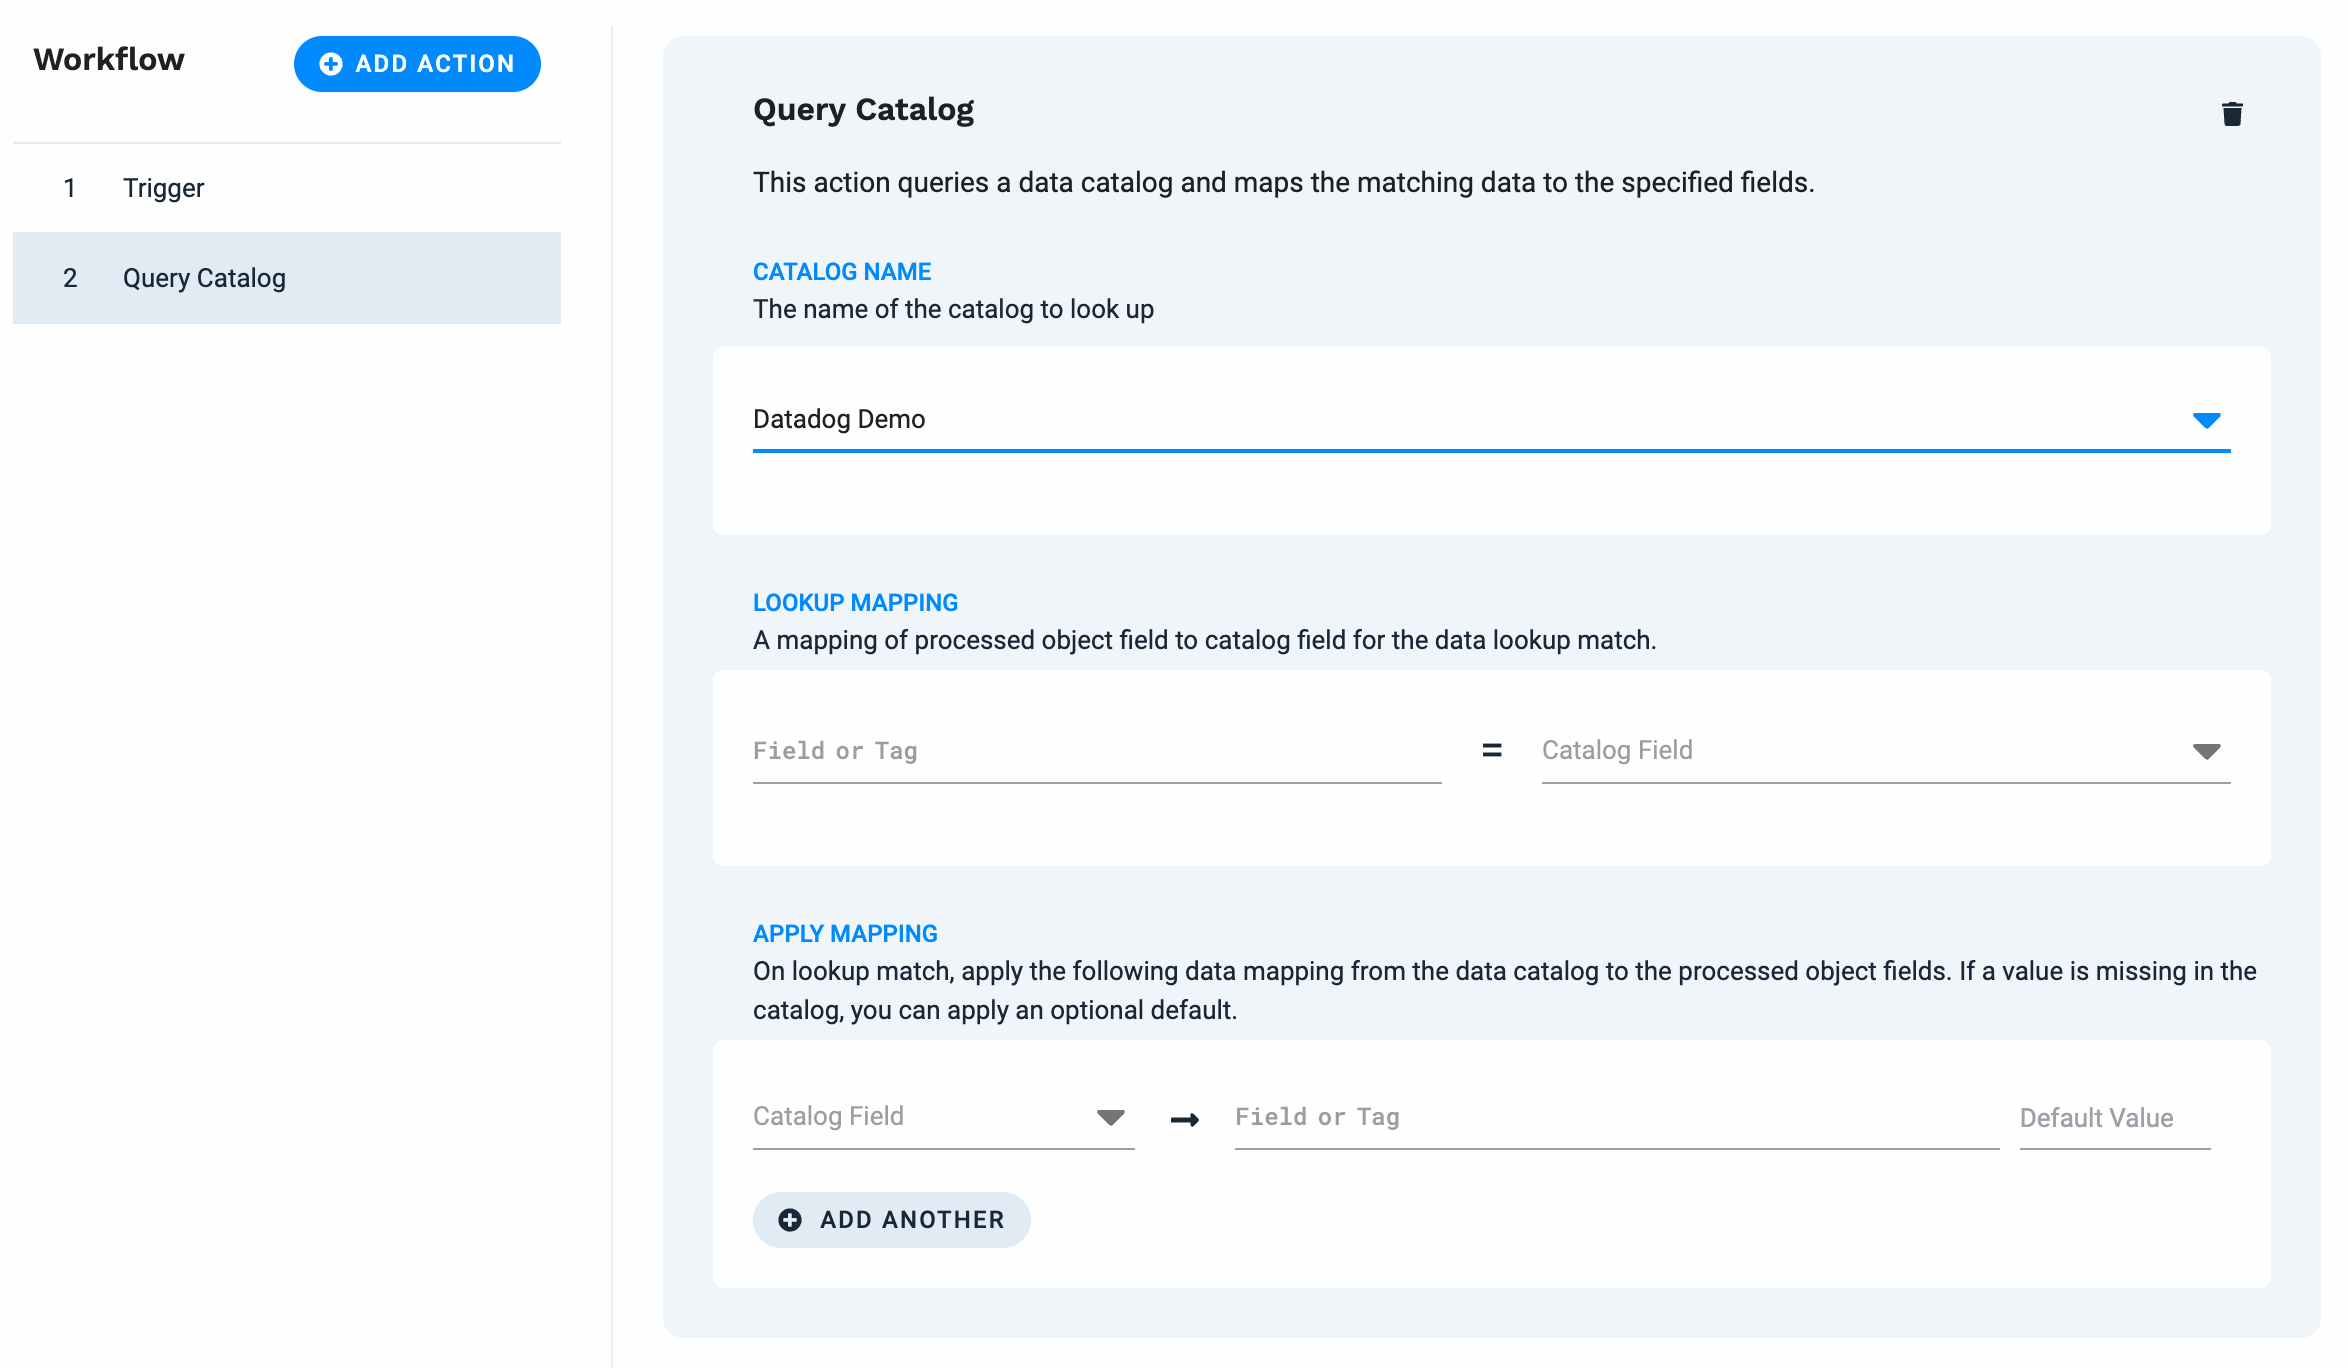
In the Workflow workspace, click Add Action, then select Query Catalog. Click Add Selected Action.
Note
You must create a Data Catalog before you can use the Query Catalog feature. You can create a data catalog in the Moogsoft UI or by using the Moogsoft API. Refer to Create data catalogs and the API example for more information.
In the Catalog Name section of the Query Catalog action, click inside the box and select your catalog name, such as
group_id_map(or other name such as group or team), so that your Alert can cross-reference thegroup_ididentifier associated with your resource.In the Query Catalog part of the workflow, you associate the Data Catalog resource, such as
resource_id, with thegroup_idusing the Apply Mapping field.For example, in the following Event Workflow figure, the Catalog Name selected is Escalation Group. Under the Apply Mapping heading, the Data Catalog resource (named
group) is mapped to thetags.group.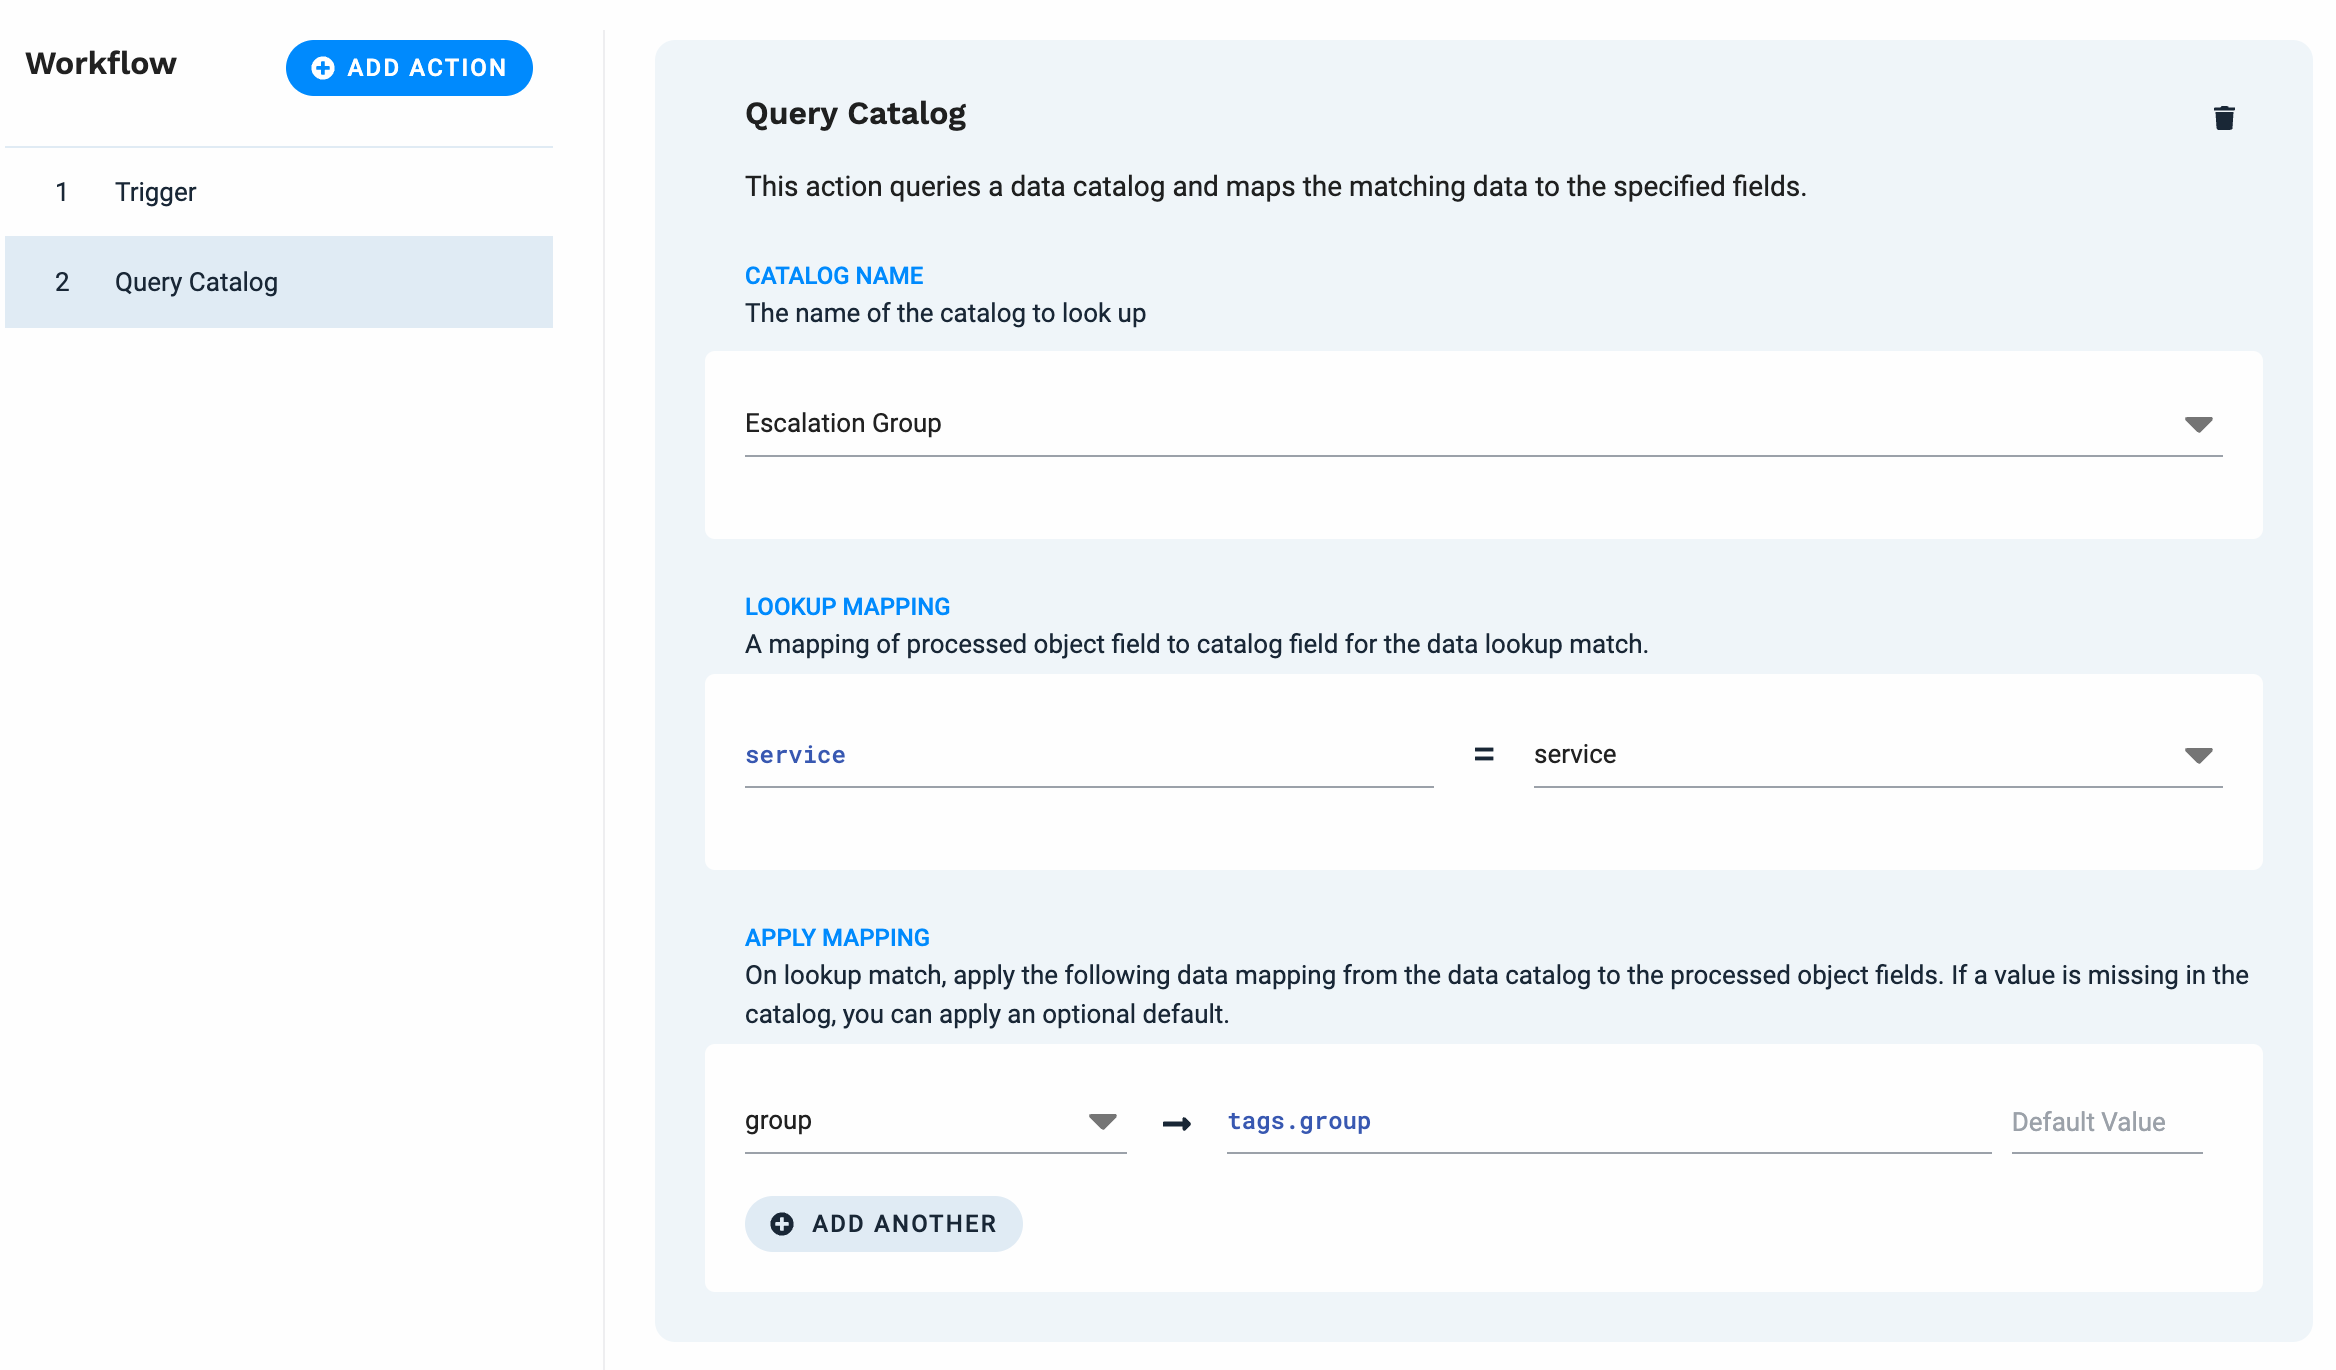
More methods to apply tags in your data source
In addition to using the outbound webhook Name and Scope > Filter or the equivalent pre-configured outbound integration filter to define your tags, Moogsoft features several other methods for creating tags that you can use to route notifications. To do this, you can:
Insert tags in the incoming messages before ingestion. You can have incoming messages, streaming into Moogsoft, contain a specified tag. When alerts or events are grouped, de-duped, and correlated, the resulting incidents inherit the tags.
Populate incoming messages with a tag during ingestion . You can populate incoming alert and events with tags, when you set up your ingestion services, such as Create Your Own Integration (CYOI). Using CYOI, you can easily monitor your mapping. For example, let’s say you are using Integrations > Ingestion Services > Create Your Own Integration > Bitbucket. You can:
Go to Bitbucket > Map Your Data > Source Field to a Moogsoft Target Field.
Map your incoming data to a Tag by mapping the Payload Field to a Target Field and specifying a tag, such as Tag:Branch to master.
Populate your JSON payload with tags. You can map the source field of the incoming data (such as in a JSON payload) to a Moogsoft target field. This has the added benefit of being easy to monitor. See Mapping Information for more details about mapping tags.
Create tags through Enrichment. You could also create a tag for routing notifications through multiple forms of enrichment.
Automatic Event Enrichment - provides auto-classification of events. Navigate to Correlate & Automate > Workflow Engine > Event Workflows and click the Automatic Event Enrichment workflow name to set up auto-classifications. You can use a Workflow Engine > Workflow > Trigger to specify the type of events you want to automatically trigger a workflow and use that to route notifications to a specific team or organization, or individual.
Match and Update workflow - You can select one or more Input Fields, go to add Regex Tags > Output Field, and Add a Tag in the Output Field or use an existing Tag and populate that tag with the
group_idvalue.