Outbound alert webhooks (deprecated)
Important
The outbound alert webhook feature has been deprecated. The alert webhook endpoint—which offers greater flexibility and better consistency within the product—replaces the outbound alert webhook.
To create a new alert webhook endpoint, navigate to Integrations > Outbound Integrations. Click Webhook Endpoint, then select the Alert Webhook Endpoint tab. For information on creating an alert webhook endpoint, see Webhook endpoints. Note that alert webhook endpoints are used only in conjunction with alert workflows, unlike outbound alert webhooks (deprecated).
Edit an alert webhook (deprecated)
You can continue to edit the deprecated alert webhooks you have created in the past.
Note
While you can use and edit any deprecated alert webhooks, you cannot create new alert webhooks of this type. If you need a new alert webhook, see Webhook endpoints for instructions on creating a webhook endpoint to use with alerts.
To edit an existing alert webhoook (deprecated), navigate to Integrations > Outbound Integrations. Click Alert Webhook (Deprecated), and then click the webhook in the list.
Use the following sections as a reference for editing outbound alert webhooks (deprecated).
The name for the webhook must be unique within the instance. Additionally, you can specify a filter to control the kind of data that will be forwarded to your external system.
URL
The URL of the endpoint on your target system that receives information from Moogsoft Cloud.
Authorization
Select the way to authenticate with your target system.
You can choose from:
No auth
Basic Auth
Bearer Token
Select the credential to use from the list that appears to the right, or add a new credential to use by clicking Add New Credentials. Your credentials will be saved to the Credential Store.
Note
Save your authorization credentials in the secure, encrypted Credential Store instead of adding them to the headers. Saving credentials in the Credential Store also allows you to reuse them with other webhooks.
Headers and Value
By default, headers include Content-Type: application/json. If there is other information that you would like to include in headers, you can click Add New Row and add it. You can include as many additional rows as you need.
Headers consist of key : value pairs, where the key is the name of the header and the value is the contents.
The Payload Body for CREATE Operation section specifies the JSON payload that the webhook includes with each CREATE request it sends to the external system.
Edit the payload using the Input Assistant
Toggle on the Input Assistant to add Key/Value pairs to the payload using a form interface.
To add an additional payload item, click ADD KEY/VALUE PAIR. Provide the Name and Value using the menu.
Note that field values in the JSON appear with a dollar sign ($) prepended to identify the value as a field substitution.
Use the menu to experiment with inserting field values, such as location fields (for example, ${location.city}) or tags (for example, ${tags.collector}).
The Input Assistant only supports simple JSON payload, with a single level of depth. To create nested payload items, you must toggle off the Input Assistant and edit the JSON directly.
Edit the JSON payload directly
Toggle off the Input Assistant to edit the payload using free typing.
The payload editor lets you create a complex, multilevel, nested JSON object. However, after you create nested levels, you cannot re-enable the Input Assistant.
Type the dollar sign ($) while editing to open a menu listing the fields with available value substitutions. For example, the ticket ID parsed from the CREATE response will have the field name ${external_id}.
Click the JSON PREVIEW tab to see sample substitutions of the fields with representative values. The preview window shows what the payload looks like when Moogsoft sends it to the external system. Tag values are not substituted here because it might be confusing if the wrong data is shown, but the preview is helpful for matching braces, checking commas, and finding other structural problems. Note that the payload preview is not a JSON linter and does not perform validation.
Tip
Use the JSON PREVIEW option often to see what the webhook payload will look like. Note that the webhook needs to have a name for the JSON PREVIEW to work.
Type Declaration
If your target system requires certain information in a specific data type, select the variable from the Variable list and choose the preferred data type from the Type list.
Send custom values
To send a specific value instead of the input value received from Moogsoft, click Custom Values and substitute a different value to send instead when the Input Value is received.
Substituting custom values lets you modify data in a way that makes it more relevant, understandable, or useful on the external system. For example, you could set a custom value for the ${status} value of "In Progress" to "In Process" to support alternative terminology, change raw information (such as codes for systems or locations) to more understandable names, identify similar information as the same by changing a variable value to be the same for several different values, or perform other useful substitutions.
Send Payload as List
Toggle on the Send Payload as List option to add square brackets [ ] to your payload and convert it to a list. Enable this setting if your target system requires payloads formatted as lists.
If the input value is already a list, the entire payload is sent as a list instead of as individual items.
If the input value is null (does not exist), then enabling this setting will create an empty list.
If the input value exists, then enabling this setting will convert the value into a list.
Do not put quotation marks around the JSON variable in your payload body when using this setting. Only include quotation marks if you want the output to be a string of concatenated values, not a list.
When the webhook sends a CREATE or UPDATE notification, the external system sends a response back to Moogsoft Cloud which includes the name or ID for the external ticket, or the equivalent.
An outbound webhook can extract the external ticket name or ID from the response sent from the external system and store the information in the alert or incident that triggered the notification. It can also store a URL to the external ticket in the alert or incident. You can view this information when you view the Outbound tab for alert or incident details in the UI.
When you complete the information in this step, you will have constructed either a JSON path to the relevant field, or a regex.
Complete the following information so Moogsoft knows where to find the information in the response.
External Name and ID
NOTE: To reset the settings and start over, select None as the External Webhook Target.
External Webhook Target
Select the type from the list which describes the external system, or User Defined for a custom attribute lookup.
Attribute key with the External Name or Attribute key with the External ID
One or both (depending on the system type) of these fields populate automatically if you selected one of the options in the External Webhook Target list.
In most cases, you can select your target system from the list and the rest of the fields automatically populate. If your system type is not included in the list, however, you can select User Defined from the External Webhook Target list and manually configure the information.
The User Defined option allows you to manually configure the Attribute key with the External Name and/or Attribute key with the External ID.
You can specify a regular expression to extract the ticket ID or name.
For example, if the external system defines tickets like this:
"issueID" : "11450"
You can define the attribute key like this, using a regular expression: \"issueId\":\s*\"(\d+)\"
Note that the expression should use parentheses to indicate the value.
Important
To check that a regular expression is valid, you can run a test of the webhook via the user interface. First, locate the needed text in the response body that may include the Name. Next, paste this into the regular expression text box, and then add the slashes to escape the regular expression where needed. Note that the triggers need to specify when to perform an UPDATE operation for each webhook. There are several options to choose from.
External Link URL
An optional URL to the ticket on the external system.
This field defines a clickable link that allows you to open the item (such as a ticket) created by this webhook. You can use ${outbound.<integration_name>.external_name} and ${outbound.<integration_name>.external_id} to construct the URL.
In some cases, the remote system will include the URL in the response body when a TEST is run from the user interface at the top of the page. Locate the Response section of the Create Operation Details. You should see a line that resembles:
"url": "https://name.example_system.com/api/v2/tickets/1293",
The External Link URL is the URL portion (in the above example, https://name.example_system.com/api/v2/tickets/, plus the identifying information (ID or name) for the ticket.
If the URL is not included in the response from the external system, but the main URL is known, the external link URL can be built manually for example:
https://name.example_system.com/tickets/${outbound.<integration_name>.external_name} (where <integration_name> is the name of the alert webhook.
You can choose to send UPDATE notifications for open tickets in the external system. Updating lets you keep the related items on your external system in sync with Moogsoft Cloud so that changes to alerts or incidents are reflected.
First, set Enable update notifications. Then specify the following:
Request method and URL for update operation
Check with the external system to determine the expected request type for updates. POST is the default.
URL
The target URL where the webhook should send UPDATE requests.
Triggers
Select all the incident or alert updates you want to trigger notifications in the external system, including:
Assignee changed
Assigned Groups changed
Classes changed
Description changed
Priority changed
Services changed
Severity increased
Status changed
Tags changed
Total Alerts changed
Type changed
The Payload Body for UPDATE Operation setting specifies the JSON request body that is sent with the UPDATE webhook. By default, the same JSON request body from the CREATE is copied into the UPDATE section.
The payload body for the UPDATE is created in the same manner as the CREATE. For more information on using the options, see the section on the CREATE Payload. However, use the field ${external_id} to substitute for the ticket ID that is retrieved.
Note
Moogsoft Cloud payload fields are context aware and can be replaced by text substitutions. Field and tag substitution for JSON payloads describes how predefined rules are used by the system.
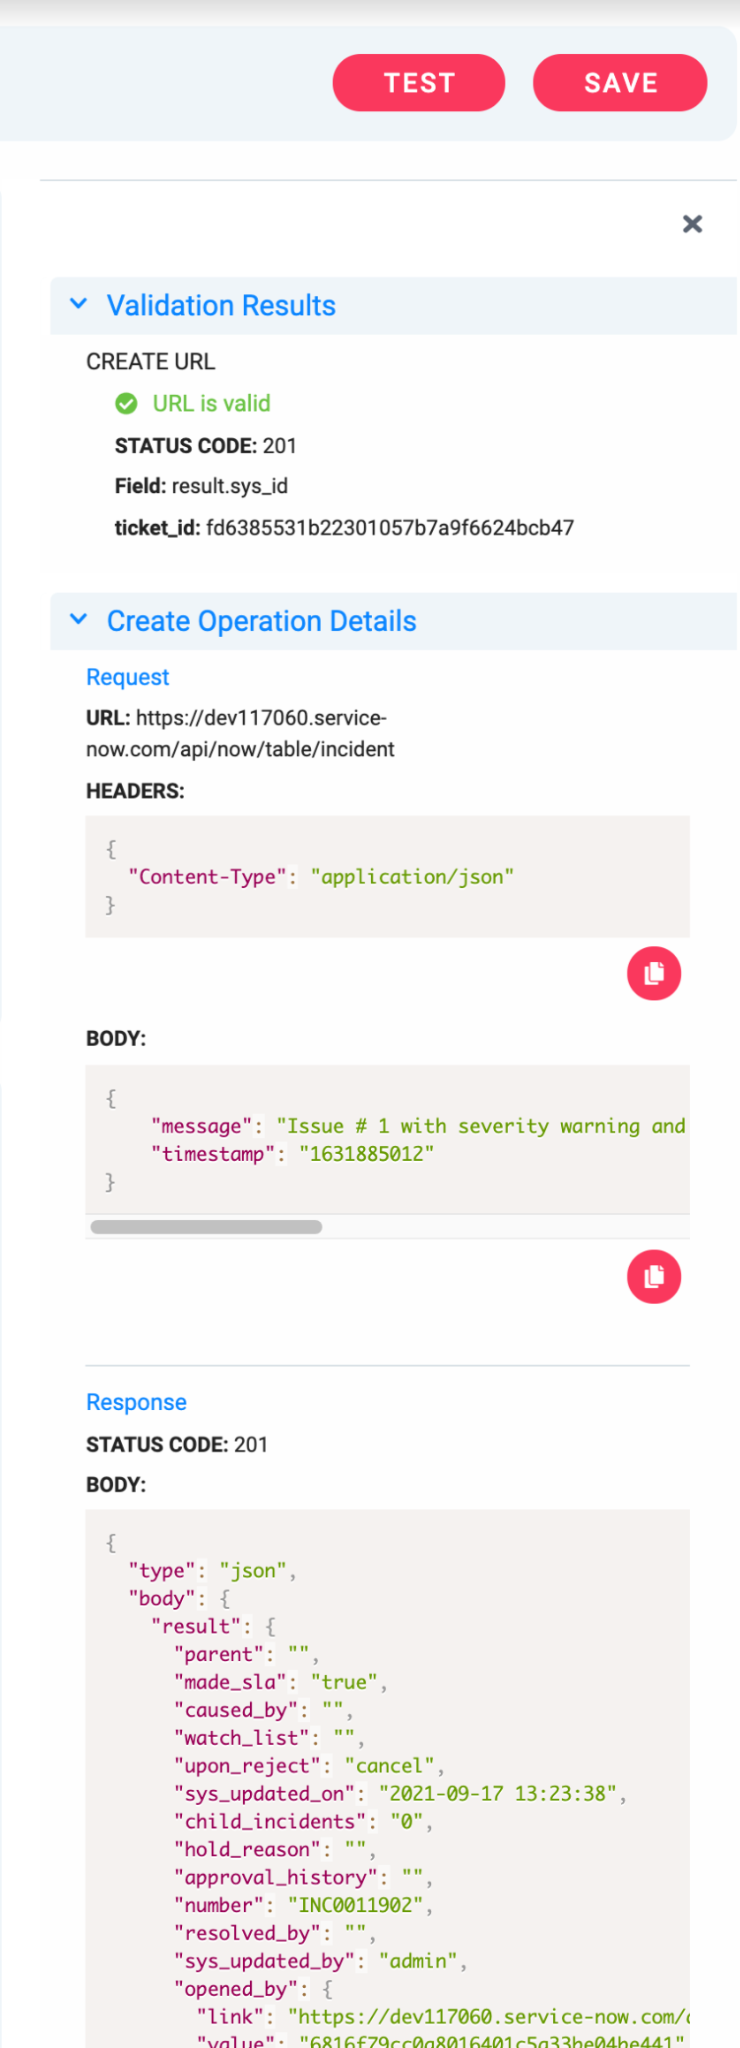
To check the validity of your webhook, click Test in the upper right corner of the page.
After creating the payload for the CREATE operation, you can perform an end-to-end validation by clicking Test. Test validates the end-to-end connectivity to the endpoint by executing an actual REST call on Create and Update. Testing can help you build your payload incrementally, ensuring both connectivity and payload validity at each step (by validating authorization, ticket ID extraction, and other payload components). Note that testing the payload creates a ticket, so be sure to close that ticket so that there are no dangling tickets left at the endpoint.
Tip
TEST is enabled only after you enter a Name and URL for the outbound webhook. Use the Test option frequently. It is a best practice to test after each change you make to the JSON to ensure the payload is still valid after each change.
Testing performs variable value substitution on a best-effort basis and performs end-to-end validation.
Note that there are some fields that the payload test cannot actually substitute values for, such as tags. Because it has no knowledge of the actual values, it cannot determine reasonable values to substitute, and so does not add any text. If the external endpoint requires a tag field to have a value, manually add some text in the summary field just for the purpose of the test. Delete it when your test is complete.