Validate the incident webhook
This is Step 5 in the procedure for creating an incident webhook.
After you have completed the setup tasks, test your webhook.
In the top right of the webhook configuration, click Test.
Your webhook will either validate successfully, or fail validation.
Validation success
If your webhook is configured correctly, you will see an HTTP success message under Validation Results on the right side of the page. Refer to Status codes in HTTP for a complete list of possible HTTP responses.
This example shows the response for a CREATE operation:

You can also review the Headers, Body and Response in the Create Operation details, to ensure that the information matches your expectations.
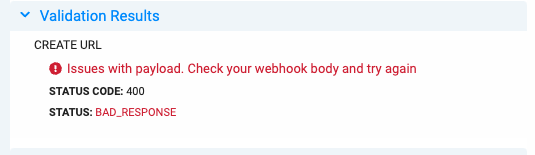
Validation failure
If the webhook fails validation, you will see a response other than the 200 response. Review the information in the Validation Results and Operation Details to see if you need to take action.
This example shows validation failure for a CREATE operation:
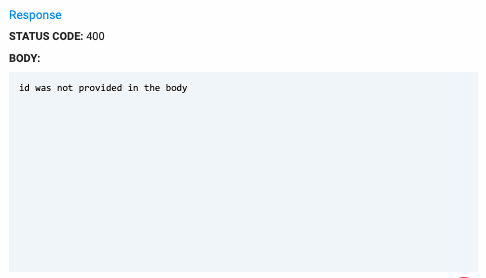
The Response section under Operation Details may provide helpful information. In this example, id was not included in the payload.
Note
For some operations, your webhook will fail the validation process, even if it is configured correctly. For example, if the webhook requires the presence of information supplied by an earlier operation (such as a ticket_id from a CREATE operation) which is not resolved automatically during the Test process, the remote endpoint may fail due to the unresolved variable. Review the response information for the configured webhook to make sure it is working as expected.