Normalize event data
Watch a use case walkthrough: Event data normalization ►
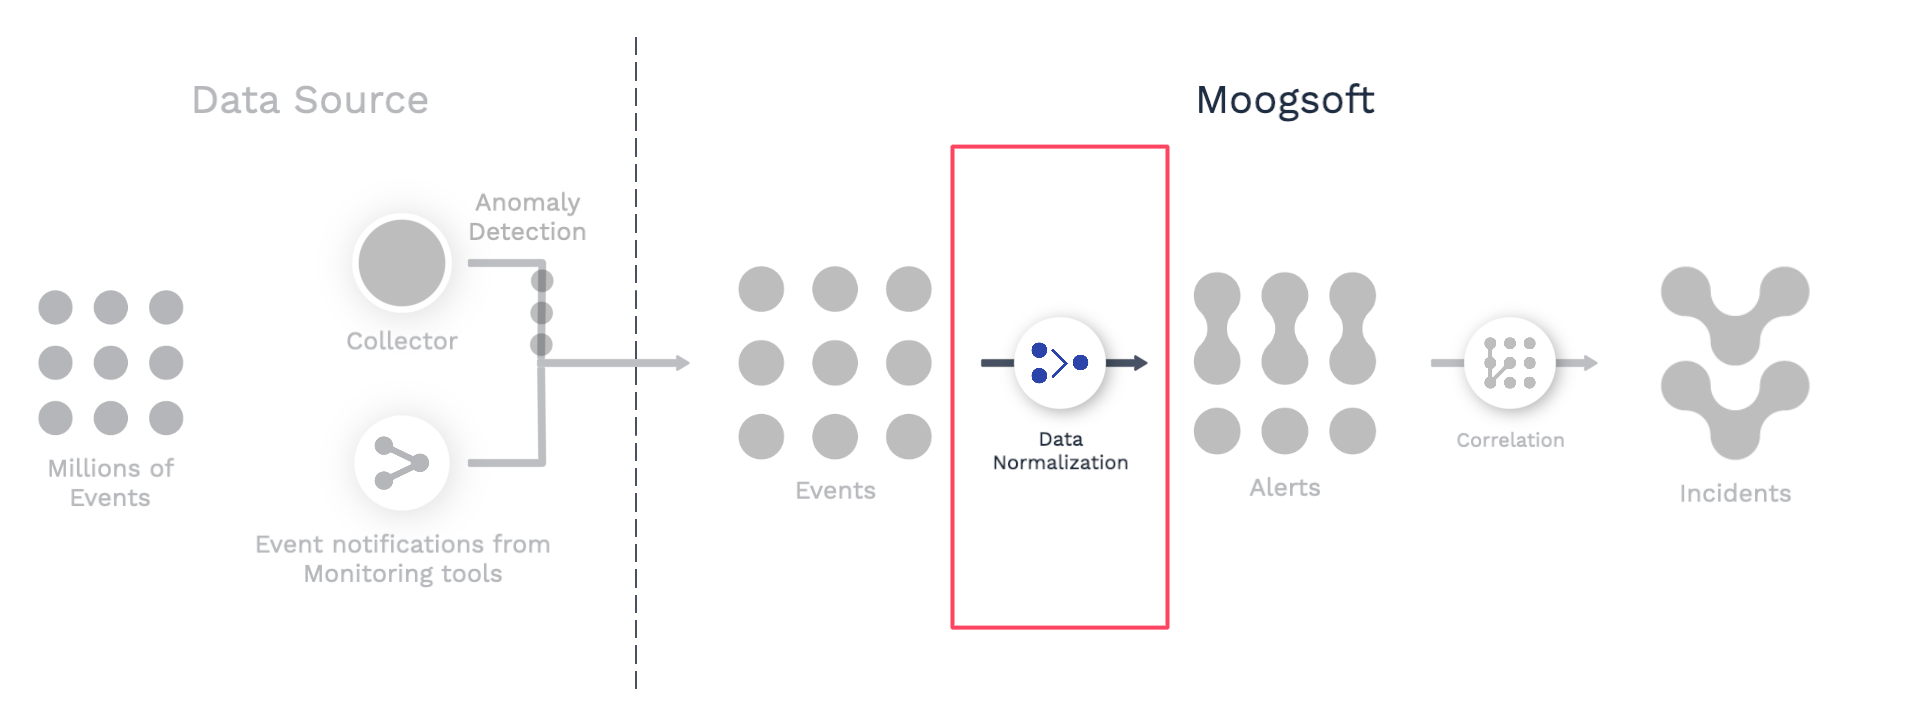
Ingested event data may require some normalization. For example, some values may be inconsistent, or some values may need to be parsed so you can use different parts for different purposes. Normalizing your data allows you to sort, search, and filter alerts more easily. You can ensure that your alerts look the way you want, and improve how the Correlation Engine groups alerts into incidents. Use event workflows in Workflow Engine to normalize your data.
Here are some typical use cases for data normalization:
You want to use the hostname for the source but the raw events have the hostname embedded in a tag.
You want to update the event description, using information in other data fields, so that all event descriptions are formatted consistently.
You want to classify the event service or check based on information in other fields or tags.
There are many Workflow Engine actions available, but some of the ones most commonly used for data normalization include:
Extract substring: Use regular expressions to extract a substring from a field, and copy that string to another field.
Match and update: Change fields for only certain events by matching regular expressions.
Template field: Assemble and copy the contents of one or more fields and/or text strings to another field.
Explore your data
Work through the following steps as you decide whether and how to normalize your event data:
Ingest events from your monitoring sources. Note that using a custom integration will give you more control over how your monitoring data is mapped to Moogsoft Cloud Events API and tags.
Navigate to Incidents > Alerts and examine your data. Sort by different columns, and scan through the values to look for inconsistencies.
If you are ingesting data from different monitoring systems, filter your alerts by manager and examine the pattern of data from each system.
Consider your desired correlation settings for grouping alerts into incidents. Will you need to correlate alerts from different monitoring systems? If so, what values from each data source need to be correlated? Are they already similar to one another and in the same event field, or will you need to manipulate the values in some of the fields?
Consider whether you want to make certain fields (for example, description) more useful and readable by extracting meaningful substrings or prefixing them with additional information.
Decide whether and how you want to fill in empty fields, for example by copying tags into event fields.
If you need to add information from external sources to your events, read about enriching data here.
Normalize your data using event workflow actions
Once you have decided on the changes you want to make to your data, create one or more event workflows to implement those changes. Follow these steps for each workflow you create. Note that multiple workflows will process events sequentially.
Navigate to Correlate & Automate > Workflow Engine, Event Workflows tab, and then click Add Workflow.
Enter a name and description for your workflow. You will not be able to save your workflow unless you provide both a name and description.
Decide whether you want your workflow to process all events, or only a subset. (For example, you might want to set up separate workflows for data from different monitoring sources.) To limit the scope of your workflow, click Trigger in the workflow and then select filter criteria. Events which meet the criteria will be processed by the rest of the workflow. Excluded events will be forwarded to the next workflow, or if there are no further workflows, to the Correlation Engine.
Review the available workflow actions. Based on your data exploration, decide which actions you want to use to normalize your data.
Click Add Action, select the action from the list, and then click Add Selected Action. Repeat for as many actions as you need to add. Complete the information for the settings in each action.
Save your workflow.
Drag the Workflow Tester section up from the bottom of the screen.
Test your workflow by choosing fields and entering sample data values, and then clicking Run Test.
Enable your workflow.
Test your workflow "in real life" by ingesting more data and examining the results.